8 Crucial Video Editing Tips for Beginners in 2025
Stepping into the world of video editing can feel overwhelming. With endless software options, complex timelines, and a mountain of technical jargon, it's easy to get lost before you even begin. To begin transforming your raw footage into polished content, you'll need to choose the right video editing software, which can range from beginner-friendly apps to exploring powerful software options like DaVinci Resolve 18.
But here's the secret: great video editing isn't about mastering every single tool at once. It's about understanding a few core principles that transform raw footage into a compelling story. This guide provides essential video editing tips for beginners, focusing on practical, actionable techniques you can apply immediately to improve your workflow and final product.
We'll cover everything from fundamental organization and pacing to the subtle art of sound design, giving you the foundation to create professional-looking content. For those creating faceless short-form videos for platforms like TikTok and YouTube Shorts, we'll also highlight how specialized tools like ClipShort can automate and accelerate these processes, letting you focus on creativity instead of complexity. This list is your roadmap from rough cuts to refined, engaging videos.
1. Use Jump Cuts to Maintain Pacing and Engagement
A jump cut is an abrupt transition between two shots of the same subject, often used to cut out dead air, mistakes, or filler words like "um" and "uh." This technique creates a fast-paced, dynamic rhythm that keeps viewers hooked. In today's fast-scrolling social media world, holding attention is critical, making jump cuts one of the most essential video editing tips for beginners to master. By removing unnecessary pauses, you make your content feel more energetic and professional.
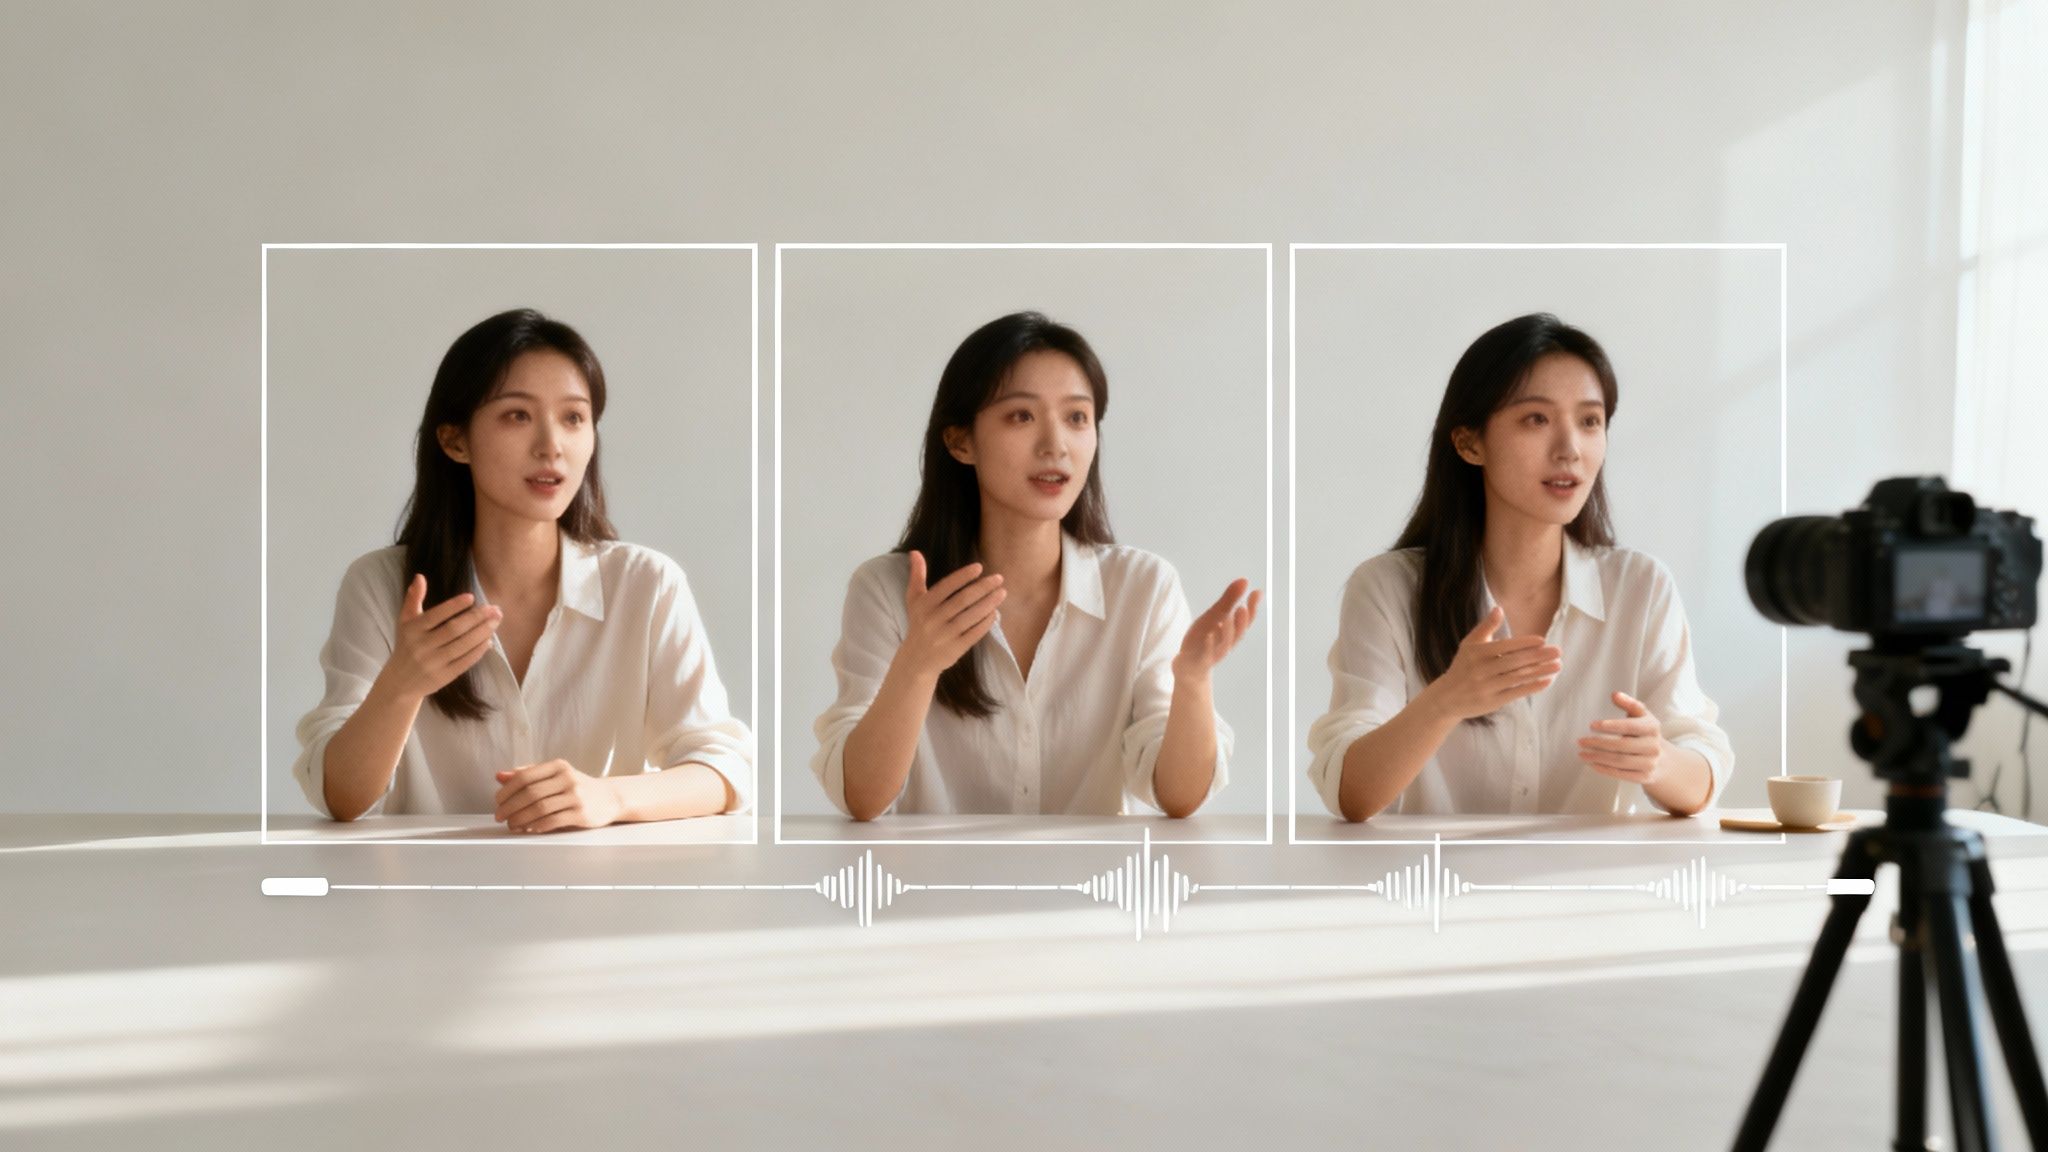
Pioneered by YouTubers like Casey Neistat and now a standard in high-energy videos from creators like MrBeast, this technique is perfect for tutorials, vlogs, and any short-form content where momentum is key. It allows you to condense information without losing the viewer's interest.
How to Implement Jump Cuts Effectively
To create a seamless jump cut, you simply slice out the unwanted portion of a clip and join the remaining ends. The key is to make it look intentional.
- Cut at Natural Pauses: Make your cuts at the end of sentences or during natural pauses in speech. This prevents the edit from feeling jarring.
- Maintain Consistency: Keep the background, lighting, and subject's position as consistent as possible between cuts to avoid a disorienting effect.
- Add Subtle Sound Effects: A slight "swoosh" or a subtle music sting can help smooth the transition and make it feel more polished.
- Avoid Overuse: While effective, too many rapid cuts can be overwhelming. As a general rule, try to leave at least one full second of footage between cuts to give your audience a moment to breathe.
By mastering jump cuts, you can significantly improve your video's pacing and retention, a vital skill for creating engaging content. To see how this technique is applied specifically for short-form content, check out our guide on how to make viral YouTube Shorts.
2. Master Color Correction and Basic Grading
Color correction is the technical process of fixing issues in your footage, such as adjusting white balance, exposure, and contrast to ensure shots look natural and consistent. Color grading, on the other hand, is the creative process of applying an artistic style or mood to your video. Mastering these two fundamentals is a critical video editing tip for beginners, as it instantly elevates your content from looking amateur to professional.
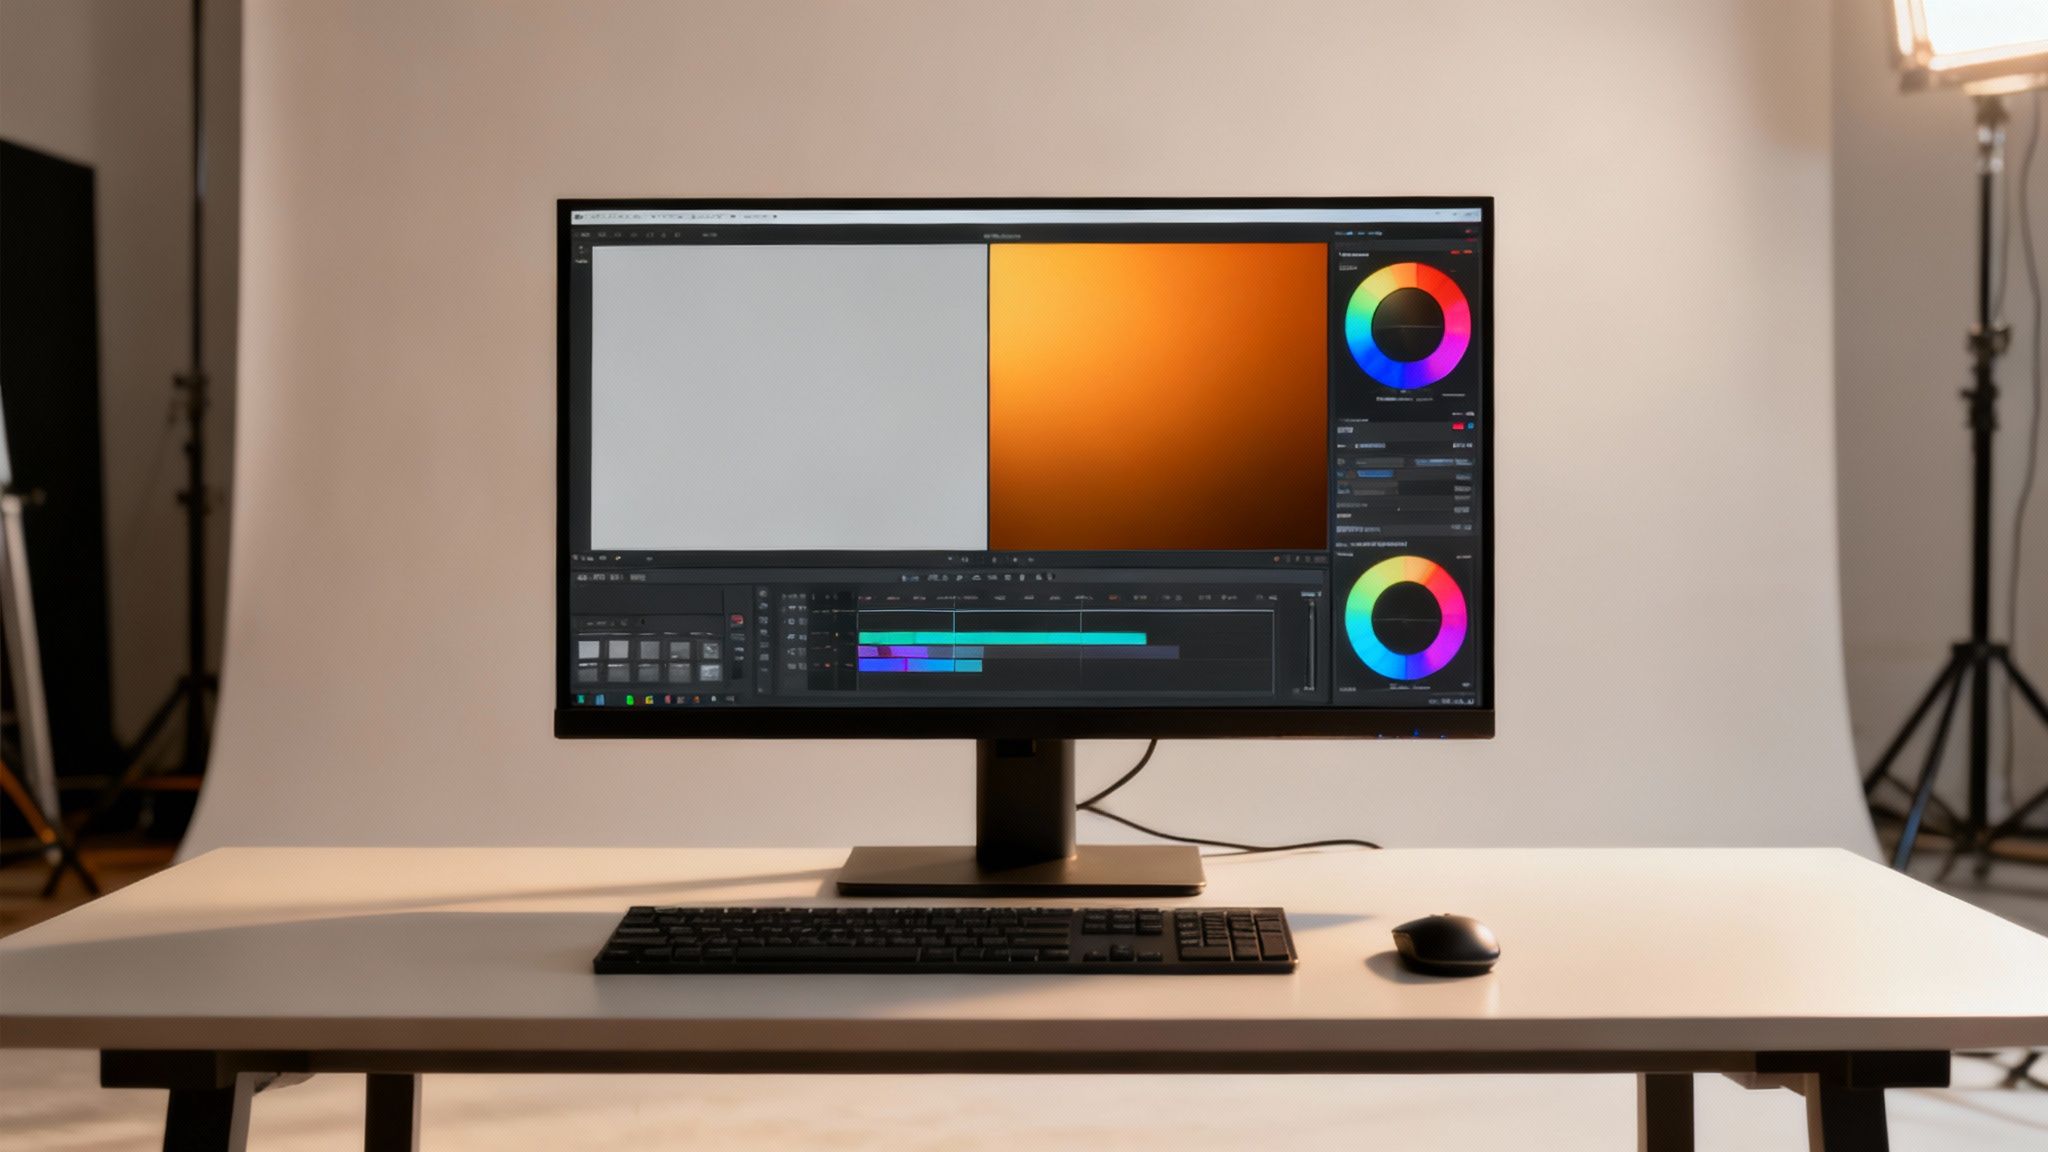
This distinction is crucial; correction is about accuracy, while grading is about aesthetics. You can see this in action everywhere from major Netflix productions, which use specific color palettes for brand identity, to travel vlogs that use warm, vibrant tones to create an inviting atmosphere. Understanding the distinct roles of these two processes is fundamental, and a deeper dive into color correction vs color grading explained can clarify their differences.
How to Implement Color Correction and Grading Effectively
Start with correction first to create a clean, neutral base before applying any creative styles. This workflow ensures your colors are both accurate and artistic.
- Start with White Balance: Use your editing software's automatic white balance tool or a color picker on a neutral white or grey object in your shot. This removes unrealistic color casts and is the first step to accurate color.
- Adjust Exposure and Contrast: Tweak your exposure so the image is not too dark or too bright. Use scopes like a waveform monitor to guide you and avoid "crushing" the blacks or "clipping" the whites, which results in a loss of detail.
- Use Reference Images: When grading, pull up a still from a film or video with a look you admire. Try to match your footage to it; this is a great way to train your eye and learn what makes a grade work.
- Create Your Own Presets (LUTs): If you often shoot in similar conditions, save your color settings as a preset or LUT (Look-Up Table). This will dramatically speed up your workflow for future projects and maintain a consistent brand style.
- Grade in Log When Possible: If your camera supports it, shoot in a "log" or flat profile. This captures more dynamic range, giving you maximum flexibility to push and pull colors during the grading process without losing quality.
3. Organize Your Project with Smart File Management
Proper file organization is the unsung hero of a smooth editing workflow. Before you even import a single clip, creating a structured folder system saves you from the future chaos of lost files, broken media links, and wasted time. This foundational practice isn't just for Hollywood studios; it's a critical discipline that distinguishes efficient creators from frustrated ones, making it one of the most important video editing tips for beginners. A clean project structure makes finding assets effortless, speeds up your editing, and simplifies collaboration.
This systematic approach is standard for professional freelance editors managing multiple clients and is essential for anyone aiming to produce content consistently. By establishing a clear architecture for your raw footage, audio files, graphics, and final exports, you create a repeatable, scalable process. This organization is crucial when handling large volumes of short-form content or repurposing assets across different videos.
How to Implement Smart File Management
A great system is one you can stick with. Start by creating a master folder for each new video project and then build a consistent sub-folder structure within it.
- Create Dedicated Folders: Inside your main project folder, immediately create sub-folders like
01_Footage,02_Audio,03_Graphics,04_ProjectFiles, and05_Exports. This keeps every asset type in its designated place. - Use a Clear Naming Convention: Name your files consistently to make them searchable. A common format is
YYYY-MM-DD_ProjectName_ClipNumber(e.g.,2024-10-26_FallVlog_001). This chronological sorting saves immense time. - Maintain Backup Copies: The "3-2-1" rule is a professional standard: keep three copies of your data on two different types of media, with one copy stored off-site (like on a separate external drive or cloud storage).
- Archive Completed Projects: Once a project is finished, move the entire folder to an archive drive. This keeps your primary working drive clean and fast, preventing it from getting bogged down with old files.
By adopting these habits early, you build a professional workflow that prevents technical headaches and lets you focus on the creative aspects of editing.
4. Use Keyboard Shortcuts to Increase Editing Speed
Keyboard shortcuts are the single most effective way to accelerate your editing workflow. Instead of navigating menus with a mouse, you can execute commands like cutting, pasting, and navigating the timeline with a simple keystroke. Mastering common shortcuts can dramatically increase your productivity, with some estimates suggesting a 40-60% boost in speed. This skill is often what separates a quick, efficient editor from a slow, methodical one.
Professional film editors often navigate entire projects almost exclusively with their keyboards, and top content creators frequently credit shortcuts with cutting their editing time in half. By minimizing reliance on the mouse, you reduce physical strain and keep your creative focus locked on the timeline. This is one of the most fundamental video editing tips for beginners that pays dividends immediately.
How to Implement Keyboard Shortcuts Effectively
The goal isn't to learn every shortcut overnight but to build a functional vocabulary of the ones you use most. Start by identifying your most repeated actions.
- Start with the Essentials: Begin by memorizing 5-10 of the most common shortcuts for your software, such as 'C' for the cut tool, 'V' for the selection tool, and spacebar for play/pause.
- Print a Reference Card: Keep a printed list of shortcuts next to your monitor. Websites like CheatSheets.com are excellent resources for finding a reference for your specific software.
- Practice One Per Session: Dedicate each editing session to mastering one new shortcut. This gradual approach makes the learning process feel less overwhelming.
- Create Custom Shortcuts: As you become more advanced, create custom shortcuts for multi-step processes unique to your workflow. This personalizes your editing environment for maximum efficiency.
By integrating shortcuts into your process, you build muscle memory that transforms editing from a chore into a fluid, creative experience. For a deeper dive into foundational skills, you can explore our full guide on video editing for beginners.
5. Choose and Use B-Roll Effectively
B-roll is the supplemental or alternative footage you intercut with your main shot (A-roll) to add context, visual interest, and emotional depth. It's the secret ingredient that transforms a simple talking-head video into a compelling story. Learning to use B-roll is one of the most impactful video editing tips for beginners, as it helps cover awkward cuts, illustrate your points, and give your content a professional, high-production-value feel.
This technique is a staple in documentary filmmaking, news media, and virtually all high-quality YouTube content. Travel vloggers use sweeping landscape shots as B-roll over their narration, while product reviewers show close-ups of features to support their commentary. By adding relevant visual layers, you keep your audience engaged and make your narrative more dynamic and believable.
How to Implement B-Roll Effectively
The goal of B-roll is to support, not distract from, your primary message. You can layer it over your main timeline to add visual variety or use it to transition between different segments.
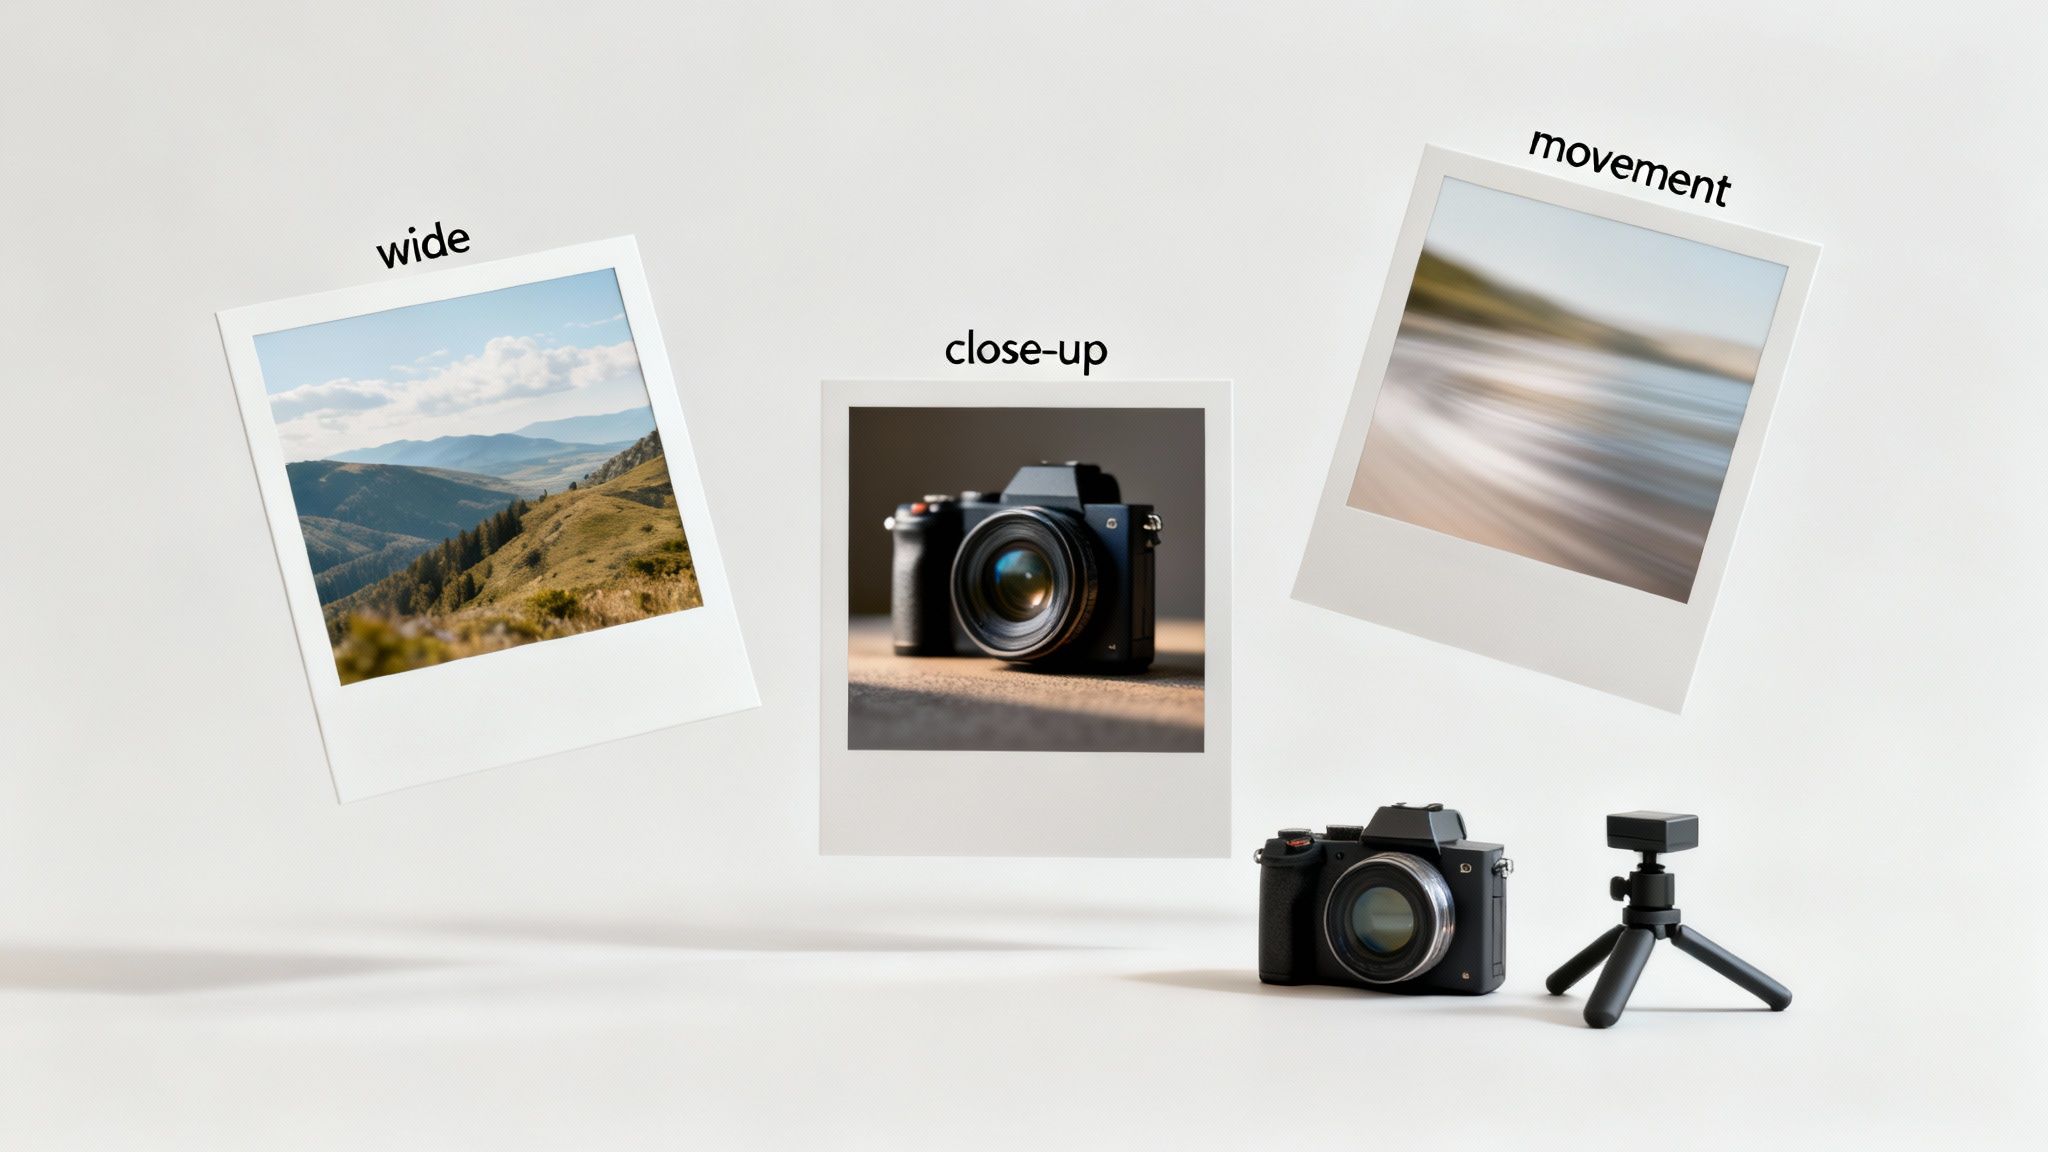
- Plan Your Shots: Before filming, think about what supplemental footage will best illustrate your story. Capture a mix of wide shots, medium shots, and close-ups from different angles to give yourself plenty of options.
- Shoot More Than You Need: A good rule of thumb is to capture at least three times more B-roll than you think you will use. This ensures you have the perfect clip for every moment in your edit.
- Match Pacing and Mood: Your B-roll should match the energy of your main footage and audio. A fast-paced tutorial needs quick, dynamic B-roll clips, while a calm, reflective video calls for slower, more cinematic shots.
- Use Stock Footage: If you don't have the exact shot you need, don't worry. Websites like Pexels and Pixabay offer high-quality, free stock footage that can fill in the gaps and elevate your video.
Mastering B-roll allows you to tell a richer story, hide imperfections, and maintain viewer engagement, making it an essential skill for any aspiring video editor.
6. Sync Audio and Video Properly for Professional Results
Audio-video synchronization is the foundational process of aligning separately recorded audio and video tracks so they play back together seamlessly. Nothing screams "amateur" faster than dialogue that doesn't match a speaker's lip movements. Getting this right is one of the most crucial video editing tips for beginners because it directly impacts perceived quality and viewer immersion. Proper sync maintains the illusion of reality, while poor sync can make even the best content unwatchable.
This technique is essential across all levels of production. Film crews use timecode and clapperboards for precision, while YouTubers often sync high-quality audio from an external microphone with their camera's footage. Even podcasters creating video versions of their shows rely on this process to align multiple camera angles and audio sources. Mastering sync is a non-negotiable step toward creating polished, professional-grade videos.
How to Sync Audio and Video Effectively
Most modern editing software includes tools to simplify this process. The goal is to find a common, sharp sound spike in both the camera's scratch audio and the high-quality external audio to use as an alignment point.
- Create a Clear Sync Point: Start each recording with a loud, sharp noise like a single hand clap (a DIY clapperboard). This creates a distinct spike in the audio waveform that is easy to see and align.
- Use Waveform Matching: Visually align the audio waveforms from your camera and external recorder in your editing timeline. Most software allows you to zoom in to match the peaks frame by frame for perfect accuracy.
- Leverage Automatic Sync Features: Many non-linear editors (NLEs) like Adobe Premiere Pro and DaVinci Resolve have an "auto-sync" feature. Simply select your video and audio clips, right-click, and let the software analyze and align the waveforms for you.
- Match Your Settings: Before you even hit record, ensure the frame rate (e.g., 24 fps, 30 fps) and sample rate (e.g., 48 kHz) are identical across all your recording devices to prevent audio drift over time.
By ensuring your audio and video are perfectly synchronized, you preserve the professional quality of your project and keep your audience focused on your message, not your mistakes.
7. Understand and Apply Basic Sound Design Principles
Sound design is the art of creating a video's entire audio landscape, from dialogue and music to subtle sound effects. Viewers will often forgive shaky visuals, but poor audio can make them click away instantly. Mastering basic sound design is one of the most impactful video editing tips for beginners because it dramatically elevates the perceived production value and emotional resonance of your content. A well-mixed audio track makes a video feel professional, immersive, and engaging.
From the immersive audio in a Netflix series to the impactful "thuds" and "swooshes" in movie trailers, sound design tells a story and guides the audience's emotional response. For short-form content, good audio ensures your message is clear and memorable, even when viewers are scrolling quickly.
How to Implement Basic Sound Design
Effective sound design involves balancing different audio elements to create a clean, dynamic, and cohesive mix. The goal is to ensure every sound has a purpose and contributes to the overall viewing experience.
- Set Correct Audio Levels: As a rule of thumb, keep your main dialogue peaking between -12dB and -6dB. This ensures it's clear and loud without distorting. Background music should sit much lower, typically around -18dB to -12dB, so it supports the vocals rather than competing with them.
- Layer Subtle Sound Effects (SFX): Add small, non-distracting sound effects to emphasize on-screen actions or transitions. A simple "swoosh" for a text reveal or a soft "click" for a button press can make your video feel more polished and dynamic.
- Use an Equalizer (EQ) on Dialogue: An EQ helps you shape the frequencies of your audio. Boost the mid-range frequencies of your voiceover to help it stand out clearly against background music and other sounds.
- Apply a Compressor: A compressor evens out the dynamic range of your audio, making the quiet parts louder and the loud parts quieter. This creates a more consistent listening experience, which is crucial for mobile viewers.
By focusing on these fundamental sound design principles, you can ensure your audio is as compelling as your visuals, leading to better engagement and a more professional final product.
8. Choose the Right Video Format and Export Settings
Your video isn't finished until it's exported correctly. Export settings dictate the final video's quality, file size, and compatibility with different platforms. Many beginners overlook this crucial last step, only to find their hard work results in a pixelated video or a file that won't upload. Understanding the basics of formats, codecs, and bitrates is one of the most practical video editing tips for beginners, ensuring your content looks its best wherever it's viewed.
Proper export settings prevent the need for time-consuming re-renders and guarantee your video is optimized for its intended destination. A professional studio creating a master file for archiving will use different settings than a YouTuber exporting a video for platform optimization, or a social media creator exporting a vertical video for TikTok. Each use case demands a specific approach to maintain quality and ensure smooth playback.
How to Implement Proper Export Settings
Choosing the right settings in your editing software's export menu is straightforward once you know what to look for. The goal is to balance quality with file size.
- Export a High-Quality Master: Always export a master version of your video in a high-quality format like Apple ProRes or a high-bitrate H.264. This file serves as your digital negative, which you can use to create other versions without losing quality.
- Create Platform-Specific Versions: Use your master file to export copies tailored for each platform. For example, YouTube, Instagram, and TikTok all have recommended bitrates, resolutions, and aspect ratios.
- Match Your Frame Rate: Ensure your export frame rate matches your project and source footage frame rate (e.g., 24, 30, or 60 fps) to avoid stuttering or motion artifacts.
- Use Hardware Encoding: If your computer supports it (like NVIDIA's NVENC or Apple's M-series chips), enable hardware encoding. This uses your GPU to speed up the export process significantly.
- Document Your Settings: Once you find settings that work well for a specific platform, save them as a preset or write them down. This saves time and ensures consistency for future projects.
By developing a smart export strategy, you ensure your videos are delivered in the best possible quality for every platform. To dive deeper into platform-specific requirements, learn more about the ideal social media video sizes and specs.
8-Point Video Editing Tips Comparison
| Technique | 🔄 Implementation Complexity | ⚡ Resource & Speed | 📊 Expected Outcomes | 💡 Ideal Use Cases | ⭐ Effectiveness |
|---|---|---|---|---|---|
| Use Jump Cuts to Maintain Pacing and Engagement | Low–Medium; simple trims but timing-sensitive | Low resources; very fast to execute | Increases pacing and viewer retention; dynamic feel | Vlogs, tutorials, short-form social content | ⭐⭐⭐⭐ — High for short-form engagement |
| Master Color Correction and Basic Grading | Medium–High; technical skills and calibrated monitor needed | Moderate resources; time-consuming per clip | Cohesive visual style; stronger mood and professionalism | Narrative, branded videos, travel, cinematic projects | ⭐⭐⭐⭐⭐ — Transforms perceived production quality |
| Organize Your Project with Smart File Management | Low; requires upfront structure and discipline | Low tech cost; time investment upfront saves time later | Faster workflow, fewer lost files, easier collaboration | Any project scale; teams and long-term archives | ⭐⭐⭐⭐⭐ — Foundational for reliable workflows |
| Use Keyboard Shortcuts to Increase Editing Speed | Medium; steep initial learning curve (muscle memory) | Minimal resources; large speed gains once learned | Significant productivity increase; fewer repetitive actions | Frequent editors, tight deadlines, professional workflows | ⭐⭐⭐⭐ — Major efficiency multiplier |
| Choose and Use B-Roll Effectively | Medium; requires planning and extra shooting | Higher shoot time and storage needs; moderate edit time | Improved storytelling, smoother cuts, higher polish | Documentaries, vlogs, product reviews, explainers | ⭐⭐⭐⭐ — Enhances visual narrative and coverage |
| Sync Audio and Video Properly for Professional Results | Medium; technical but aided by tools (timecode/waveforms) | Requires good audio sources and sync-capable software | Believable dialogue and continuity; avoids distracting errors | Multi-camera shoots, interviews, external-recorded audio | ⭐⭐⭐⭐⭐ — Critical for professional credibility |
| Understand and Apply Basic Sound Design Principles | High; steep learning curve and monitoring gear recommended | Moderate–High resources (headphones, software, time) | Dramatically elevates emotional impact and clarity | Films, trailers, podcasts, narrative content | ⭐⭐⭐⭐⭐ — Audio often defines perceived quality |
| Choose the Right Video Format and Export Settings | Medium; technical knowledge of codecs/bitrates needed | Moderate resources; hardware encoding speeds exports | Optimized file size, compatibility, fewer re-exports | Platform-specific delivery, archiving, client delivery | ⭐⭐⭐⭐ — Essential for reliable distribution and quality |
Your Next Step: From Learning to Creating
You've just navigated a comprehensive roadmap of foundational video editing techniques, from the strategic use of jump cuts to the technical nuances of export settings. The journey from novice to proficient editor doesn't happen overnight; it’s built one project at a time. The path forward isn't about memorizing every single tip but about internalizing the core principles behind them. Think of each concept not as a rigid rule, but as a tool in your creative arsenal.
The most impactful takeaway from these video editing tips for beginners is the power of deliberate practice. Your next video isn't just another piece of content; it's a practice session. Choose one or two areas from this guide to focus on. Perhaps you'll concentrate on meticulously organizing your project files before you even import a single clip. Or maybe you'll dedicate extra time to mastering basic color correction, learning how subtle shifts in saturation and contrast can dramatically alter the mood of your visuals. This focused approach transforms learning from an overwhelming task into a series of manageable, rewarding steps.
Turning Knowledge into Action
Mastering these skills unlocks more than just the ability to assemble clips. It gives you control over your narrative, enabling you to evoke specific emotions, hold viewer attention, and communicate your message with clarity and impact. A well-paced edit with crisp audio and balanced color doesn't just look professional; it builds trust with your audience and establishes your credibility as a creator.
Here are your actionable next steps:
- Commit to a Focus: Before starting your next project, pick one specific skill from this article, such as sound design or effective B-roll integration. Make improving that one skill your primary goal for that edit.
- Build Your Shortcut Muscle Memory: Print out a list of your software's most common keyboard shortcuts and keep it by your workstation. Challenge yourself to use them instead of clicking through menus. You’ll be amazed at how quickly your editing speed increases.
- Analyze, Don't Just Watch: When consuming content from creators you admire, actively analyze their editing choices. Ask yourself why they used a specific cut, sound effect, or color grade. Deconstructing professional work is a powerful learning tool.
Embracing the Creator's Mindset
Ultimately, technical proficiency is the foundation upon which great storytelling is built. For creators producing faceless short-form content for platforms like TikTok and YouTube Shorts, speed and consistency are paramount. While mastering traditional software is invaluable, leveraging AI-powered tools can be a strategic accelerator. Platforms like ClipShort are designed to handle the heavy lifting, automating tasks like sourcing visuals, generating captions, and finding the right music. This allows you to bypass much of the initial technical learning curve and focus immediately on what truly matters: your content strategy, your scripting, and your unique creative voice.
Whether you choose the meticulous path of traditional editing or the accelerated workflow of an AI assistant, the most critical step is the one you take right now. Don't let the pursuit of perfection lead to paralysis. Open your software, import your footage, and start creating. Your skills will grow with every cut, transition, and finished video you produce.
Ready to skip the steep learning curve and start creating high-quality, engaging videos in minutes? ClipShort automates the entire video creation process, from script to final render, making it the perfect tool for beginners and creators focused on scaling their content. Discover a faster way to produce professional videos by visiting ClipShort today.