How to Take Clips from a YouTube Video for Viral Shorts and Reels
Figuring out how to take clips from a YouTube video is one of the most valuable skills a creator can have today. Whether you're using YouTube's own "Clip" feature for a quick share, a screen recorder for total control, or specialized software for top-tier quality, the process is pretty straightforward.
Mastering this unlocks a massive opportunity: turning your long-form videos into a steady stream of engaging content for TikTok, Reels, and Shorts.
Why Clipping YouTube Videos Is a Content Game Changer
Before we jump into the "how," let's talk about the "why." Understanding the power behind this strategy is what separates creators who just post from those who build an audience. Today's content world runs on short, fast, and memorable videos. Your audience is everywhere, and clipping lets you show up on every platform they use.
Instead of burning yourself out trying to create brand new content for every single app, you can strategically mine your existing long-form videos for gold. This isn't about being lazy; it's about being smart. You massively boost your content output and get a way bigger return on the time you've already invested.
Maximizing Your Content Reach
Think about it. You just spent a week filming and editing a 20-minute product review. Buried inside that video are golden moments—the unboxing, a killer feature demo, your final honest opinion. Each of those is a potential standalone hit.
When you pull those moments out, you're creating assets perfectly designed for short-form platforms. A 30-second clip showing off that one cool feature has a much better shot at being discovered on Instagram Reels than your full 20-minute deep dive.
This strategy helps you:
- Find New Audiences: People who’d never sit through a long video might find you through a viral Short or TikTok.
- Drive Channel Discovery: Every clip you post is a mini-trailer for your main channel, funneling curious viewers back to subscribe.
- Skyrocket Engagement: Short, punchy videos are ridiculously shareable and tend to rack up more likes and comments relative to their length.
The numbers don't lie. With over 500 hours of video being uploaded to YouTube every single minute, you have to be strategic to get noticed. Clipping isn't just a neat trick anymore; it's a core survival skill for staying visible.
Tapping Into a Massive Trend
The explosion of short-form video is impossible to ignore. Back in 2023, YouTube Shorts was already hitting an incredible 50 billion daily views, and that number has since climbed to over 70 billion. This is exactly why so many creators are laser-focused on turning their longer videos into a constant stream of Shorts.
In fact, channels that consistently post Shorts have seen their subscriber growth jump by 50% year-over-year. The proof is in the pudding. You can find more stats on these powerful YouTube trends.
To help you decide which method to start with, here's a quick breakdown of the most common approaches.
Clipping Methods at a Glance
This table gives you a quick comparison of the main ways to clip YouTube videos, helping you choose the best tool for the job based on your need for speed, quality, and extra features.
| Method | Best For | Ease of Use | Key Feature |
|---|---|---|---|
| YouTube Clip Feature | Quick sharing, no downloads | Very Easy | Built-in and shareable via link |
| YouTube Downloaders | High-quality offline clips | Easy | Full video download in high resolution |
| Screen Recording | Capturing specific sections | Moderate | Total control over what you record |
| Browser Extensions | Convenient on-the-fly clipping | Easy | Integrates directly into YouTube's interface |
| Automated AI Tools | Repurposing at scale | Very Easy | Finds viral moments and formats them for you |
Each of these methods has its place. The built-in clipper is great for a quick tweet, but for serious repurposing, you'll want to look at downloaders or automated tools. Now, let's get into the step-by-step for each one.
Mastering Manual Clipping for Full Creative Control
For creators who are all about precision, nothing beats getting your hands dirty. If you want absolute control over the final clip, manual methods are your go-to. This is about pinpointing the exact moments you want to capture, making sure every single frame is perfect for your repurposed content.
Sure, automated tools are fast, but they can't match the meticulous control you get when you do it yourself. This is especially true when you're working with narrative-driven content where timing and emotional beats are everything. Let's walk through the most reliable ways to do it.
Using YouTube's Built-In Clip Feature
The most straightforward way to grab a clip is using the tool YouTube gives you right on the page. Just look below the video player, next to the "Share" button, and you'll see the "Clip" option. It's designed for one thing: quick and simple sharing.
With it, you can select any segment between 5 and 60 seconds long, slap a title on it, and get a unique link. This is perfect for firing off a specific highlight on Twitter or in a message without having to download a thing. The big catch? It only creates a shareable link that points back to YouTube; you don't actually get a video file you can edit offline.
Screen Recording for Ultimate Flexibility
When you need an actual video file and want total freedom over what you capture, screen recording is your best friend. Software like OBS Studio (which works on pretty much everything) and QuickTime Player (which is already on your Mac) lets you record any part of your screen you want.
This method is a lifesaver for a few key scenarios:
- Capturing Live Streams: You can grab moments as they happen without having to wait for the VOD to be published.
- Recording UI Elements: It's perfect for tutorials where you need to show the YouTube player itself or other on-screen interactions.
- Avoiding Downloads: You get a video file directly onto your computer without relying on third-party downloader sites, which can sometimes be sketchy.
For the best results, make sure the YouTube video is playing at its highest possible resolution. Pop it into full-screen mode before you hit record to avoid capturing your bookmarks bar or other desktop clutter.
Pro Tip: Before you start a screen recording, close out of any apps and browser tabs you don't need. This frees up your computer's resources, giving you a much smoother, higher-quality recording without any stuttering or dropped frames.
Precision Editing with Desktop Software
For frame-by-frame accuracy, you have to bring the footage into a real video editor. Once you have your video file (either from a download or a screen recording), you can import it into powerful and free programs like DaVinci Resolve or Shotcut.
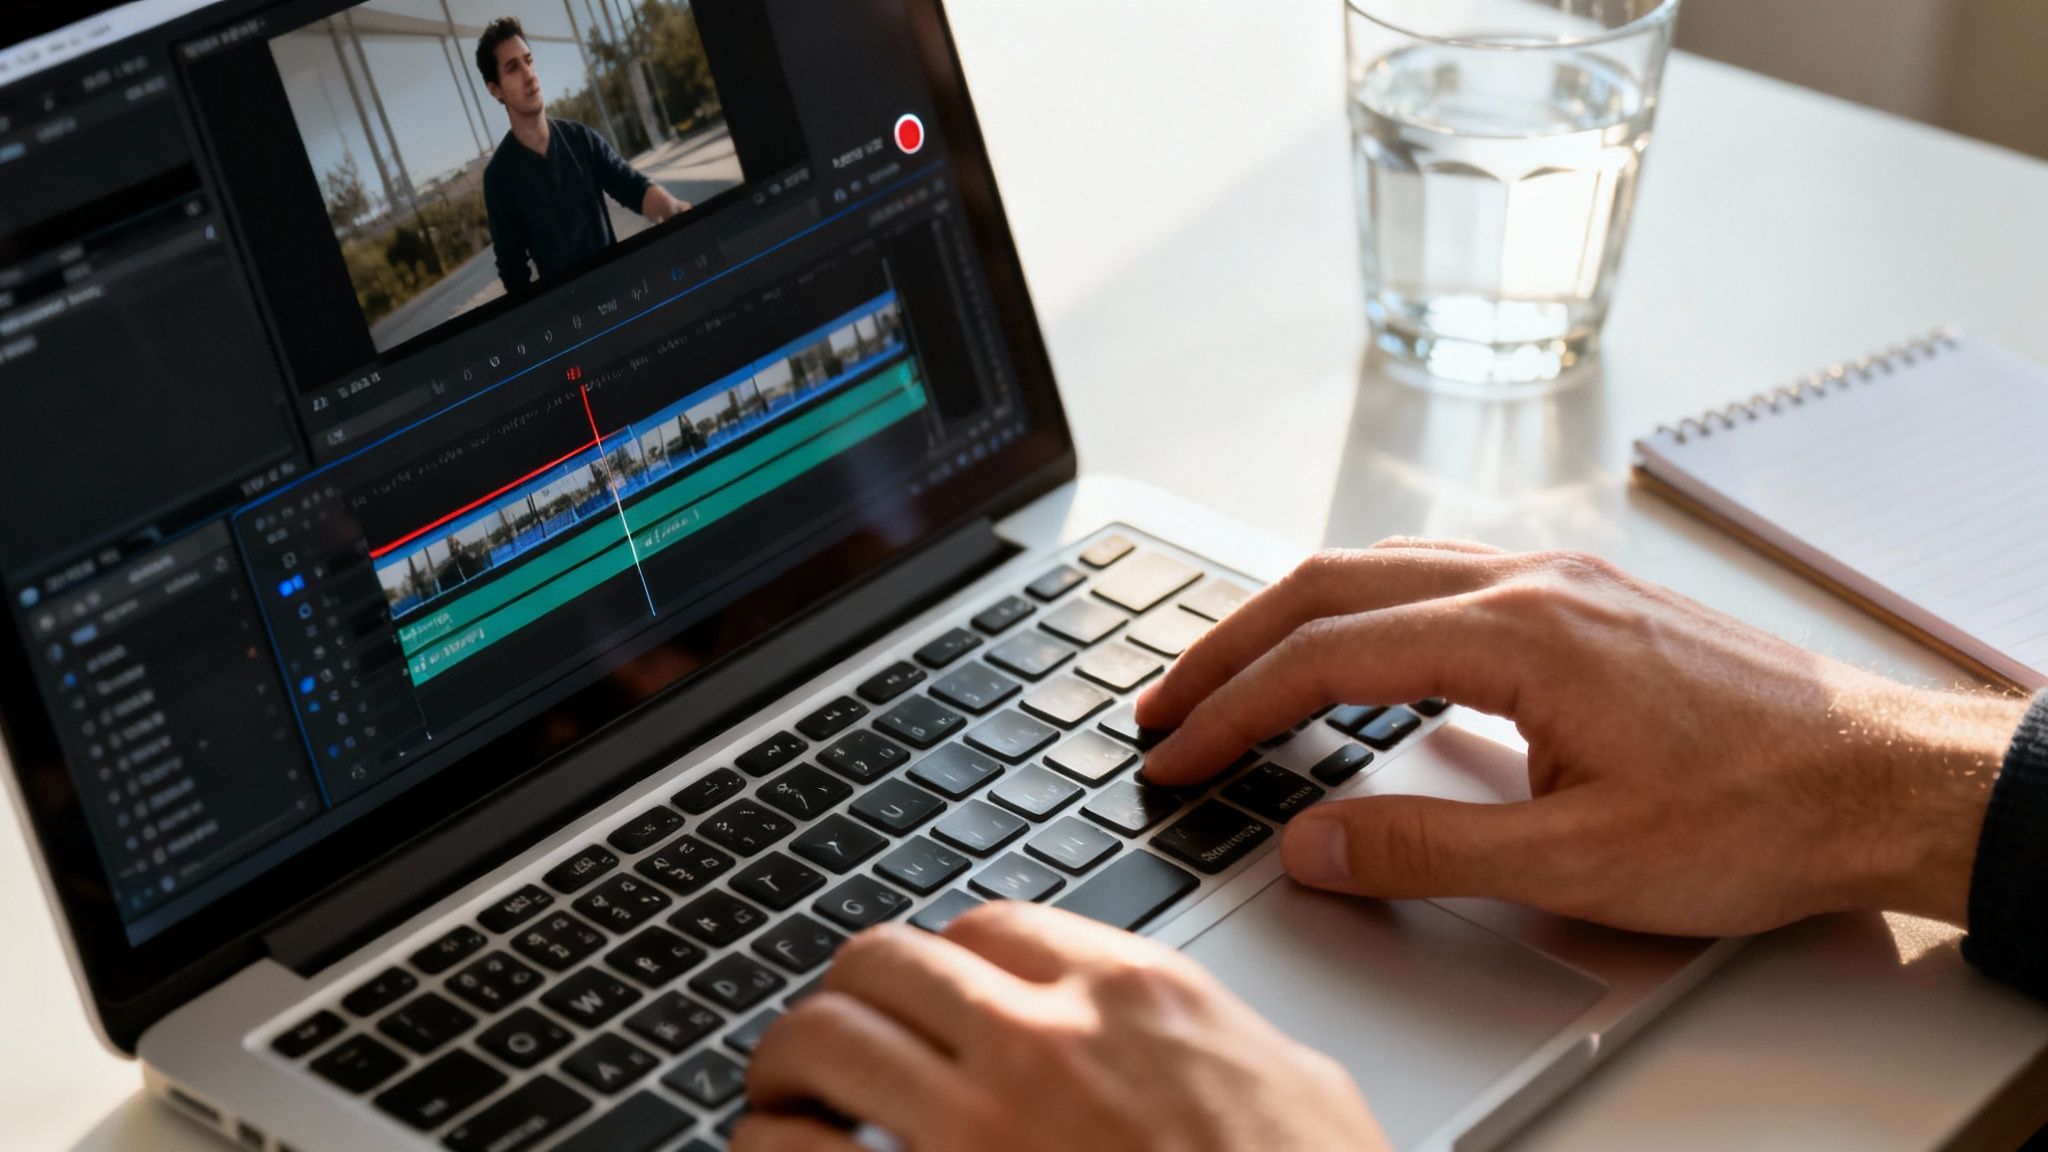
This workflow gives you surgical precision. You can trim your clip down to the exact millisecond, add text overlays, punch in on the action, or even stitch multiple small clips together. In today's content game, speed is everything. It wasn't long ago that we were using command-line tools for this stuff, but the modern creator needs a much faster turnaround.
With online video making up 82.5% of all web traffic and short-form content driving Google search visibility growth from 5% to 15% in just two years, efficiency is non-negotiable. You can dive deeper into these video marketing trends yourself. Combining manual control with an efficient editing process is the secret sauce for creating short-form content that truly stands out.
Using Downloaders and Extensions for Offline Editing
When YouTube’s own clipping tool feels too basic, but you're not quite ready to fire up a full-blown video editor, there's a fantastic middle ground: downloaders and browser extensions.
These tools are all about speed and simplicity. They let you grab an entire YouTube video and save it right to your computer. What you get is a high-quality, clean video file you can then slice, dice, and edit offline at your leisure.
This approach is incredibly popular because it’s fast and doesn't require a steep learning curve. Instead of fussing with screen recording, you get the pristine source file. This is perfect when you plan to pull multiple clips from one long video, like isolating the best moments from a podcast or a detailed tutorial.
How Online Video Downloaders Work
Online downloader websites are probably the most straightforward option out there. The process is dead simple: you copy the YouTube video’s URL, paste it into a box on the downloader’s site, and pick the video quality you want. In a few moments, you’ve got an MP4 file ready for action.
It’s a lightning-fast solution for anyone looking to clip a YouTube video without installing any new software. For instance, if you're a marketer needing to create a reaction video to an industry announcement, you can snag the original video in seconds and drop it straight into your editing timeline. The convenience is hard to beat.
A word of caution, though. Stick with reputable downloader sites. Some are clogged with pop-up ads and can be a gateway for sketchy software. For those who demand the absolute best quality for detailed offline editing, using a dedicated YouTube video downloader 4K is the way to go.
The Power of Browser Extensions
If you find yourself grabbing videos often, a browser extension is a game-changer. Once you install one, it usually adds a "Download" button directly on the YouTube page itself. This completely eliminates the copy-and-paste routine, making the whole process nearly instant.
Picture this: you're a content curator who needs to archive a bunch of videos for a future compilation. An extension turns this into a one-click job, seriously speeding up your workflow. It’s an incredibly efficient way to build a library of content for your Shorts, Reels, or TikToks.
No matter which tool you choose, always check the output options. A solid downloader or extension will let you select from various resolutions (from 360p up to 1080p or even 4K) and formats. This ensures your final clips look sharp and professional on any platform.
Common Pitfalls and Best Practices
While these tools are a huge help, there are a few things to keep in mind to make sure everything goes smoothly.
- Watch for Watermarks: Some free tools sneak their own logo onto the downloaded video. Always double-check this, because an unexpected watermark can instantly make your clip look unprofessional.
- Be Mindful of Copyright: Just because you can download a video doesn't automatically give you the right to re-upload it. Make sure your usage falls under fair use guidelines, especially if you're planning on posting YouTube videos on Instagram or other social platforms.
- Choose High Resolution: Always, always download the highest quality available. You can easily downscale a video without losing quality, but you can't go the other way. Trying to blow up a low-res file will only result in a pixelated, blurry mess.
Keeping these tips in mind will help you use downloaders and extensions to build a rock-solid foundation for all your short-form video content.
Automating Your Workflow with AI Clipping Tools
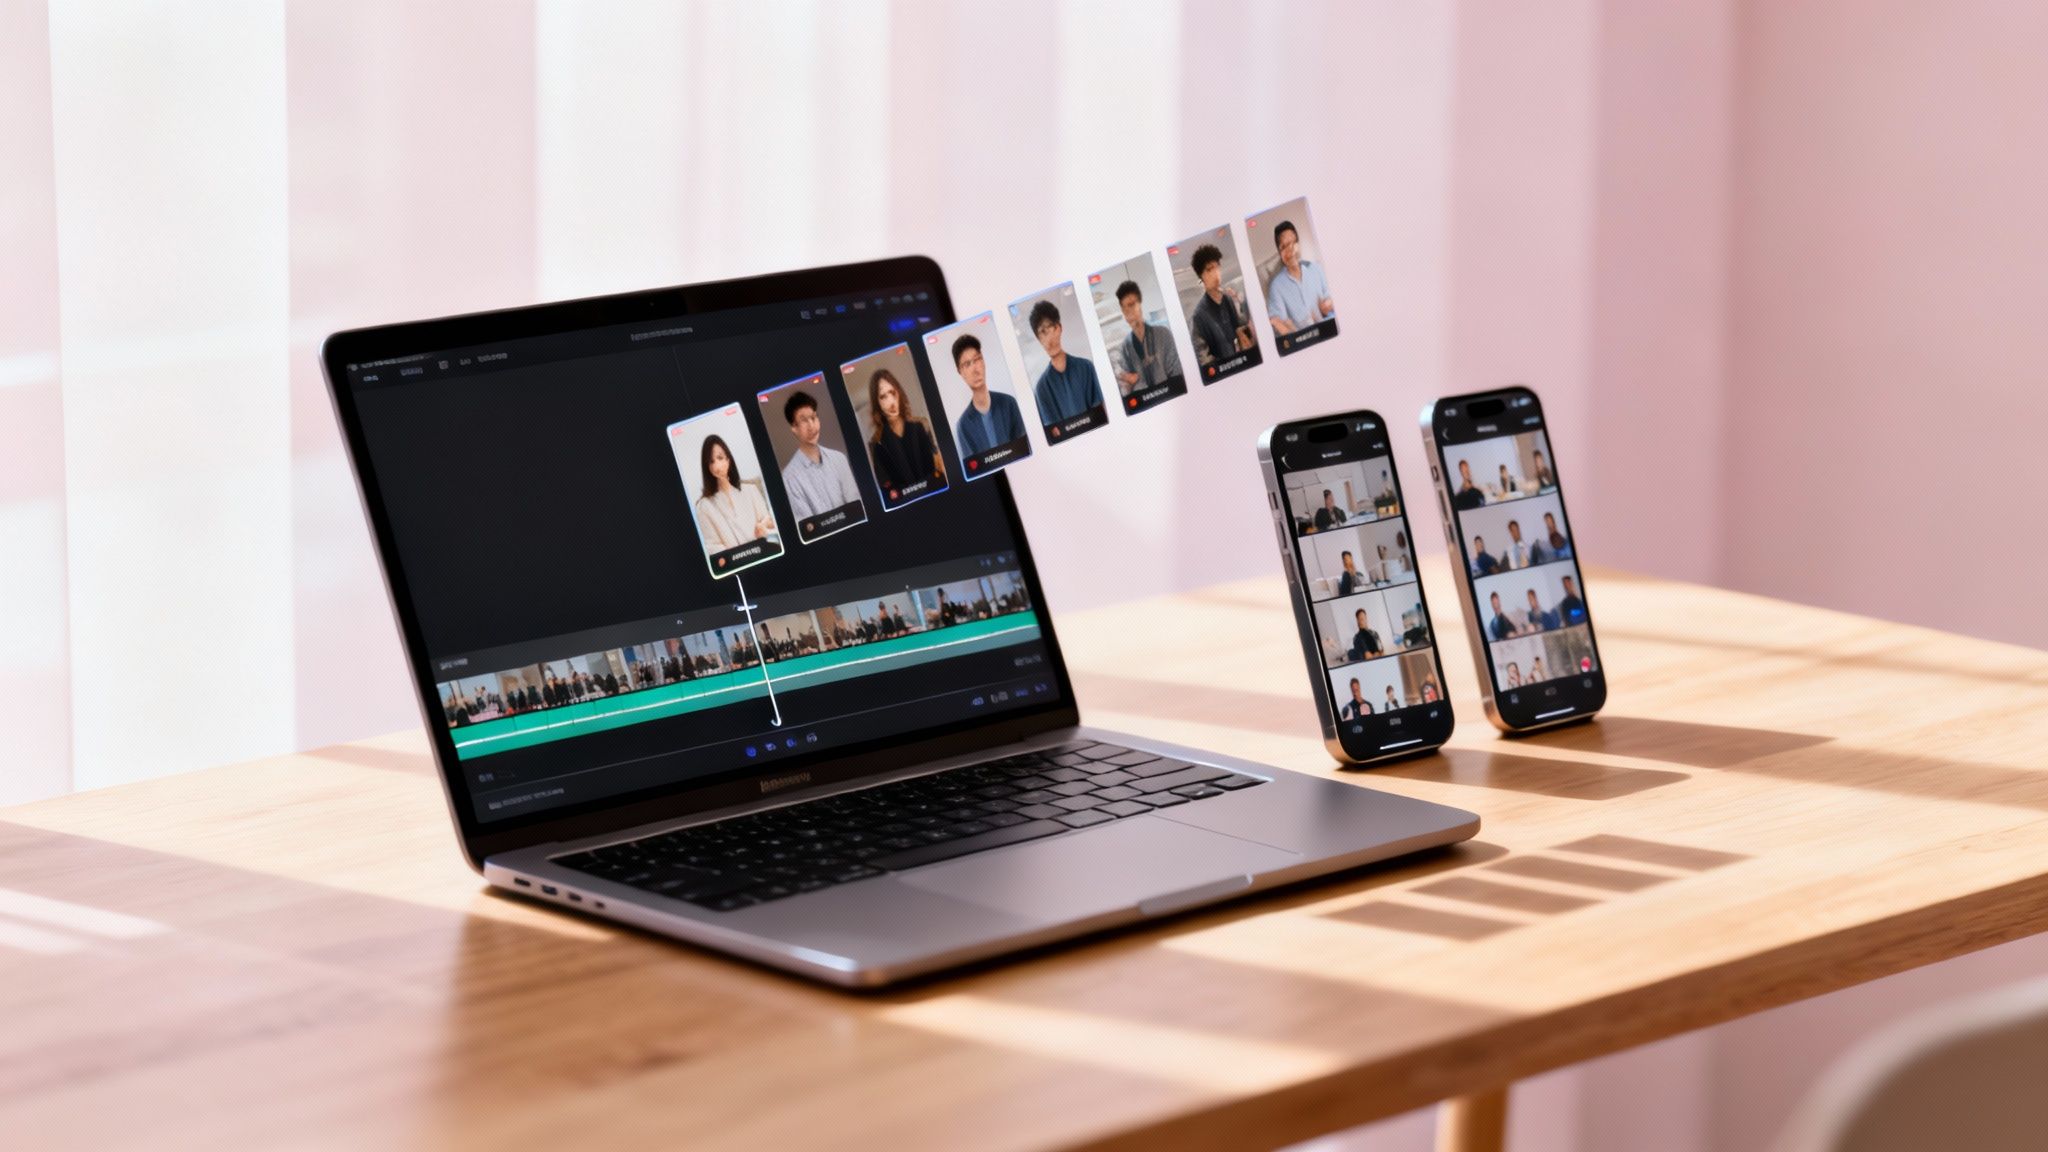
Manual methods are great when you need absolute precision, but they just can't keep up when you need speed and scale. If you're serious about feeding your social media channels with a steady stream of high-quality clips, the best move you can make is to bring in AI-powered tools. This completely changes the game, turning a tedious, manual chore into an efficient, almost hands-off process.
Instead of you spending hours scrubbing through footage to find the best moments, the AI does the heavy lifting. Platforms like ClipShort will analyze your entire video—digging into the transcript, pinpointing moments of high engagement, and understanding the context—to surface the segments with the most viral potential.
How AI Transforms the Clipping Process
The concept is beautifully simple: you drop in a YouTube link, and the AI serves up a platter of potential short-form videos. It's like having a dedicated editor who has already watched your content and intuitively knows what will pop off on TikTok, Reels, and Shorts.
This approach cuts out hours of guesswork and mind-numbing manual work. Let’s say you have a one-hour podcast. Finding the best three or four 60-second clips by hand could easily eat up your entire afternoon. With an AI tool, you get those same suggestions in a matter of minutes.
This flow chart gives you a bird's-eye view of just how simplified the workflow becomes.
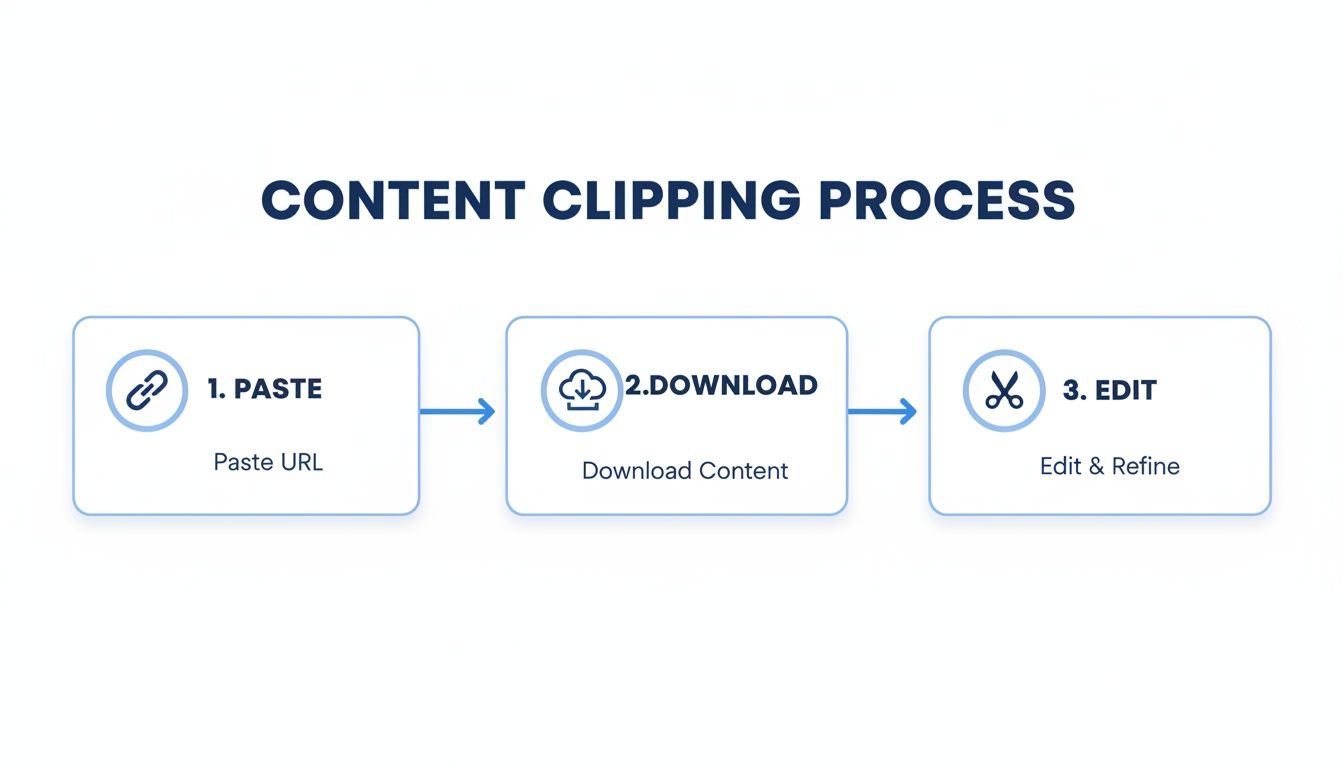
As you can see, AI condenses what used to be a multi-stage editing slog into a straightforward, three-part flow.
Beyond Clipping to Full-Blown Video Creation
But the real magic of modern AI tools isn't just finding the right segment. Once a clip is picked, the platform can automatically tackle the most time-consuming parts of producing a polished, ready-to-post video.
This usually includes features like:
- Automatic Transcription and Captions: The tool instantly generates a transcript and overlays it with dynamic, stylized captions that are proven to keep viewers watching.
- AI Voiceovers: For faceless content, you can generate a surprisingly human-like voiceover from your script in dozens of languages, completely replacing the original audio if you want.
- Visual Refinement: Some AI can even select relevant B-roll or stock imagery to complement the dialogue, making sure the visuals stay fresh and engaging.
- Perfect Formatting: Every single clip is automatically formatted to the 9:16 vertical aspect ratio, so it looks perfect on mobile right out of the box—no manual tweaking needed.
By letting the AI handle these production steps, you can go from a raw YouTube link to a publish-ready Short in less than five minutes. That kind of speed is just impossible to achieve with a traditional editing workflow.
The Strategic Advantage of AI Automation
Using AI for clipping isn't just a time-saver; it’s a strategic decision that unlocks true content scalability. For creators, social media managers, and brands, this means you can finally maintain a consistent posting schedule without burning out your team or yourself.
Think about a creator who wants to post three new Shorts every single day to fast-track their channel's growth. Doing that manually is a full-time job, period. With an AI assistant, it becomes a manageable part of their daily routine. They can pour their energy into making great long-form videos, confident that the AI will handle the rest. You can learn more about how creators are leveraging automatic video editing to grow their channels faster than ever.
Ultimately, these tools put the power of a small editing team into the hands of a single person. You can experiment, test different hooks, and discover what your audience loves at a pace that was once unthinkable. In today's crowded content world, this is how you stay competitive and relevant.
How to Optimize Your Clips for Maximum Social Media Impact
Knowing how to grab a clip from a YouTube video is just the starting line. The real magic happens in the final optimization steps, turning a simple segment into a scroll-stopping piece of content. You can't just drop a raw clip onto TikTok or Reels and expect results; you have to package it to win on these fast-paced platforms.
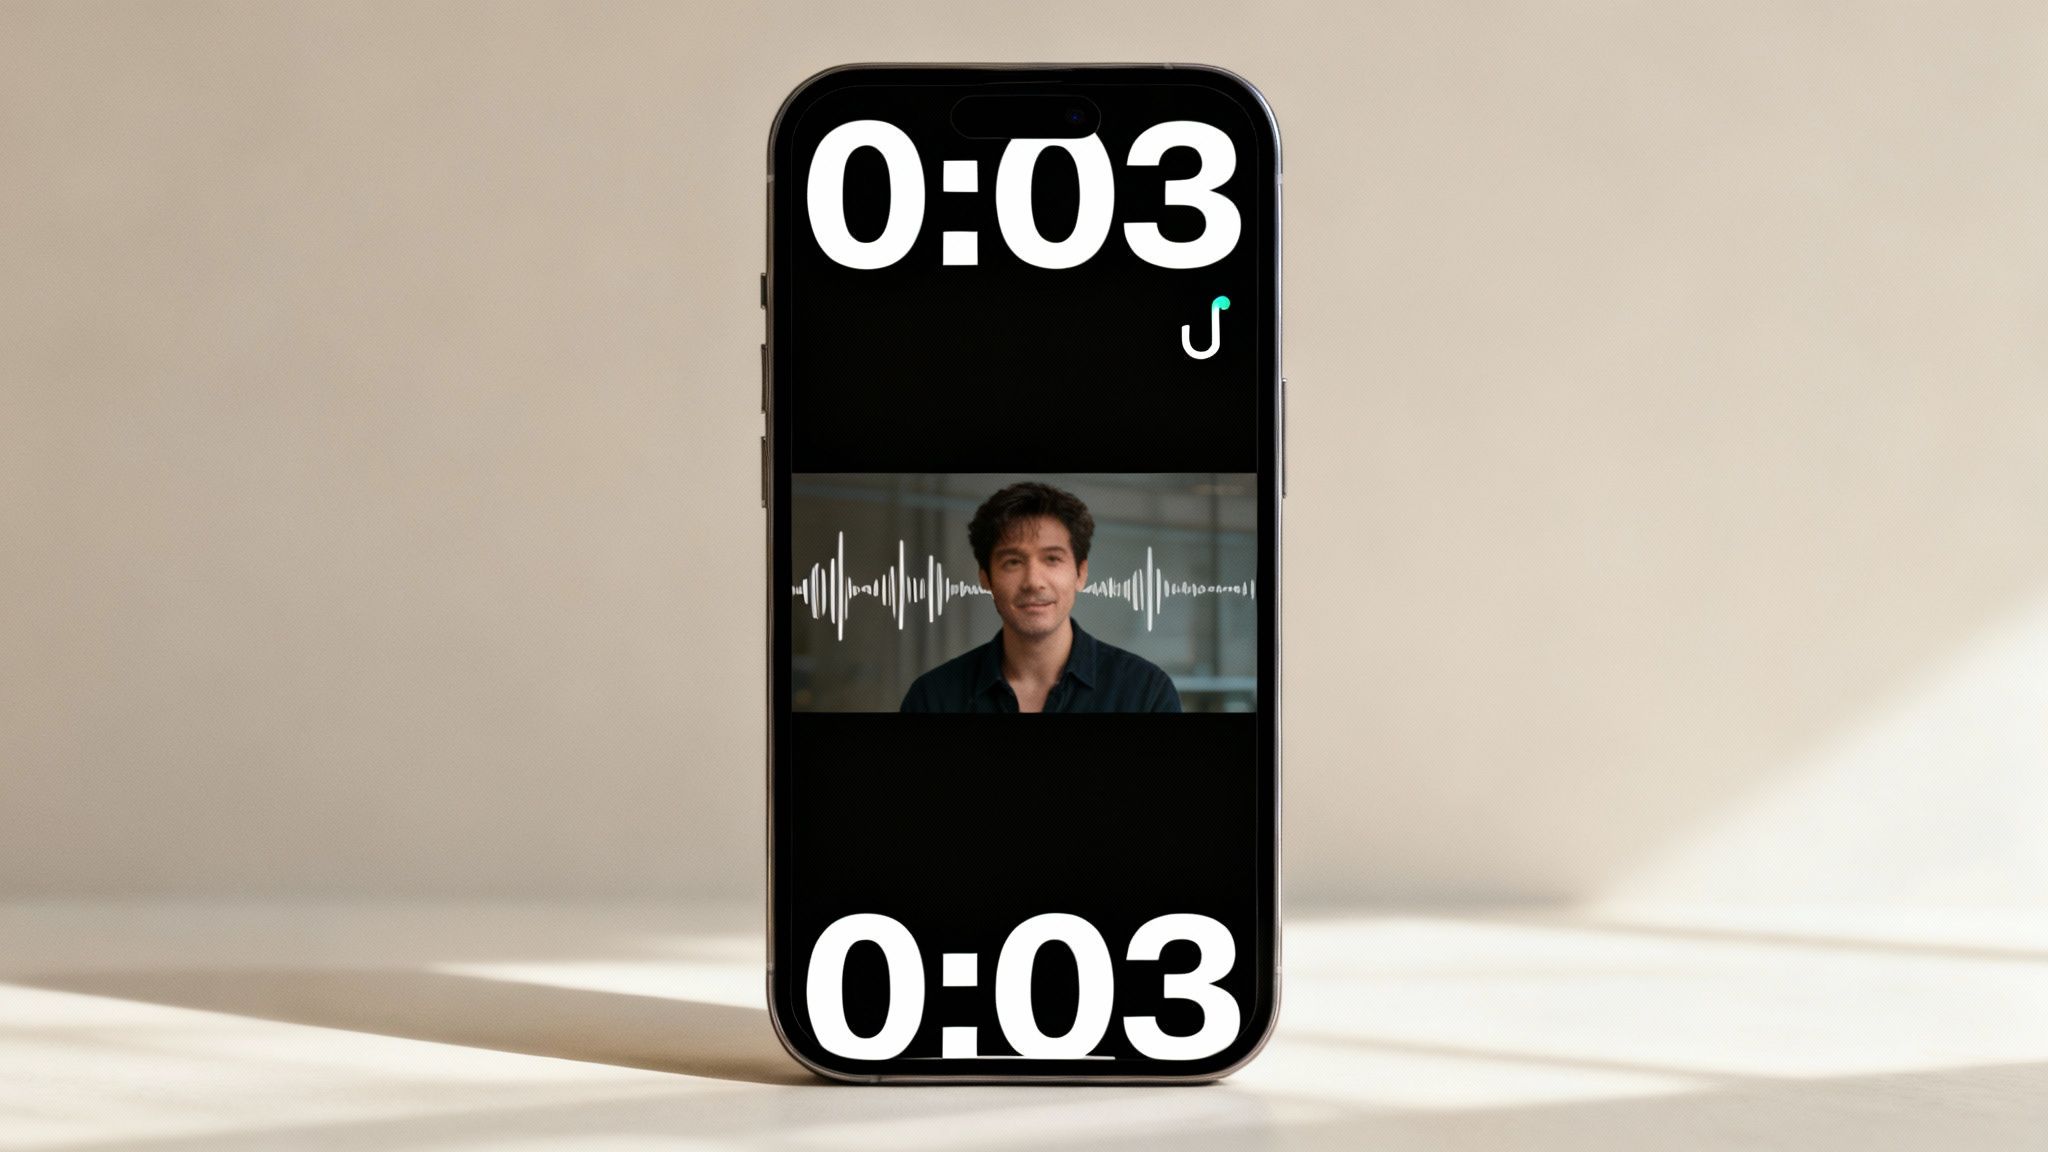
The first three seconds are everything. You have to immediately answer the viewer's silent question: "Why should I watch this?" Your hook could be a provocative question, a shocking statement, or a visual that sparks instant curiosity. If you don't grab them right away, they're gone with a flick of the thumb.
Once you’ve hooked them, your job is to keep them. This is where bold, animated captions become absolutely essential.
Enhance Visual Engagement
Let’s face it, a huge number of people watch videos with the sound off. Dynamic, easy-to-read captions make sure your message hits home, no matter where someone is watching. They also add a visual rhythm to the video, keeping the viewer's eyes glued to the screen.
- Font and Color: Go for large, clear fonts with high-contrast colors that pop. Think bold yellows, whites with a dark outline, or other styles that align with your brand.
- Animation: Having captions appear word-by-word or phrase-by-phrase is a game-changer. This simple trick pulls the viewer through the video and can dramatically increase your total watch time.
- Placement: Position your captions in the center or lower-third of the screen. Just make sure they’re inside the "safe zones" of each platform's interface so they aren't covered by buttons or usernames.
This visual reinforcement is a huge part of what makes short-form content so addictive and effective.
The goal isn't just to get views; it's to get quality views. A viewer who watches your entire 30-second clip is far more valuable to the algorithm than someone who bails after two seconds. Animated captions are your best tool for achieving that.
Format for Vertical Success
Every single clip must be formatted for a vertical, full-screen mobile experience. A horizontal video with black bars on the top and bottom immediately screams low-effort. Always export your clips in a 9:16 aspect ratio (1080x1920 pixels) to look native and professional.
File size is another thing to keep an eye on. Once you have your clips, you need to optimize them for each platform. To ensure your content looks sharp and loads quickly, for example, you might need to learn how to compress videos for Instagram Reels without losing quality.
Finally, lean into the features that are specific to each platform. Adding trending audio, even at a very low volume behind your main audio, can give your clip's discoverability a serious boost. The algorithm often favors content that uses popular sounds. You should also write captions that invite engagement—ask a question or start a debate to turn passive viewers into active participants. These small tweaks make a world of difference.
Navigating Copyright and Fair Use When Clipping
Okay, so you've mastered the technical side of grabbing clips from YouTube. It's easy to get excited and start building a massive library of content. But before you go too far, we need to talk about the legal and ethical rules of the road.
Just downloading and re-uploading someone else's work is the fastest way to get a copyright strike and potentially lose your channel. That doesn't mean you can't use clips, but you have to be smart about it.
The two big concepts you need to get comfortable with are copyright and fair use. Copyright is simple: it automatically protects original work, giving the creator the exclusive right to decide how it's used. Fair use, however, is a legal principle that lets you use copyrighted material without permission for specific purposes, like commentary, criticism, news reporting, or teaching.
Understanding Fair Use in Practice
Fair use isn't a free pass—it's more of a balancing act. When it comes to making clips, the single most important idea to focus on is transformation. The big question is: are you just reposting a clip, or are you adding something new to it that changes its meaning or context?
Your goal should always be to create something new from the original. For instance, using a short segment of a movie trailer to review it or to provide your own comedic commentary is a great example of being transformative. On the other hand, just stringing together the "best of" moments from another creator's stream without adding your own input probably won't cut it.
A good rule of thumb is to use only as much of the original work as is absolutely necessary to make your point. Shorter clips paired with your own significant commentary are always a much safer bet than longer, unedited chunks.
Best Practices for Ethical Clipping
To keep your channel in good standing with YouTube and build a positive reputation in the community, just stick to these simple guidelines.
- Always Give Credit: This is non-negotiable. Drop a link to the original video and shout out the creator in your description. It’s basic respect, and it helps your viewers find the original source.
- Add Significant Value: Your clip should be a springboard for your own content. Add a voiceover, pop on some text commentary, or even film a reaction. Make it clear that this is your take on their content.
- Don't Compete with the Original: Your short clip should never feel like a replacement for the original video. A good clip makes people want to go watch the full thing, not feel like they’ve already seen all they need to.
Stick to these principles, and you can repurpose content with confidence. If you want to see more real-world examples of how this is done right, we've got a deeper dive into how to make a video with YouTube clips that respects the original creators.
Got Questions About Clipping Videos? We've Got Answers
Even when you have the best tools lined up, jumping into video clipping can bring up some questions. It’s totally normal. Here, we’re tackling the most common things creators wonder about, from legal sticky spots to the nitty-gritty tech specs.
Getting these details right from the start is what separates a smooth content strategy from one that hits unnecessary roadblocks. Let's clear things up so you can clip with total confidence.
Is It Actually Legal to Clip Someone Else’s YouTube Video?
This is the big one, and the answer isn't a simple yes or no. Just grabbing someone's video and reposting it is a fast track to a copyright strike. However, using clips often falls under what's known as "Fair Use."
Fair Use is a legal doctrine that lets you use copyrighted material without permission for things like commentary, criticism, news, or education. The absolute key here is transformation. You can't just be a copycat; you have to add something new.
- Add Commentary: React to the clip or add your own analysis over it.
- Educate: Use the clip as an example in a larger, educational piece.
- Critique: Break down what’s happening in the clip and offer your unique take.
As a rule of thumb, always credit the original creator. It’s good practice, shows respect, and can help you steer clear of disputes.
Can I Make Money from Shorts I Create Using Other Videos?
Yes, you absolutely can monetize Shorts made from other people's content, but there's a catch. You have to play by YouTube's monetization policies. This means your content must be transformative and provide real, original value.
Simply finding the best moments in a video and re-uploading them won't fly. That’s a quick way to get demonetized.
Think of it this way: your final video needs to feel like your creation. Add your own voiceover, offer some sharp analysis, or turn it into a clever remix. The more of your own creative spin you add, the safer you'll be.
What’s the Best Format for TikTok and Reels Clips?
To make your clips look sharp and professional on platforms like TikTok, Instagram Reels, and YouTube Shorts, you need to export them with the right settings. Getting this right ensures your video fills the screen perfectly and plays smoothly.
Here’s the cheat sheet for optimal quality:
- File Type: MP4 is the gold standard. It works flawlessly everywhere.
- Codec: Stick with the H.264 codec. It gives you a great mix of high quality and manageable file size.
- Aspect Ratio: This is non-negotiable. Always use 9:16 (which is 1080x1920 pixels). This vertical format is what fills a phone screen.
- Frame Rate: Aim for something between 30 and 60 FPS (frames per second) for that clean, buttery-smooth look.
Thankfully, most modern video editors and dedicated AI clipping tools are smart enough to handle this for you. They usually export with these settings by default, so you don't have to sweat the technical details.
Ready to stop spending hours hunting for viral moments and start creating professional, engaging short-form content in minutes? With ClipShort, you can turn any idea or YouTube link into a polished, ready-to-post video with AI-powered scripts, lifelike voiceovers, and dynamic captions. Try ClipShort for free and automate your content creation today!