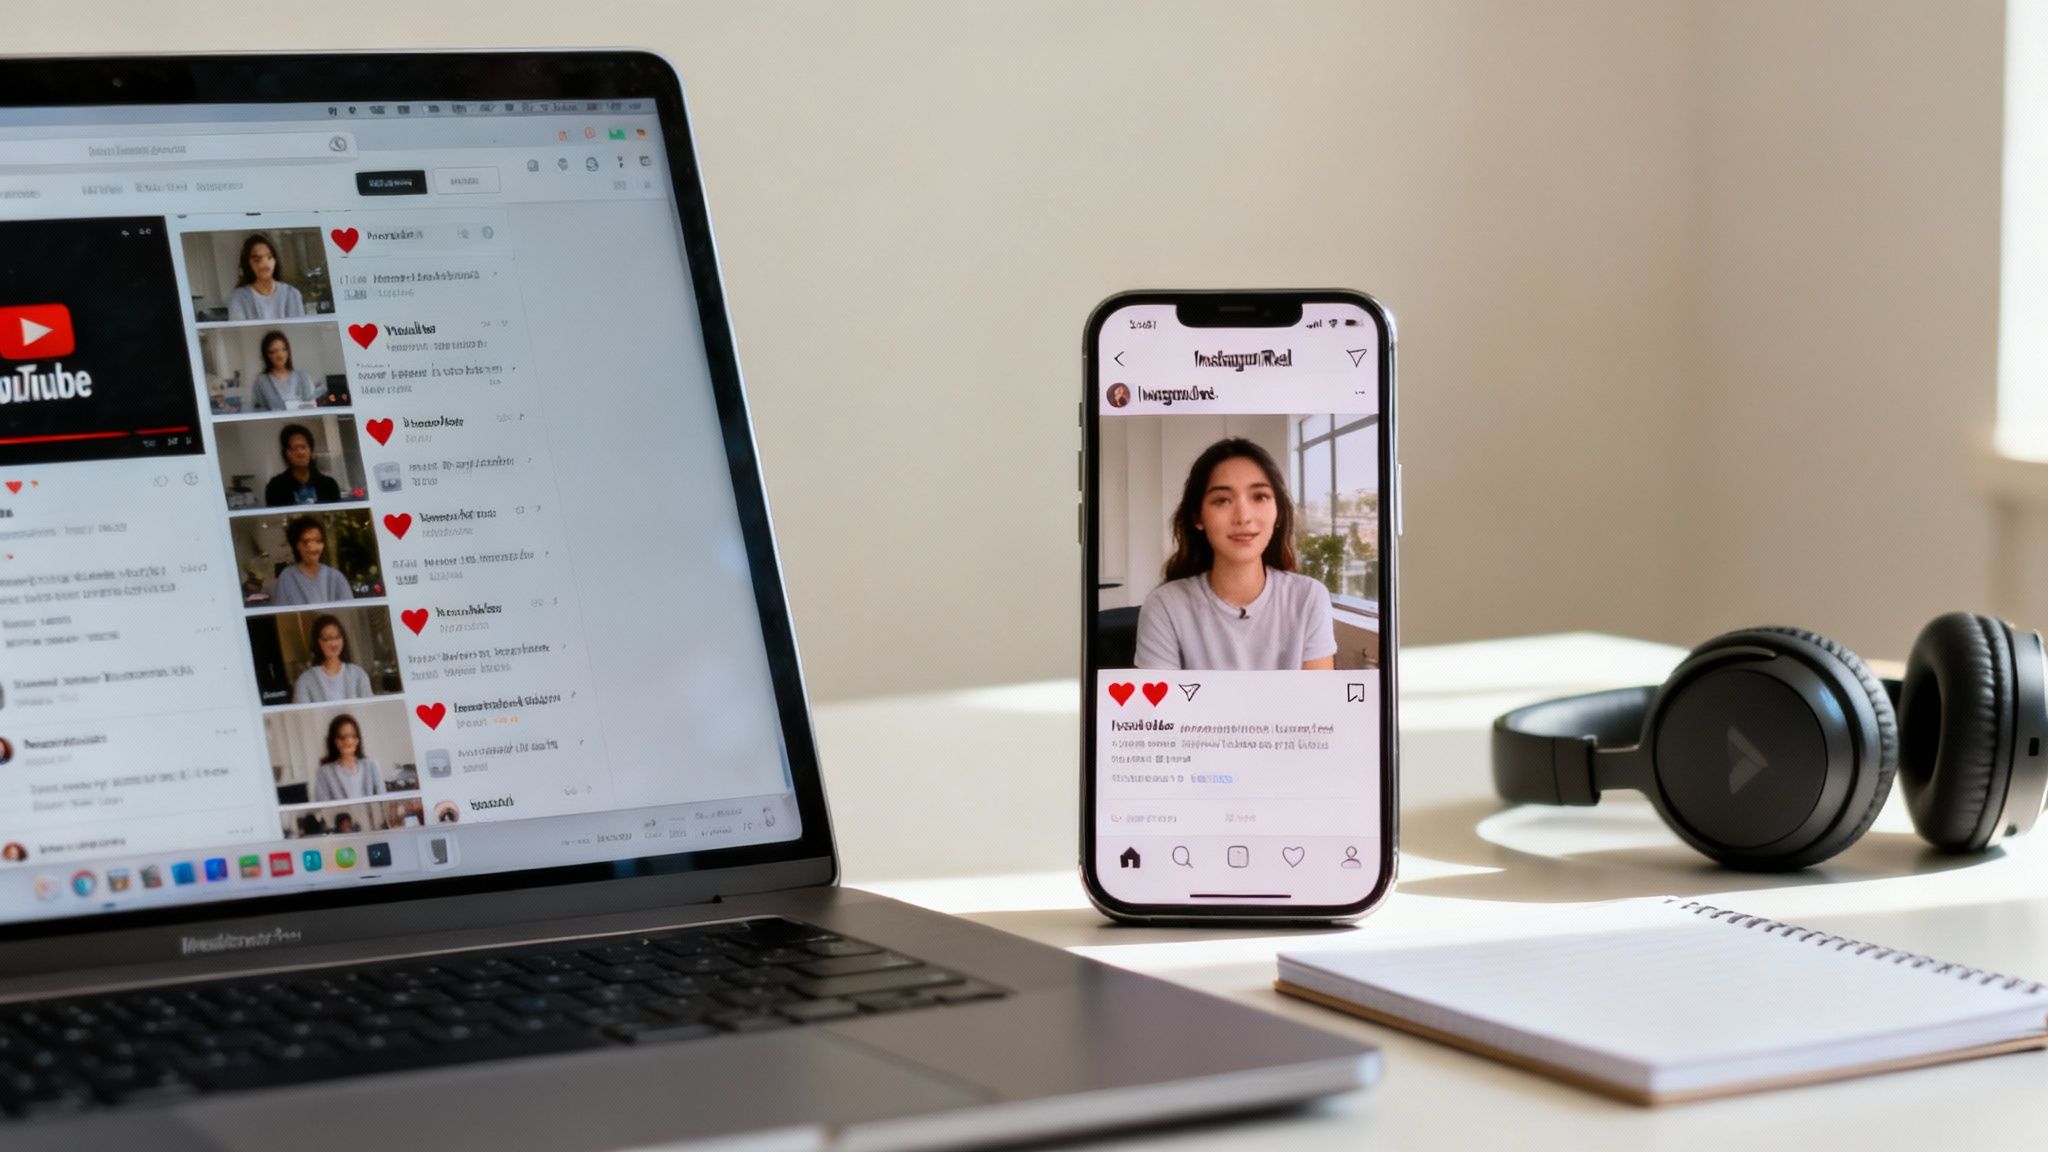
Post Videos on Instagram From YouTube Like a Pro
You can absolutely post your YouTube videos on Instagram, but it’s not as simple as copy-pasting a link and hoping for the best. To really make an impact, you need to reformat your horizontal, long-form content into vertical clips built for how people actually use Instagram. Think Reels, Stories, and Feed posts that grab attention instantly.
Why Repurposing YouTube Videos for Instagram Is a Game-Changer
Turning your YouTube videos into Instagram content is so much more than a time-saving hack. It’s a genuine strategy for growing your audience and making your brand stronger.
Let's be real: your YouTube subscribers and your Instagram followers are often two totally different groups of people. The person who settles in to watch a 15-minute deep dive on YouTube is not in the same mindset as someone scrolling through Reels on their lunch break. They want quick, high-impact visuals that are easy to digest.
By repurposing, you're meeting both audiences right where they are. You aren't just recycling old content; you're giving your best ideas a fresh format and a new chance to go viral.
How YouTube and Instagram Video Compare
Before you dive in, it’s crucial to understand why you can't just upload the same file to both platforms. The formats, lengths, and even the way people watch are fundamentally different.
YouTube vs Instagram Video At a Glance
| Feature | YouTube (Long-Form) | Instagram Reels | Instagram Stories | Instagram Feed Video |
|---|---|---|---|---|
| Orientation | Horizontal (16:9) | Vertical (9:16) | Vertical (9:16) | Vertical or Square |
| Ideal Length | 8-15+ minutes | 15-90 seconds | 15-60 seconds | 1-10 minutes |
| Viewing Style | Intentional, sit-down | Fast-paced scrolling | Quick taps, ephemeral | Casual scrolling |
| Key Goal | Deep education, storytelling | Entertainment, virality | In-the-moment updates | Community engagement |
This table makes it clear: a direct repost is a recipe for disaster. You have to adapt.
Maximize Your Reach on Different Platforms
Think about it. A 20-minute YouTube video is packed with "golden nuggets" that are perfect for Instagram.
- A gaming creator can pull a few hilarious reactions or epic wins and turn them into a handful of killer Reels.
- A cooking channel can slice up a long recipe video into a quick, step-by-step tutorial for Instagram Stories, complete with polls and stickers.
This approach lets you:
- Tap into new audiences: You can connect with people who live on short-form content and might never find your long-form YouTube channel otherwise.
- Generate powerful engagement: The fast-paced nature of Reels and Stories is designed for quick likes, comments, and shares, which the algorithm absolutely loves.
- Build a consistent brand: Showing up across platforms reinforces who you are and what you're an expert in, making you the go-to authority in your niche.
And the data doesn't lie. In Q2 2023, brands reported that Reels generated 55% more interactions than single-image posts and 29% more than regular video posts. That's a massive difference.
The Smart Way to Grow Both Channels
At the end of the day, this isn't just about feeding the Instagram machine. It’s a symbiotic relationship.
A killer Reel acts like a movie trailer for your main event on YouTube. It gets people hooked and drives them to your link in bio to see the full story. To really nail this, you need to understand the wider world of content repurposing strategies.
For a deeper dive into making every piece of content work harder for you, check out our own guide on https://www.clipshort.co/en/blog/content-repurposing-strategies.
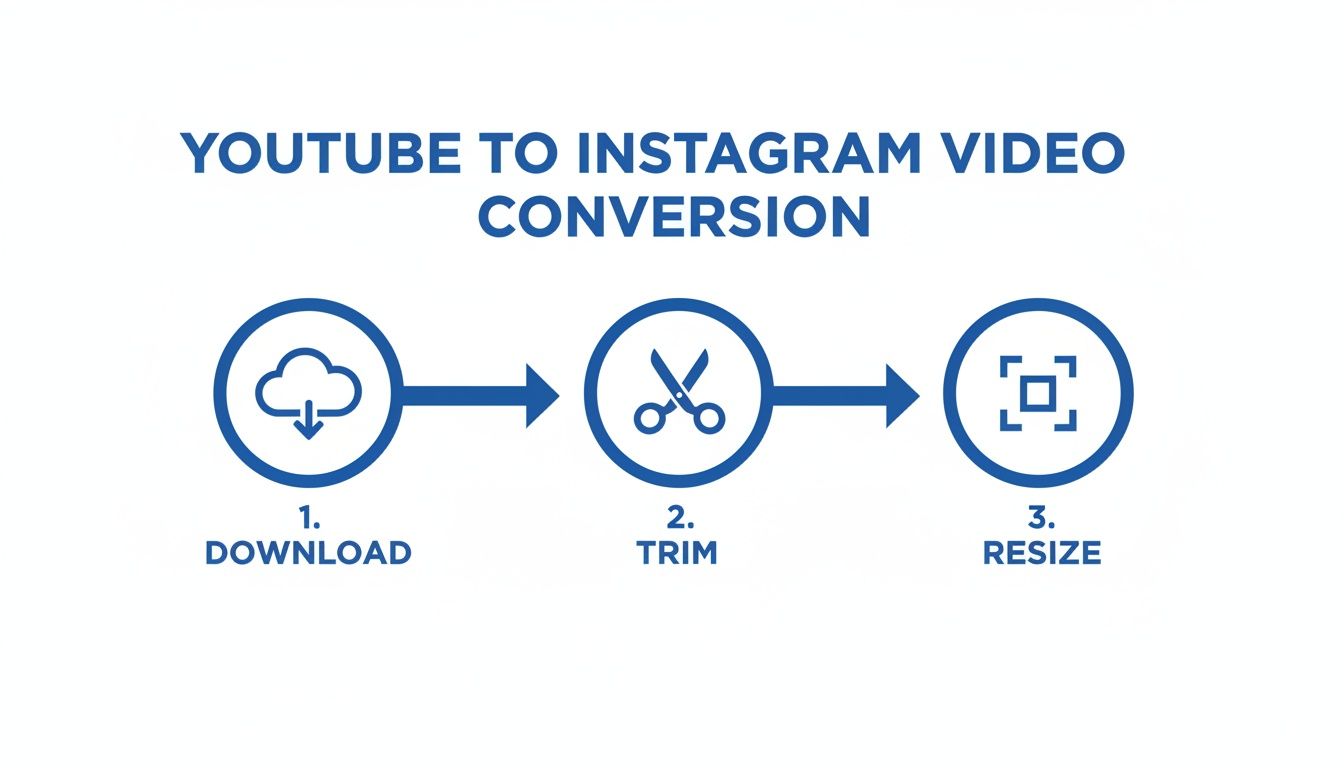
Your Workflow for Converting YouTube Videos
To consistently turn your YouTube videos into great Instagram content, you need a repeatable process. This isn't just a simple download and re-upload job. It’s about strategically re-imagining your content for Instagram's vertical, fast-paced world.
The whole thing starts with one key decision: how you get your hands on the original video file.
Securing Your High-Quality Source Video
The quality of the final Instagram clip you post is 100% dependent on the quality of the video you start with. You’ve got two main ways to get your YouTube video, and one is definitely the winner.
- Best Option: Use the Original File. Always, always start with the master file you first uploaded to YouTube. This version is uncompressed, has the best possible resolution and audio quality, and gives you the most freedom when you start editing.
- Alternative Option: Download from YouTube Studio. If you can’t track down the original, you can grab a copy straight from your YouTube Studio dashboard. It’s convenient, but just know this version will be slightly compressed, which can lead to a tiny bit of quality loss.
Here's where to find the download button inside your YouTube Studio.
Just head to the "Content" tab, find the video you need, click the three-dot menu, and hit "Download." That’ll give you a solid MP4 file to get started with.
Choosing Your Editing Tools
With your video file in hand, it's time to pick your weapon of choice for editing. You don't need a Hollywood-level budget; there are powerful tools out there for every price point, including completely free ones.
- Mobile-First Apps (CapCut, InShot): Perfect for quick edits right on your phone. These are fantastic for basic trimming, resizing, and adding text or music. They’re built for social video and are super intuitive.
- Desktop Software (Clipchamp, DaVinci Resolve): For more precision and control, a desktop editor is the way to go. Clipchamp is a really user-friendly online option, while DaVinci Resolve offers professional-grade power for free. These tools just make it easier to manage multiple clips and really dial in your edits.
- AI-Powered Tools (ClipShort): Platforms like ClipShort are built specifically for this kind of repurposing. They can automatically find the most interesting parts of a long video, reformat them for vertical screens, and even add animated captions. It's a massive time-saver. Many creators are finding that digging into automatic video editing is the secret to keeping up a consistent posting schedule.
The best tool is the one you'll actually use. Don't get stuck trying to learn complex software if a simple mobile app gets the job done and keeps you from falling behind.
Resizing and Trimming for Instagram
This is where the magic really happens—and it's the most important technical step. You have to convert your horizontal 16:9 YouTube video into a vertical 9:16 format so it looks right on Reels and Stories.
When you change the aspect ratio, your original video won't fill the screen. You'll need to decide how to deal with that empty space. Most editors give you a couple of choices:
- Crop and Reframe: This means zooming into the video and repositioning it so your main subject stays centered in the new vertical frame. It's usually the best way to get that immersive, full-screen look.
- Add a Blurred Background: Some tools can fill the empty space at the top and bottom with a stretched-out, blurred version of your video. This can be a decent compromise if cropping would cut out something important.
After you've resized it, you have to trim the clip down to fit Instagram’s limits. Remember, while Reels can now be up to 90 seconds long, shorter is almost always better. Your goal is to find one powerful moment—a key tip, a funny outtake, or a big reveal.
You aren't trying to cram your entire YouTube video into a Reel. You're creating a tiny, standalone piece of entertainment that can hook a brand new viewer in seconds.
Optimizing Your Clips for Maximum Engagement
Simply resizing and trimming your YouTube video is just the start. If you really want your repurposed clips to pop on Instagram, you need to add creative layers that make them feel native to the platform. It's the small, intentional details that separate a forgettable clip from one that actually stops the scroll.
The whole technical process is pretty straightforward: get your file, trim it down, and resize it for vertical viewing.
Once you've got that down, you can focus on the fun stuff—the creative elements that drive real views.
Make Your Video Accessible with Captions
One of the single most important things you can do is add dynamic, easy-to-read captions. Think about it: a huge chunk of Instagram users watch videos with the sound off, especially when they're scrolling in public. If your clip depends on someone speaking, you’re losing a massive audience right off the bat without subtitles.
But don't just rely on Instagram's auto-generated captions. You can create a much better experience with custom styles that match your brand and hold attention.
- Simple Text Overlays: This is the bare minimum. Clean, static text at the bottom is way better than nothing.
- Animated Word-by-Word Subtitles: You've seen these everywhere. The "karaoke caption" style highlights each word as it's spoken, and it's incredibly good at keeping viewers locked in.
- Branded Captions: Use your own fonts and colors to create a cohesive look. This makes your content instantly recognizable as yours.
Remember, captions aren't just for accessibility; they're a powerful retention tool. A viewer is much more likely to watch a video to completion if they can follow along visually, sound on or off.
Leverage Instagram Native Features
Your repurposed video shouldn't feel like an outsider on the platform. Integrating Instagram's own features is a huge signal to the algorithm that your content belongs there. This is especially true for Reels and Stories.
Choose Trending Audio
For Reels, jumping on a trending audio track can give your video a serious visibility boost. Even if your original clip has its own sound, you can add a popular song and just lower its volume to 1-5%. Your original audio stays front and center, but you still get the discovery benefits of being associated with a trend.
Design a Captivating Cover Image
Your Reel's cover image is what people see on your profile grid before they press play. A blurry, awkward still frame isn’t going to get anyone excited. Instead, treat it like a mini movie poster.
Design a simple, compelling cover using a high-quality still from the video. Then, add a bold headline that sparks curiosity, like "My Biggest Mistake" or "3 Tips for X." This small step can dramatically improve how many people tap to watch from your profile.
If you're looking for more ideas, exploring different Instagram Reels best practices can offer some great inspiration for covers, audio choices, and more.
Automating Your Workflow With Smart AI Tools
Let's be honest: manually resizing, trimming, and captioning every single clip you want to post is a soul-crushing time sink. If you're a busy creator or social media manager trying to post consistently, this grind is often the biggest bottleneck holding you back from truly unlocking the potential of your content library.
This is where artificial intelligence completely changes the game. AI-powered video tools are built to handle the most tedious, repetitive parts of the repurposing process. They can turn hours of painstaking editing into just a few minutes of final review.
How AI Simplifies Video Repurposing
Instead of you having to scrub through a 20-minute video searching for a 30-second gem, these smart platforms do the heavy lifting for you. They analyze your entire YouTube video—both the transcript and the visuals—to pinpoint the moments most likely to grab attention and get shared.
From there, the automation really kicks in. The tool can:
- Identify Viral-Worthy Clips: It intelligently suggests several high-potential short clips based on what's being said and shown in your video.
- Auto-Reformat to Vertical: Each clip it finds is automatically resized from the original 16:9 to a vertical 9:16 aspect ratio, perfectly framed for Reels and Stories. No more awkward cropping.
- Generate Animated Captions: The platform transcribes the audio and creates those dynamic, word-by-word subtitles that are essential for grabbing attention on silent-scroll feeds.
This automated approach isn't just about saving time; it often leads to a higher quality output. You no longer have to sweat the small stuff like getting the framing just right or tediously creating subtitles from scratch.
The real win here is that you can shift your focus from tedious technical tasks to actual creative strategy. You get to spend less time lost in an editor and more time planning content that genuinely connects with your audience.
The Power of Automated Clipping
When you look at the data, the value of this kind of automation becomes crystal clear. YouTube Shorts, which are often just clipped-down versions of longer videos, deliver incredible reach. In 2023, channels actively uploading Shorts grew by 50% year-on-year. We're even seeing smaller accounts get faster initial growth on Shorts compared to TikTok or Reels.
This proves the immense power of turning long-form videos into bite-sized clips—a process that is practically tailor-made for AI. You can dig into more data on short-form video performance to see just how strong these trends are.
This automated workflow is the secret weapon for creators who need to get videos from YouTube onto Instagram at scale. Tools like ClipShort use this exact technology. You just feed it a YouTube link, and in minutes, you get back multiple vertical clips that are ready to post. It's the perfect solution for keeping up with a high-volume posting schedule without getting buried in the minutiae of video editing, freeing you up to focus on what actually matters: creating great content.
Crafting Your Post and Promotion Strategy

Okay, your perfectly edited clip is exported and ready to go. But don't hit "post" just yet. The next few steps are what separate a video that thrives from one that gets lost in the endless scroll. A great video deserves an equally great promotional strategy, and that all starts with a compelling caption.
Think of your Instagram caption as having three critical jobs: hook the reader, give context, and tell them what to do next. That first line is your most valuable real estate because it's all anyone sees before deciding whether to tap "more." You have to make it count. Start with a sharp hook—a provocative question, a bold statement, or a problem you know your audience faces.
Once you have their attention, use the rest of the caption to add real value. Share a key takeaway from your full YouTube video, or maybe tell a quick behind-the-scenes story about making it. Give people a reason to care about the clip they just watched.
Building Your Hashtag Strategy
Hashtags are your video's best friend for discovery. They're how you connect with people who don't follow you... yet. A huge mistake I see all the time is creators using only massive, generic tags like #video or #explorepage. Sure, they have volume, but your content will be buried in seconds.
A much smarter approach is to use a blended hashtag strategy.
- Broad Hashtags (1-2): These are the popular, high-traffic tags related to your general topic (like
#contentcreatoror#youtubetips). Think of them as giving you a quick, initial burst of visibility. - Niche Hashtags (3-5): This is where the magic happens. Get specific. If your video is about baking sourdough, use tags like
#sourdoughbakingor#breadmaking. These connect you with a super-engaged, targeted audience that's actually looking for what you offer. - Branded Hashtags (1): Always include a unique hashtag for your brand or a specific series (e.g.,
#ClipShortTips). This helps build community and makes it easy for your biggest fans to find all your related content in one place.
You don't need to stuff your post with 30 hashtags. A potent mix of 5 to 10 highly relevant hashtags is almost always more effective.
The Art of the Call to Action
Every single post you make should have a purpose. Your Call-to-Action (CTA) is where you flat-out tell your audience what you want them to do next. Without a clear CTA, even someone who loved your video might just smile and scroll on by.
Your CTA should be direct and simple. Don't be shy about asking for what you want.
The most powerful CTAs are low-friction and specific. Instead of a vague "check out my channel," try "Tap the link in my bio to watch the full tutorial on this!"
Here are a few CTA examples you can steal and adapt:
- To Spark Engagement: "What's one tip you'd add? Let me know in the comments!"
- To Encourage Shares: "Tag a friend who needs to see this."
- To Drive YouTube Traffic: "I break down the full process in my latest YouTube video. Link in bio to watch now!"
Finally, timing is everything. Post when your audience is most active—your Instagram Insights will tell you exactly when that is. Once you post, stick around for the first 30-60 minutes to reply to comments. This activity signals to the algorithm that your content is sparking conversation, which can give your reach a serious boost. On top of that, learning to use Instagram Direct features can be a game-changer for building relationships and personalized promotion.
Your Top YouTube to Instagram Questions, Answered
Once you start moving content between platforms, a few questions always pop up. It's totally normal. Getting the hang of the unwritten rules, especially around copyright and what actually works on Instagram, can feel a bit confusing at first.
Let's clear up some of the most common hurdles creators face.
Is It Okay to Just Repost Someone Else’s YouTube Video?
This is a big one, and the answer is a firm no.
Downloading and reposting another creator's video without their direct, explicit permission is almost always a copyright violation. Think of it this way: this entire guide is about getting more mileage out of your own hard work. Using someone else's content without permission can get your video taken down, earn your account a strike from Instagram, or even lead to legal issues.
Bottom line? Stick to repurposing content that you own, period.
The whole point of repurposing is to amplify your own creative voice and build your brand—not to piggyback on someone else's. It’s about respecting the craft and the entire creator community.
Will Instagram Punish Me for a TikTok Watermark?
Yes, it absolutely will. It's no secret that Instagram's algorithm tends to suppress Reels that have a visible watermark from a rival platform like TikTok. It makes sense—they want original content, not leftovers from their competition.
For the best possible performance, always work from a clean, watermark-free version of your video. Export the final cut directly from your editing software and upload that native file to each platform. This gives your content the best shot at reaching a wider audience.
What's the Ideal Length for an Instagram Reel?
While you can post a Reel that’s up to 90 seconds long, that doesn't mean you should.
When you're pulling a clip from a longer YouTube video, the sweet spot is usually much shorter. I always recommend aiming for a powerful, punchy clip between 15 and 45 seconds.
Your goal isn't to cram your whole YouTube video into a Reel. It's to isolate one killer moment, one surprising insight, or one key takeaway that makes people stop scrolling. Shorter clips are also far more likely to get rewatched, which sends a huge positive signal to the algorithm and helps your video get shown to more people.
Ready to stop wasting hours manually chopping up your videos? ClipShort uses AI to instantly find the most viral-worthy moments in your YouTube content, then automatically resizes and captions them for Instagram. Try it now and start repurposing smarter, not harder.