How to Post Videos from YouTube to Instagram The Right Way
Turning your YouTube videos into Instagram content is one of the smartest ways to get more mileage out of your work. The basic idea is to grab your original YouTube video file, reformat it for Instagram's vertical or square world, and then chop it up for Reels, Stories, or Feed posts. It's a killer strategy for tapping into a huge, overlapping audience without having to film a single new thing.
Why Repurposing YouTube Videos for Instagram Is a Smart Move
Thinking about how to post videos from YouTube to Instagram isn't just a technical problem—it's a strategic one. The best creators don't treat these platforms like separate islands. They build a connected content ecosystem where YouTube and Instagram feed each other, creating a powerful loop that fuels audience growth and engagement.
The core principle is simple: work smarter, not harder. You’ve already poured hours into creating a polished, long-form YouTube video. Just leaving it on YouTube is a massive missed opportunity. That one video is a goldmine of micro-content, perfect for Instagram's fast-paced, scroll-happy audience.
Here's why this approach just makes sense:
- Massive Audience Overlap: Let's be real, your ideal follower is probably hanging out on both platforms. Repurposing your content means you show up where they are, reinforcing your message and brand without being repetitive.
- More Content, Less Effort: Instead of stressing about what to post on Instagram every day, a single 10-minute YouTube video can easily be sliced into a full week's worth of Reels, Stories, and posts. Consistency is king with the algorithm, and this is the easiest way to achieve it.
- Tap Into a New Discovery Engine: Instagram's algorithm, especially for Reels, is built for discovery. A killer clip from your YouTube video can go viral overnight, introducing your brand to thousands of new people who might just head over to your channel and hit subscribe.
- Skyrocket Your Engagement: Short, punchy clips almost always get more immediate reactions—likes, comments, and shares—than longer videos. These quick bursts of engagement tell the algorithm your content is worth showing to more people.
The Power of Cross-Platform Synergy
This isn't just a hunch; the data shows a massive crossover between YouTube and Instagram audiences, creating a natural bridge for your content to travel.
Here's a quick look at how the platforms stack up and why repurposing works so well:
YouTube vs Instagram Platform Snapshot
| Metric | YouTube | |
|---|---|---|
| Active Users | 2.78 Billion+ | 2 Billion+ |
| Primary Format | Long-form, horizontal (16:9) | Short-form, vertical (9:16) |
| Content Focus | In-depth, educational, entertainment | Visual, quick, engaging, behind-the-scenes |
| Audience Overlap | 77% of users are also on Instagram | 76.9% of users are also on YouTube |
| Key Opportunity | Pillar content, deep dives | Micro-content, trailers, teasers, highlights |
The audience overlap is staggering. A whopping 76.9% of Instagram users also use YouTube, and it's a two-way street, with 77% of YouTube users also on Instagram. The numbers tell a clear story: while YouTube dominated with 1.35 trillion visits in 2023, Instagram is catching up fast, hitting 87.3 billion visits—that's a 62.40% jump since 2019, thanks in large part to Reels. You can find more of these Instagram stats on Sprout Social.
This data screams one thing: Reels chopped from your YouTube videos are perfectly positioned to succeed. In fact, Reels from influencers see a 2.08% engagement rate, crushing traditional video posts at just 0.42%.
Real-World Repurposing Scenarios
Enough with the theory. Let's make this practical.
Say you’re a tech reviewer and you just dropped a 15-minute deep dive on a new smartphone. Here’s how you could slice and dice it for Instagram:
- The Hype-Building Story: The day before your YouTube video goes live, post a quick 15-second Story. Show a cool unboxing shot or a dramatic slow-mo of a feature test. Slap on a countdown sticker to get people excited.
- The Viral Reel: Find the single most surprising or visually awesome moment in your review—maybe a crazy camera zoom or a durability test. Cut that into a 30-second Reel, add some trending audio, and throw on some bold text captions.
- The Educational Feed Post: Create a 60-second video for your feed that walks through the phone's top three features. In the caption, you can tell everyone to check out your YouTube channel for the full, in-depth review.
By treating your YouTube video as the "pillar" content, you can effortlessly generate a stream of "micro" content for Instagram. This not only fills your content calendar but also creates multiple entry points for new followers to discover your work.
This strategy changes the game. Your content stops being a series of one-off posts and becomes an interconnected system. Your Instagram becomes a powerful promotion engine for your YouTube channel, and your YouTube content becomes an endless well of high-quality material for your Instagram. It's a win-win that drives growth everywhere.
The Complete Workflow for Getting Your Videos from YouTube to Instagram
So you've poured your heart into a killer long-form YouTube video, and now you want to get more mileage out of it on Instagram. Smart move. But this isn't about a lazy download-and-repost job. To really win, you need a solid workflow that makes your content feel like it was born for Instagram's vertical world.
Success here is all about the details—from getting the right video file to reframing every shot for maximum impact on a phone screen.
Step 1: Secure the Highest Quality Video File
First things first: you need a clean, high-resolution video file. I see so many creators make the mistake of ripping their own video from YouTube using some sketchy third-party site. Don't do it. This almost always leaves you with a pixelated, compressed file that looks terrible once you start editing.
Always, always start with your original source file—the exact same high-res video you uploaded to YouTube in the first place. This is your master copy, and it gives you the best possible quality to work with.
If you’ve misplaced the original (it happens to the best of us), your next best option is to download your own video from YouTube Studio. Just head to your 'Content' tab, find the video, click the three-dot menu, and hit 'Download.' It'll be a bit compressed, but it’s a world away from what a random online downloader will spit out.
Step 2: Reformat for a Vertical World
Okay, you've got your file. Now for the most important part: transforming that widescreen 16:9 video into a vertical 9:16 format that looks natural on Reels and Stories. This is where so many people drop the ball. Posting a horizontal video with those ugly black bars is a dead giveaway that you're just reposting, and it tanks engagement.
You have to actively reframe your content. This isn't just about cropping; it's about re-directing the viewer's eye within a much narrower frame. You need to make sure the key action or your face stays front and center.
Think of it this way: your YouTube video is a landscape painting, but an Instagram Reel is a portrait. You have to choose the most compelling part of the scene and make it the star. This flowchart breaks down the basic journey.
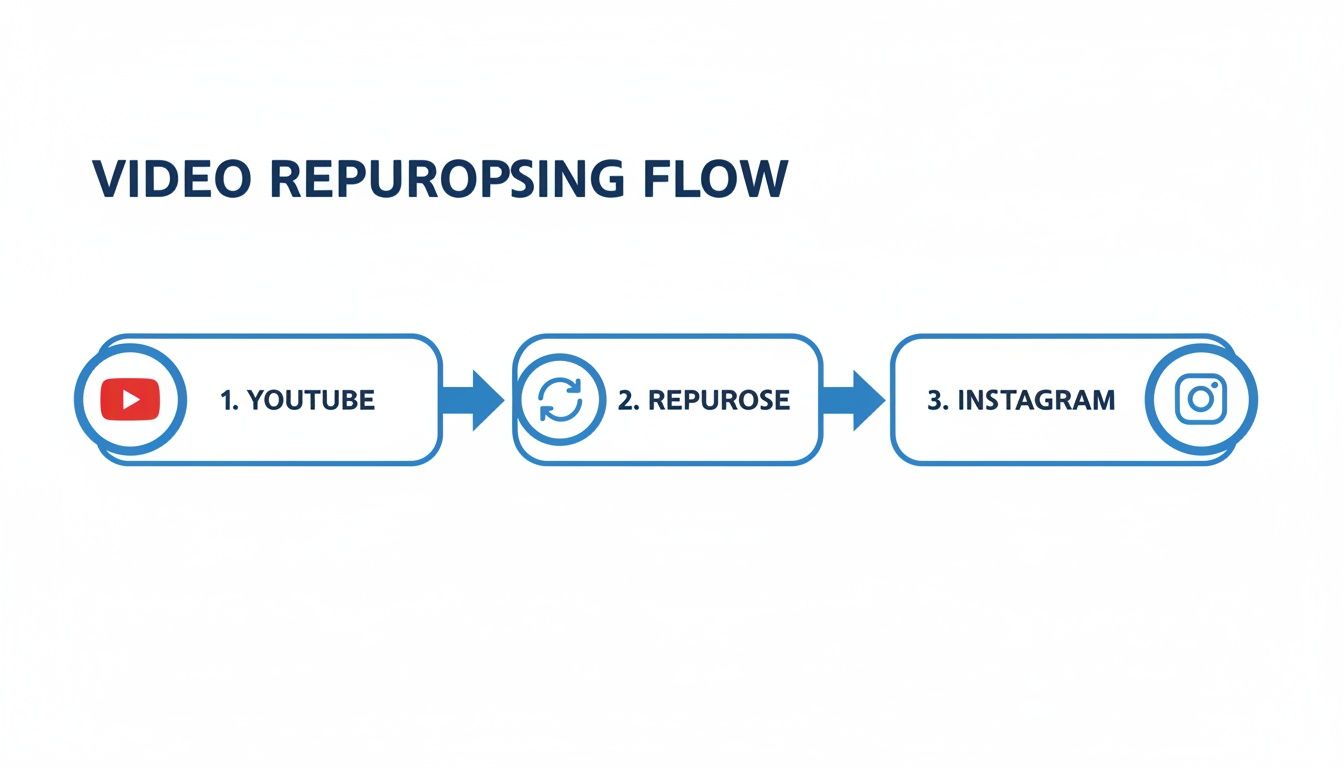
This simple three-step flow—from YouTube, through a repurposing tool, to Instagram—is the core of the strategy.
For anyone looking to post videos from YouTube to Instagram, this reformatting step is non-negotiable. Most editing software like CapCut or Adobe Premiere Pro has built-in vertical presets (1080x1920 pixels) to get you started. If you want to get granular, our guide on social media video specs has all the technical details you'll need.
Step 3: Find and Trim Your Golden Moments
A 15-minute YouTube video is a goldmine of potential Instagram clips. Your job is to be a prospector and find those "golden moments"—the nuggets of pure value that can stand on their own in under 90 seconds.
Here’s what I always look for:
- Powerful Soundbites: A single, hard-hitting sentence that makes someone stop scrolling.
- Surprising Statistics: A wild number or a fascinating fact that hooks their curiosity.
- Visually Compelling Shots: A slick B-roll sequence, a dramatic reaction, or just something cool to look at.
- Actionable Tips: A quick, useful piece of advice that someone can use right away.
A great Instagram clip is self-contained. It doesn't need a five-minute backstory. It gets right to the point and delivers its punchline fast.
Once you find these moments, trim them mercilessly. Reels can be up to 90 seconds and feed videos up to 60 seconds, but shorter is almost always better. A punchy 30-second clip will outperform a rambling minute-long one every time.
The audience overlap is huge, so this strategy just makes sense. In 2023, YouTube had 1.35 trillion visits, while Instagram had 87.3 billion. But here's the kicker: 76.9% of Instagram users are also on YouTube, and 77% of YouTube users are on Instagram. You're not finding a new audience; you're reaching your existing audience on a platform they use differently.
Step 4: Add the Final Polish
Before you hit export, a few final checks are in order. Make sure your export settings are optimized for Instagram to avoid that ugly compression that can kill your video's quality. An MP4 file with an H.264 codec is the gold standard.
And don't forget audio! Yes, many people watch with the sound off (which is why captions are crucial, but more on that later). For those who do listen, the audio has to be perfect.
Listen to your final clip on your phone's speakers, not your fancy studio headphones. This is how most people will hear it. Is it balanced? Is it clear? Is there any annoying background hiss? What sounds great on a desktop can be a mess on mobile, so always do this final check.
Optimizing Your Repurposed Video for Maximum Engagement
So you’ve got your video trimmed and reformatted. Great. But the job isn’t done. Just dumping a vertical clip onto Instagram and hoping for the best is a recipe for disappointment.
To really make your content pop, you have to think like an Instagram user. They’re scrolling fast, often with the sound off, and they're always looking for a reason to keep moving. Your YouTube audience commits to watching; your Instagram audience needs to be hooked in under three seconds. This is where a few key optimizations can turn a good clip into a viral one.
Craft a Scroll-Stopping Hook
The first three seconds are everything. If you don't grab their attention right away, they're gone. Simple as that. Your hook needs to be a knockout—a powerful question, a shocking statement, or a bold claim that makes them need to know what happens next.
Here are a few hook formulas I’ve seen work wonders:
- The "Mistake" Hook: "You're making this huge mistake when..."
- The "Secret" Hook: "Here's the one secret to..."
- The "Contrarian" Hook: "Everyone thinks X is true, but they're all wrong."
And remember, a blurry or badly cropped video will kill your hook's impact. Always make sure your clip follows the optimal Instagram video size and specifications to keep it looking sharp and professional.
Make Captions and On-Screen Text Non-Negotiable
This is probably the most critical part when you post videos from YouTube to Instagram. So many people watch videos on mute. If your clip relies on audio to make its point, you're alienating a huge chunk of your potential audience right out of the gate.
On-screen captions aren't just for accessibility; they're an essential engagement tool. They make your content watchable anywhere—on the bus, in a quiet office, or late at night.
Your on-screen text needs to be:
- Large and Legible: Use bold, clean fonts that stand out against the video background.
- Dynamic: Don't just slap static text on the screen. Animate it to appear word-by-word or line-by-line. Tools like ClipShort automate this, keeping viewers' eyes glued to the screen.
- Concise: This isn't a full transcript. Pull out the most powerful phrases and make them the star.
Find the Right Format for Your Content
Not every vertical video is created equal. Where you post on Instagram—Reels, Stories, or the Feed—changes the rules. Getting the specs right is crucial for making your content look native to the platform.
Here's a quick cheat sheet to keep you on track.
Instagram Video Format Cheat Sheet
| Format | Aspect Ratio | Max Length | Key Optimization Tip |
|---|---|---|---|
| Reels | 9:16 | 90 seconds | Use trending audio and a strong hook in the first 3 seconds. |
| Stories | 9:16 | 60 seconds per slide | Add interactive elements like polls, stickers, and Q&As. |
| Feed Video | 4:5 (recommended) or 1:1 | 60 minutes | Optimize the cover image and write a compelling caption with a clear CTA. |
Sticking to these guidelines ensures your video looks polished and professional, avoiding weird cropping or black bars that scream "repurposed content."
Leverage Trending Audio and Sounds
While many users watch silently, trending audio is a massive signal to the Instagram algorithm. Using a popular sound can give your Reel a huge boost in discoverability, pushing it out to people who don't even follow you.
The key is to find audio that actually fits the vibe of your content. You can always lower the volume of the trending track and let your original audio shine, but just having it attached tells the algorithm your content is relevant right now.
Write Compelling Captions and Calls-to-Action
The video hooks them, but the caption builds the connection. Don't just throw in a few hashtags and call it a day.
Use the caption to add extra context, tell a quick story, or ask a question that gets people talking in the comments. Most importantly, end with a strong call-to-action (CTA) telling people exactly what to do next.
Forget "link in bio." Get specific:
- "Watch the full tutorial on my YouTube channel (link in bio)!"
- "Save this for later so you don't forget!"
- "Share this with a friend who needs to see it."
- "Comment 'YES' if you agree!"
These direct commands drive the saves, shares, and comments that Instagram's algorithm loves. To get more ideas, check out our deep dive into the latest Instagram Reels best practices.
Design a Custom Cover Image
Your Reel's cover is its first impression on your profile grid and the Explore page. Never leave it to a random, blurry frame from the video.
Create a simple, clean cover with a bold title that sums up the video's value. This makes your profile grid look cohesive and helps new visitors instantly see what your content offers, making them much more likely to tap and watch.
Automating Your Workflow with AI Repurposing Tools
Let's be real—while manual editing gives you that perfect, hands-on creative control, it’s a massive time sink. Hunting for the right clips, reformatting for vertical video, trimming it down, and then adding captions… it can take hours for a single piece of content. If you're trying to post consistently, this grind is often the biggest thing holding you back.
This is where a much smarter, faster approach comes into play. Instead of thinking of each clip as its own massive project, AI-powered repurposing tools can completely flip the script on how you post videos from YouTube to Instagram. These platforms are built to do the heavy lifting for you, turning hours of tedious work into just a few minutes.
The Shift from Manual Labor to AI Efficiency
The old way of doing things is slow and repetitive. You find a good moment in your video, drag it into your editor, create a new project, crop it to a 9:16 ratio, type out your captions, export, and then do it all over again. It’s a frustrating cycle that makes it almost impossible to scale your content.
An AI-driven workflow, on the other hand, works more like a content command center. You can often start with just a script or a simple idea, and the AI takes it from there. This is a huge leap forward, especially for creators who want to scale their output without needing to be on camera for every single clip.
These tools aren't just saving you time; they're changing the entire creation process. You can spin up a dozen different video variations from one core idea, letting you test and figure out what your audience actually loves, fast.
How AI Tools Streamline Content Creation
Modern AI video generators like ClipShort are designed to automate the most soul-crushing parts of video editing. The AI essentially becomes your virtual production assistant, taking over the tasks you'd rather not do.
Here's a look at what this new workflow actually feels like:
- Script to Video: You can feed it a script or even just a topic, and the AI will generate a complete video narrative. This is an absolute lifesaver for educational content or listicles.
- Lifelike Voiceovers: Forget about recording your own audio. You can pick from dozens of surprisingly realistic AI voices in different languages and accents, making sure your message connects with your specific audience.
- Automated Visuals: The tool pulls together relevant stock footage, images, or even generates its own visuals to match your script. Suddenly, you've got a visually interesting video without spending hours on a stock footage site.
- Dynamic Captions: This might be the biggest time-saver of all. The AI automatically transcribes your audio and creates perfectly timed, animated subtitles. Since so many people watch with the sound off, this is crucial for keeping viewers hooked.
It all comes together in a clean, unified workspace that looks something like this, getting rid of the need to juggle multiple apps.

Everything from script generation and voice selection to the final visual edits happens in one place. No more jumping between different software.
A Game-Changer for Faceless Creators
This AI-powered approach is a massive deal for "faceless" channels, which are blowing up on both YouTube and Instagram. These channels are all about great storytelling and visuals, without the creator ever showing their face.
Trying to produce that kind of content manually and at scale is incredibly difficult. You’re constantly sourcing clips, recording voiceovers, and trying to sync everything up just right. AI tools completely demolish that steep learning curve. Now, a creator can pump out a polished, high-quality video in the time it used to take just to find the right background footage.
The auto-captioning technology alone is a marvel. If you're curious about the tech behind it, this guide on How to Transcribe Video to Text for Developers offers a great look under the hood. When automation handles all the technical headaches, you get to focus on what actually matters: coming up with great ideas and telling stories that stick. For a closer look at these workflows, our guide on how to automate content creation dives even deeper.
Common Repurposing Mistakes and How to Avoid Them
Getting your YouTube videos onto Instagram is often more about what not to do. I’ve seen countless creators nail the technical side but completely miss the small details. The result? Content that feels awkward, out of place, and gets ignored by the Instagram audience.
Let's break down the most common mistakes so you can dodge them. The goal is to make your video feel like it was born on Instagram, even if its journey started on YouTube.
The Horizontal Video Crime
This is the big one. Nothing screams "lazy repost" louder than a horizontal 16:9 video slapped onto a vertical platform like Reels or Stories. You end up with those massive, ugly black bars that shrink your video into a tiny box. It's an instant engagement killer.
Think about it—Instagram is designed for an immersive, full-screen experience. When your video doesn't fill that space, you're breaking the user's flow and telling them you didn't care enough to format it for them.
The Fix: Always, always reformat your video to a 9:16 aspect ratio. This isn't just about cropping the sides; it’s about actively reframing your shots to ensure the most important action stays front and center in that new vertical frame.
Ignoring the Silent Majority
So many creators forget this: over 80% of people watch videos on social media with the sound off. If all the value in your video is in the audio, you’re losing a massive chunk of your potential audience before they even give you a chance.
People browse Instagram everywhere—on the bus, in a quiet office, late at night next to a sleeping partner. Sound just isn't always an option.
Forgetting captions is like giving a speech in a soundproof room. Your message is there, but nobody can receive it. Making your content accessible to silent viewers isn't optional; it's essential for reach.
The Fix: Burn captions directly into your video. Don't just rely on Instagram's auto-captions. Use big, bold, easy-to-read text. Even better, use dynamic, word-by-word subtitles that pop up as you speak. Tools like ClipShort can do this automatically, keeping viewers hooked whether their sound is on or off.
Using Platform-Specific Language
This is a more subtle mistake, but it's just as damaging. Leaving in YouTube-specific phrases like "check the link in the description below" or "smash that subscribe button" is a dead giveaway. It instantly shatters the illusion that this content was made for your Instagram followers.
These phrases don't just feel out of place—they're confusing. Instagram's "description" is the caption, and users "follow," they don't "subscribe."
The Fix: Go through your clip with a fine-tooth comb and cut out any YouTube lingo. Swap them out for calls-to-action that actually work on Instagram.
-
Instead of: "Link in the description."
-
Say: "Check the link in our bio!"
-
Instead of: "Subscribe for more."
-
Say: "Follow for more tips!"
The Copyright Ticking Time Bomb
Finally, never assume the music you licensed for YouTube is clear for Instagram. Music rights are incredibly complex and almost always platform-specific. That license you have for a track on YouTube almost certainly does not carry over to Meta's platforms.
It's a frustrating lesson to learn after you’ve spent hours editing, only to have Instagram mute your video or take it down entirely for a copyright violation.
The Fix: Play it safe. Either use music directly from Instagram's official audio library when you post your Reel or rely on a trusted royalty-free music service that offers multi-platform licenses. When you post videos from YouTube to Instagram, taking a moment to swap the audio is a small step that saves you a huge headache down the line.
Your Top Repurposing Questions, Answered
Jumping into repurposing can feel like navigating a maze of unwritten rules and confusing tech specs. When you decide to post videos from YouTube to Instagram, a handful of questions almost always surface. Let's clear those up right now so you can move forward and skip the common headaches.
This is your quick-reference guide for the most common questions creators ask.
Can I Legally Repurpose Any YouTube Video?
This is the big one, and the answer is a hard no. You should only ever repurpose content that you personally created and own the rights to. Grabbing someone else’s YouTube video and slapping it on your Instagram—even with credit—is a direct violation of copyright law. It's just not worth the risk.
And the risks are very real:
- Your Instagram account could get hit with copyright strikes.
- The video might be muted or taken down completely.
- You could even face account suspension or a permanent ban.
The golden rule here is simple: if you didn't make it, don't post it. Focus on your own original work to build a real brand and stay out of trouble.
What's the Best Video Format for Instagram?
You want your repurposed content to look sharp, right? The secret is nailing the technical details before you even upload. Instagram’s compression can be brutal, so giving it a high-quality file from the start is your best defense against a blurry, pixelated mess.
For the best possible quality, make sure your video file checks these boxes:
- Format: MP4 is the gold standard. Stick with it.
- Codec: H.264 is the most compatible video codec out there.
- Resolution: 1080x1920 pixels is the magic number for full-screen vertical video on Reels and Stories.
Hitting these specs tells Instagram you’re serious, giving your video the best chance to look clean and crisp on any phone.
How Can I Schedule My Repurposed Videos?
Consistency is everything on Instagram. The algorithm loves it, and your audience expects it. But posting manually every single day is a surefire path to burnout. Scheduling your content is the pro move that keeps your feed active without the daily scramble.
Tools like the Meta Business Suite let you schedule posts, Reels, and Stories for both Instagram and Facebook right from one place. If you need more powerful analytics or team features, a third-party scheduler might be a better fit. Planning your content out in batches keeps you on a consistent schedule, which is exactly what the algorithm rewards with better reach.
Ready to stop wasting time on manual editing and start creating viral short-form videos in minutes? ClipShort uses AI to turn your ideas into scroll-stopping Reels, Shorts, and TikToks automatically. Generate lifelike voiceovers, add animated captions, and assemble stunning visuals without ever appearing on camera. Start creating faster and smarter at https://www.clipshort.co.