How to Make a Highlight Video That Gets Noticed
So, you want to create a killer highlight video? It all comes down to a few core things: grabbing your best footage, weaving it into a compelling story, and giving it that professional sheen with the right music and effects. You're basically taking hours of raw video and condensing it into a short, punchy reel that people actually want to watch. This isn't just for pro athletes anymore—it's a powerful tool for anyone with a message to share.
Why Highlight Videos Are Your Secret Marketing Weapon

Before you dive into your editing software, let's talk about why knowing how to make a great highlight video is such a game-changer. In today's ridiculously crowded online world, these videos aren't just simple compilations; they're strategic assets. They take your best moments and package them into something that's easy to watch and even easier to share.
What makes this so effective is that it respects the viewer's time while delivering a concentrated dose of value. That's a winning formula.
Grabbing Attention in a Crowded World
Think about an indie game developer trying to get people excited about their new release. A long, drawn-out gameplay trailer might get skipped, but a snappy 60-second highlight reel? One that showcases the most explosive action, coolest character designs, and jaw-dropping environments? That’s gold for platforms like TikTok and Instagram, where you have seconds to make an impression.
It's the same for a public speaker looking for more gigs. A two-minute video featuring their most insightful quotes, shots of an engaged audience, and glowing testimonials will land them more bookings than a boring resume or a full-length speech ever could.
Versatility for Diverse Goals
The beauty of highlight videos is just how many ways you can use them. They’re incredibly flexible for all sorts of goals, both professional and personal.
- Personal Branding: Athletes build reels to get noticed by recruiters. Artists, designers, and creators can pull together their best work into a portfolio that truly pops.
- Marketing Campaigns: Brands use them to recap awesome events, show off new products, or string together their best customer reviews.
- Content Promotion: A YouTuber can snip the best parts from a long video to create a teaser that drives viewers to the full-length version. It's a fantastic growth tactic, and you can even explore how to monetize YouTube Shorts to make the most of it.
Let's look at the numbers. By 2025, video is expected to make up a staggering 82% of all internet traffic. With 89% of businesses already using video for marketing, a polished highlight reel has gone from a "nice-to-have" to a "must-have."
Laying the Groundwork for a Winning Highlight Video
I've seen it a hundred times: someone has incredible footage, but the final highlight video just falls flat. Why? Because they jumped straight into editing without a plan. An amazing highlight video is born from a smart strategy, not just slick software.
Before you even think about stitching clips together, you need a blueprint. This is the pre-production phase, and it’s where you turn a vague idea into a focused mission. Skipping this is the single biggest mistake you can make, often leading to a video that feels disjointed or completely misses the mark. A little bit of strategy upfront makes the entire creative process smoother and far more effective.
Define Your Video’s Core Mission
First things first: what is this video supposed to do? Your answer to that question will guide every single decision you make from here on out.
Are you an athlete hoping to get noticed by a college recruiter? Your mission is crystal clear: showcase raw skill, versatility, and pure athleticism. Every clip should scream "I'm the player you need."
Maybe you're a small business owner recapping a killer community event. Your mission is to bottle that energy, highlight the best moments, and give everyone who missed it a serious case of FOMO.
The goal could be anything, really:
- Driving Sales: Showcasing a product's absolute best features in action.
- Building a Personal Brand: Compiling your best public speaking clips or behind-the-scenes creative work.
- Celebrating a Milestone: Creating an emotional reel of memories for a wedding or graduation.
Nailing down this one core purpose gives you a North Star for the entire project. It keeps you from getting lost in the weeds during editing.
This flow chart shows exactly how your mission, audience, and story all tie together.
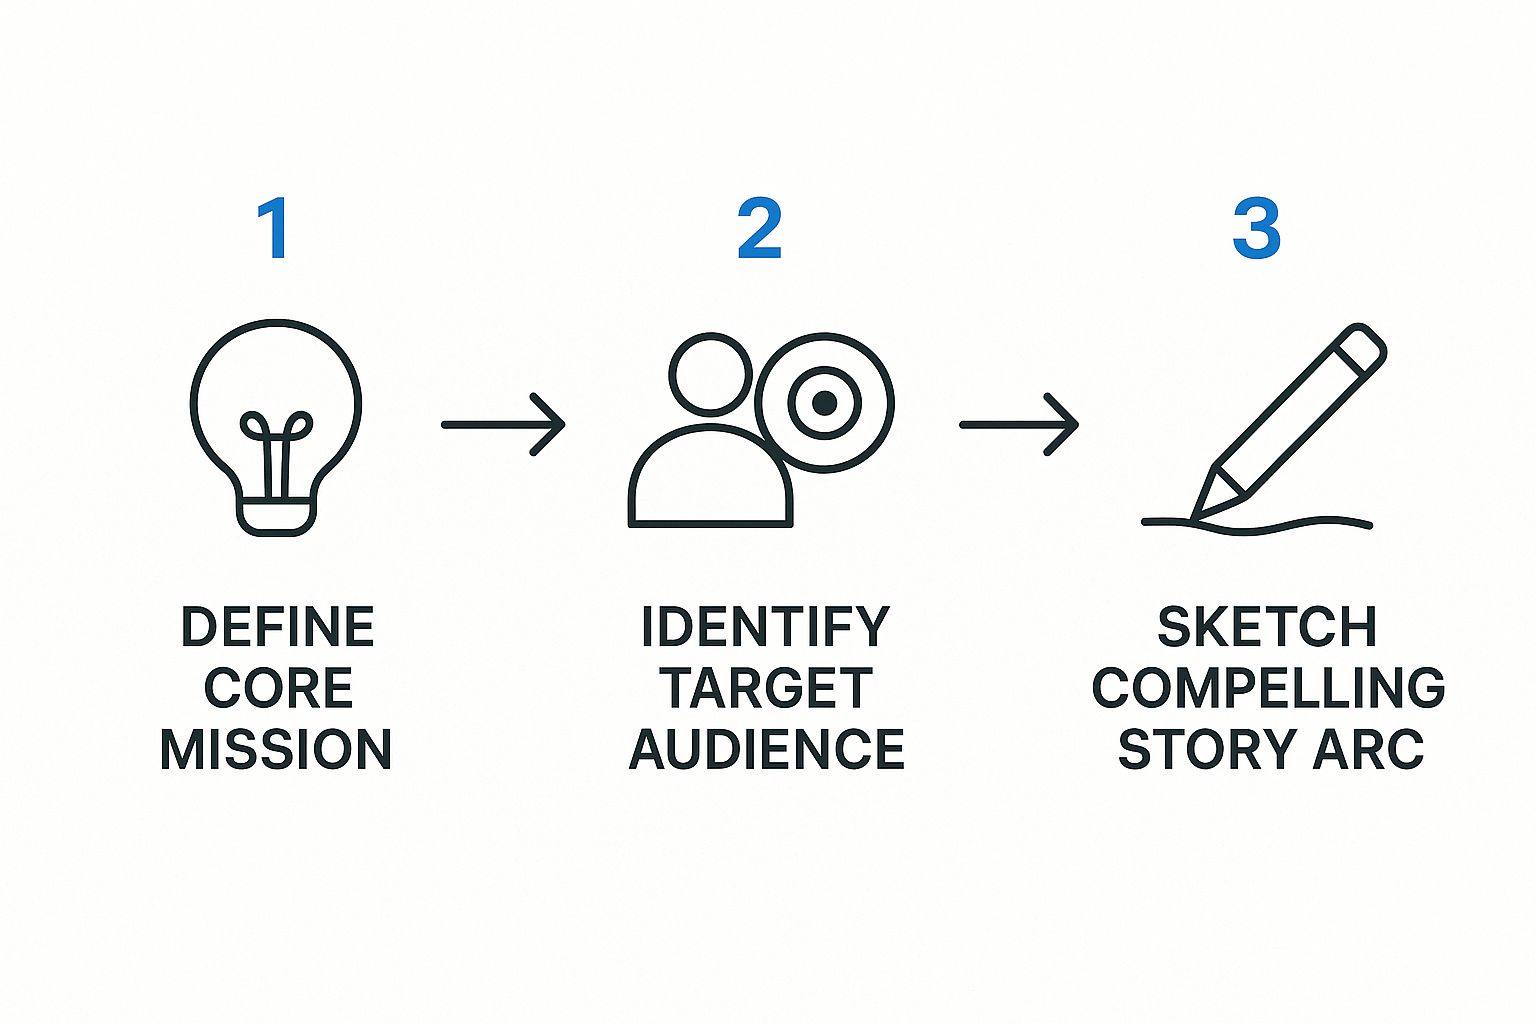
As you can see, each piece logically builds on the last. This is how you create a solid foundation before a single clip is ever trimmed.
Pinpoint Your Target Audience
Once you know your "what," you have to figure out your "who." A highlight reel for college lacrosse coaches is going to look and feel completely different from one meant for potential customers scrolling on Instagram.
Think about it: coaches want to see unedited, raw clips that show off technical skill and game IQ. Instagram users? They want something quick, entertaining, and visually stunning that grabs them in the first 3 seconds.
Knowing your audience helps you choose the right tone, pacing, and even the soundtrack. A corporate event recap probably needs an upbeat, professional instrumental track. A gaming montage, on the other hand, is practically begging for high-energy electronic music.
Key Takeaway: Your video isn't for everyone. It's for a very specific person or group. You have to tailor your message, style, and platform to what they actually want to see.
For instance, if your target is a younger demographic, you're almost certainly going to format your video vertically for platforms like TikTok or Reels. Understanding the specific rules and culture of each platform is crucial. Our guide on how to upload YouTube Shorts dives into these nuances.
Knowing where your audience hangs out online is half the battle. This focus is what ensures your video doesn't just get seen—it actually makes an impact.
Finding and Organizing Your Best Moments
Alright, with a solid plan mapped out, it’s time to get your hands dirty and dive into the raw material. This is where you transform hours of footage—whether it’s from a marathon gaming session, a live conference, or just your phone’s camera roll—into a tight, curated collection of potential highlights.
This part isn't as glamorous as the final edit, but honestly, it’s where the magic really begins. Skipping this step is a recipe for disaster; you'll end up wasting hours scrubbing through timelines looking for that one perfect shot you vaguely remember. A little organization now pays off big time later.
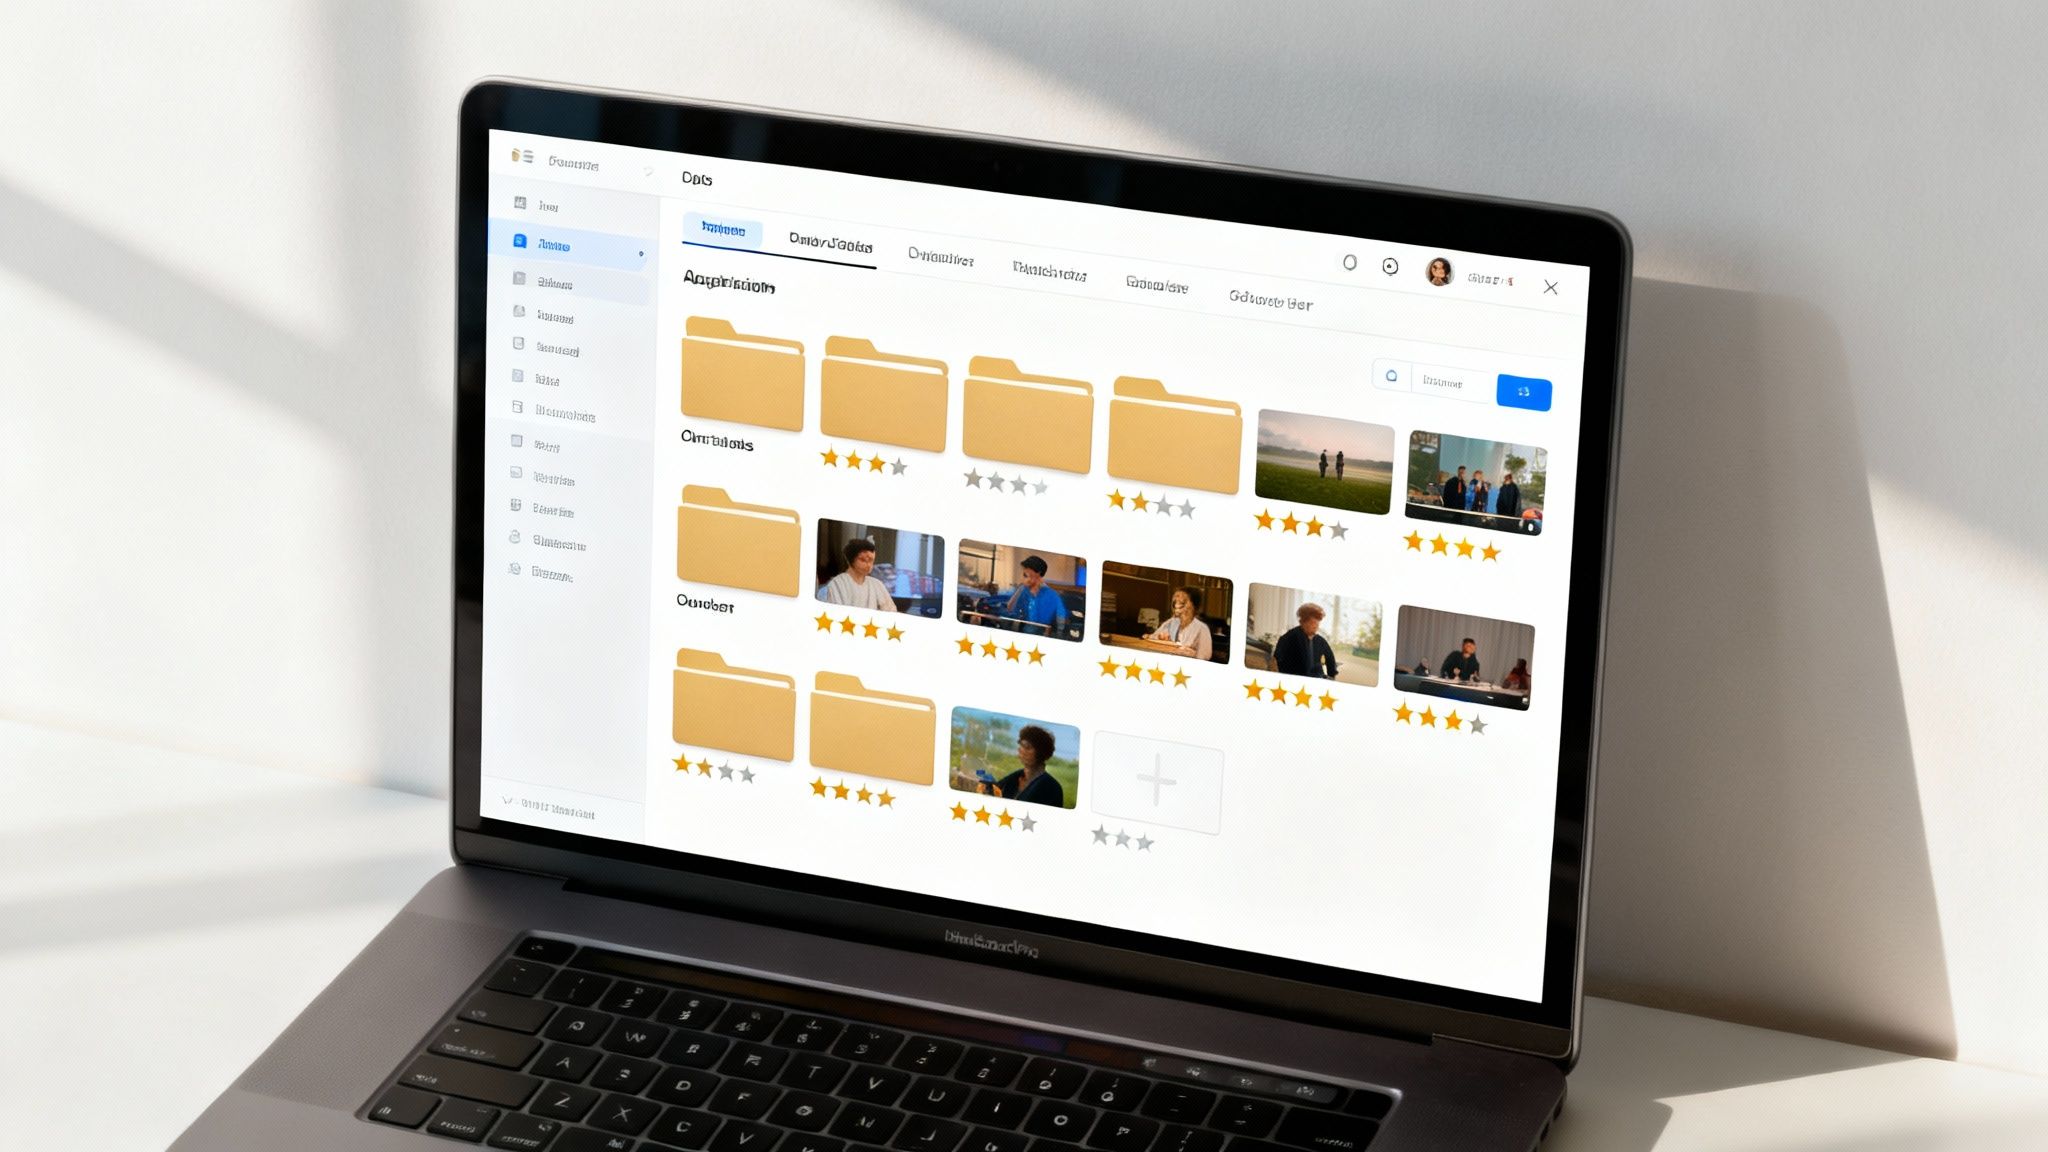
Create a Smart Folder Structure
First things first: build a clean, logical home for all your project assets. A simple but effective folder system is your absolute best friend here, preventing that all-too-common "where on earth did I save that?" panic.
For every single highlight video I work on, I start with a main project folder and immediately create these subfolders inside:
- 01_Raw-Footage: The digital dumping ground for all your original, untouched video files.
- 02_Selects: Once you start reviewing, this is where you'll move all the good stuff.
- 03_Audio: All your music tracks, sound effects, and voiceover recordings live here.
- 04_Graphics: Logos, lower thirds, title cards, or any other visual elements belong in this folder.
- 05_Project-Files: The native project files from your editing software (like Premiere Pro or DaVinci Resolve) are saved here.
- 06_Exports: This folder is reserved for your final, rendered versions of the video.
This system keeps everything neat and makes finding what you need incredibly fast. It’s a professional workflow habit that even total beginners can adopt right away, and it makes a world of difference.
Before you start digging through files, it helps to understand where your footage is coming from and the unique quirks of each source.
Comparing Footage Sources for Your Highlight Reel
This table breaks down common sources for raw footage, highlighting the pros, cons, and best use cases to help you choose the right material for your video.
| Footage Source | Pros | Cons | Best For |
|---|---|---|---|
| User-Generated Content (UGC) | Authentic and relatable. Often free to acquire (with permission). | Highly variable quality (lighting, audio, stability). Legal permissions can be tricky. | Community-driven reels, event recaps, customer testimonial videos. |
| Professional Event Recordings | High-quality audio and video. Multiple camera angles are often available. | Can be expensive to produce or acquire. Footage can feel formal or staged. | Corporate keynotes, conference summaries, polished brand stories. |
| Livestream VODs (Twitch/YouTube) | Abundant material, often capturing genuine, unscripted reactions. | Very long, requiring extensive review. On-screen graphics can be distracting. | Gaming montages, podcast clips, creator highlight reels. |
| Stock Footage | Professionally shot and graded. Fills gaps in your narrative. | Can feel impersonal or generic. Licensing costs can add up. | B-roll for corporate videos, establishing shots, and abstract concept visuals. |
| Personal Recordings (Phone/GoPro) | Immediate and personal feel. Great for capturing behind-the-scenes moments. | Quality depends heavily on the device and operator. Audio is often a weak point. | Vlogs, travel summaries, personal brand stories, action sports highlights. |
Choosing the right mix of footage is key. A corporate reel might lean on professional recordings and stock footage, while a gaming montage will live and die by the quality of its livestream VODs.
The Art of Reviewing and Rating
Now for the main event: sifting through all that footage. The trick here is to be ruthless. Open your 01_Raw-Footage folder and watch everything. But don't just watch passively—actively hunt for the moments that align with the core mission of your video.
When you find a clip with potential, immediately copy or move it into your 02_Selects folder. To take this a step further, I highly recommend renaming the file with a simple rating system. For example, a pretty good clip might become Clip01_Good.mp4, but an absolutely killer moment becomes Clip02_MustUse.mp4.
A common mistake I see is people saving everything that’s remotely interesting. To make a truly compelling highlight video, you have to be brutally selective. Your goal is to find the top 1% of your moments, not the top 20%.
This simple tagging process makes assembling your first cut infinitely easier. When you finally open your editing software, you can sort your clips by filename and immediately focus on the "MustUse" pile, building the entire foundation of your video around the absolute best content you have. This ensures your final product is all killer, no filler.
Bringing Your Story to Life with Smart Editing Tools
With your best clips lined up and ready to go, you've hit the most creative part of the journey: the edit. This is where the real magic happens, transforming a pile of raw footage into a story that grabs people. The goal isn't just to stitch clips together; it's about crafting a video with a pulse, an emotional core, and a clear point.
Forget about the days of needing a degree in film to use editing software. Modern tools are built for speed and simplicity, putting the power to create truly polished content into anyone's hands, no steep learning curve required.
Let AI Do the Heavy Lifting
The biggest game-changer in video editing lately has been the rise of smart, AI-driven platforms. These tools are incredible, especially when you need to figure out how to make a highlight video from hours of raw footage. Instead of you manually scrubbing through a two-hour stream hunting for gold, AI can find it for you.
Think about an algorithm that actually understands context. It can spot the spikes in action, find the most emotional moments, and automatically suggest the best 90 seconds from your entire recording. This kind of tech slashes the tedious work, freeing you up to focus on what really matters—the storytelling.
This is exactly where a tool like ClipShort makes a world of difference. Rather than getting lost in the weeds of technical settings, you can let its AI pinpoint viral-worthy moments, automatically add dynamic captions, and spin up a scroll-stopping short video in minutes.
The entire interface is built to be incredibly intuitive.
You can see how the platform takes what used to be complex tasks and boils them down to just a few clicks. This is what helps creators pump out high-quality content consistently without hitting a wall of burnout.
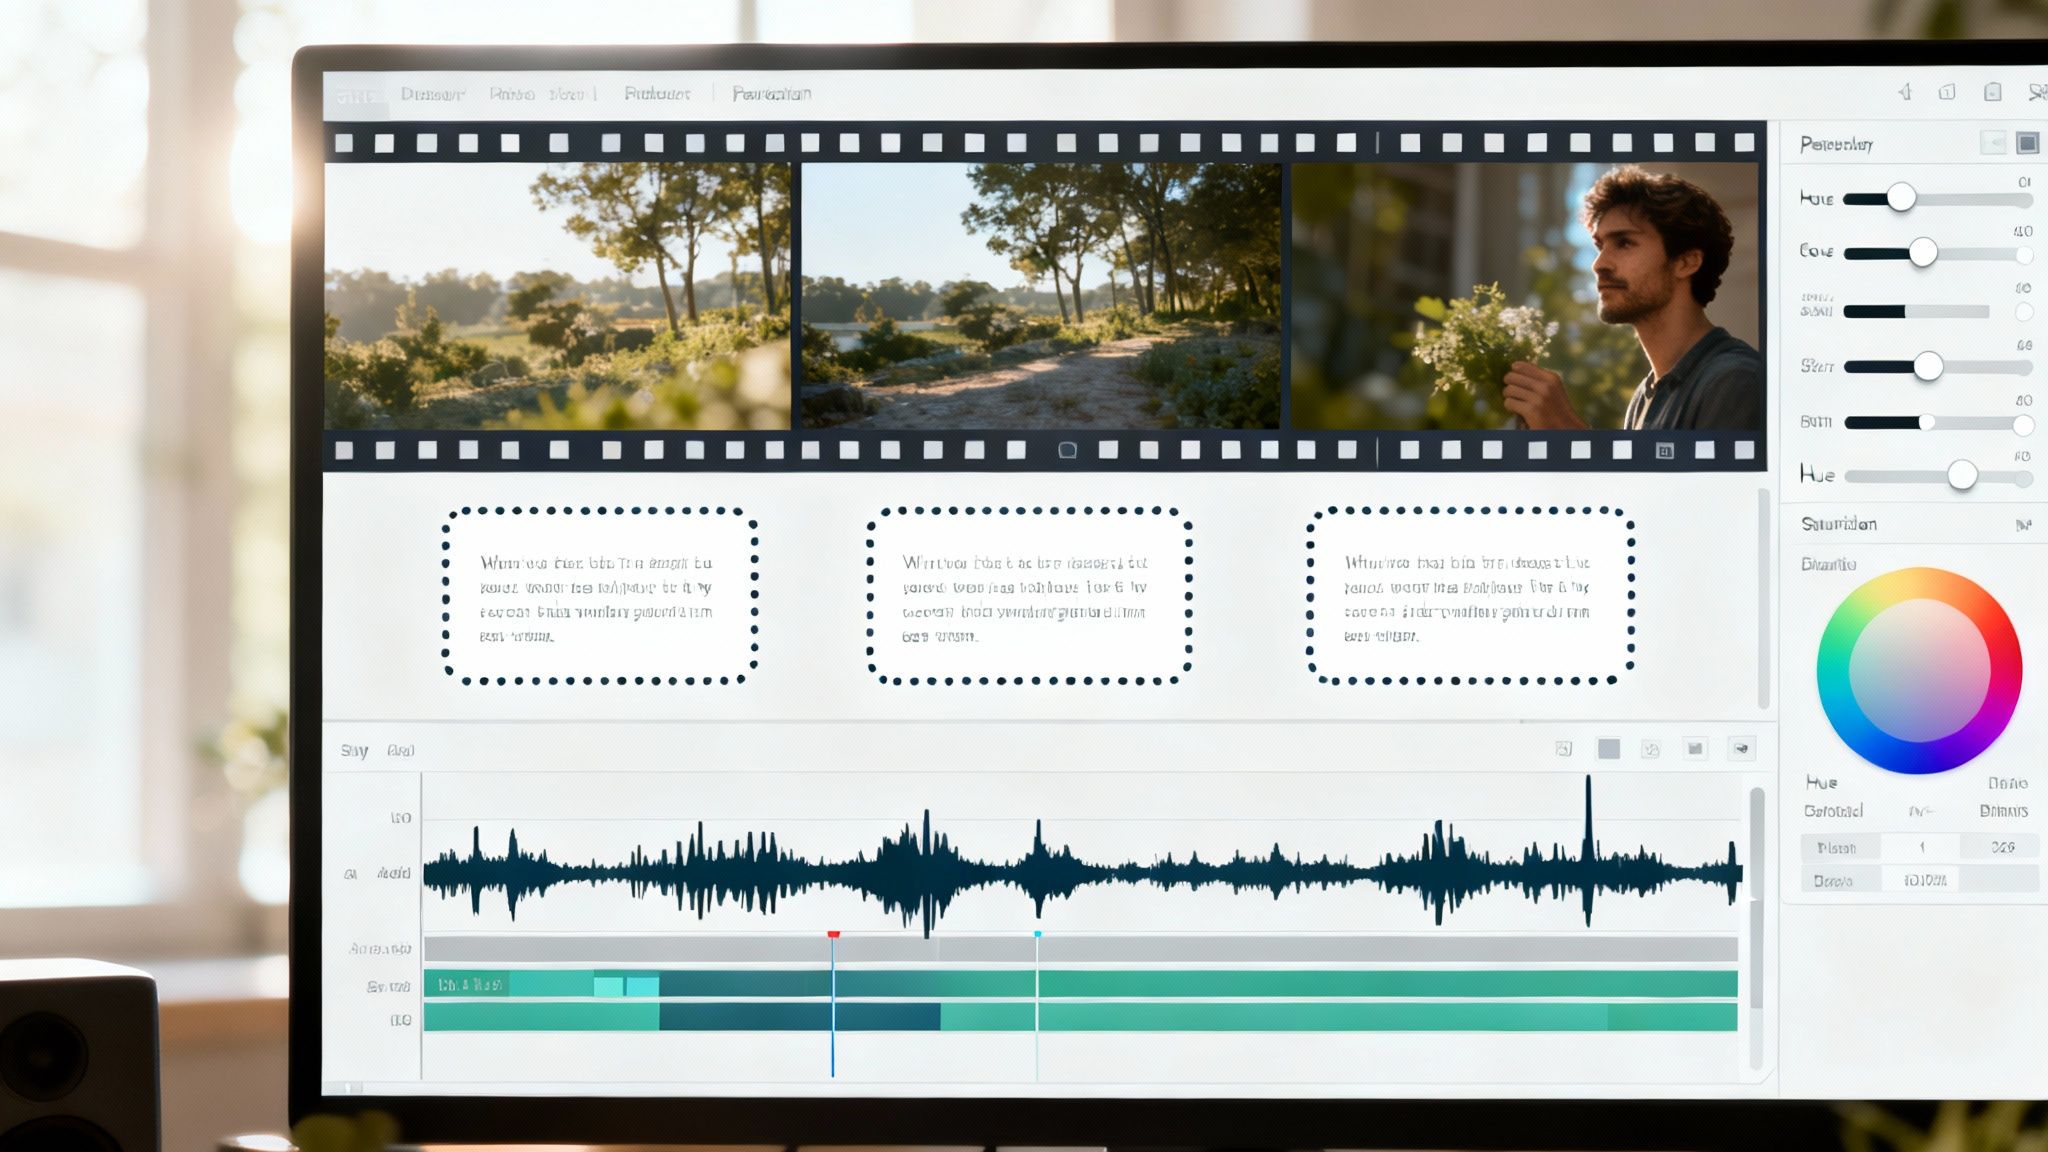
Building Your Narrative Arc
Every great highlight video, no matter how short, tells a story. It has a beginning, a middle, and an end. Don't think of it as a random collage of cool shots; treat it like a mini-movie.
-
The Hook (Beginning): Kick things off with your single most impactful clip. This is your "wow" moment that needs to hook the viewer in the first 3-5 seconds. It could be an unbelievable goal, a hilarious reaction, or a jaw-dropping scenic shot.
-
The Build-Up (Middle): This is where you add texture and build momentum. Mix up different types of clips—some fast-paced and energetic, others a bit slower to add emotional weight. This section is all about showing your range or telling the bigger story of an event.
-
The Climax (End): Always finish strong. You want to leave the viewer feeling pumped up, inspired, or just plain impressed. This final moment should lock in the core message of your video and leave a lasting impression.
This simple structure gives your video a satisfying rhythm that keeps people watching all the way through.
Trim for Maximum Impact
Once your clips are in order, it's time to get ruthless. Trim every single shot down to its absolute essence. Professional editors live by the mantra "cut the fat," and for good reason. If a part of a clip doesn't move the story forward, it needs to go.
A rookie mistake I see all the time is leaving too much dead air before and after the action. In a highlight reel, the key moment should happen almost instantly. Be aggressive with your cuts—every single second counts.
This tight, energetic trimming is what gives a video that fast-paced feel that works so well on social media. It's how you hold attention in a world of endless scrolling.
And the financial payoff for this kind of engaging content is staggering. In 2024, digital video ad spending blew past $191 billion globally, a number fueled by the massive returns video can generate. In fact, a stunning 90% of marketers report a positive ROI from their video marketing efforts, proving just how powerful a well-made video can be. You can find more of these advertising trends on Statista.
Adding Polish with Music and Visual Effects
A well-timed edit tells a great story, but the final polish is what makes a video feel truly complete. This is where you add the layers that turn your highlight reel from a simple collection of clips into something genuinely compelling.
I've always thought of it as the final 10% of the work that delivers 90% of the impact. Without the right music and visual enhancements, even the most exciting moments can fall completely flat. These finishing touches are the secret sauce when figuring out how to make a highlight video that not only gets seen but also gets shared.
Choosing the Perfect Soundtrack
Music is the heartbeat of your video. It sets the mood, drives the pace, and can forge a powerful emotional connection with your audience. Get it wrong, and you can instantly kill the vibe of an otherwise great video. Choosing wisely is non-negotiable.
Your first move should be to explore a royalty-free music library. These platforms are lifesavers, offering thousands of tracks you can legally use without sweating over copyright strikes.
When you're digging through the options, keep these things in mind:
- Match the Mood: An epic sports reel demands high-energy, motivational music. A corporate event recap, on the other hand, probably needs something upbeat but still professional.
- Pace and Rhythm: I always listen for tracks with a clear, defined beat you can cut to. When your edits sync up with the music, it creates this incredibly satisfying rhythm that hooks viewers in.
- Avoid Distractions: Be careful with overly complex songs or tracks with strong vocals—they can easily compete with your visuals for attention. More often than not, instrumental music is your safest and most effective bet.
The goal of your soundtrack is to enhance what’s happening on screen, not overpower it. Keep the volume balanced so it complements any natural audio from your clips without drowning it out.
Adding Clean Visual Enhancements
Once your audio is locked in, it's time for the visual tweaks that add context and a layer of professionalism. The key here is restraint. Seriously, less is almost always more. Over-the-top transitions and flashy effects are a fast track to making your video look dated.
Instead, focus on these simple yet powerful additions.
Tasteful Transitions
Forget the star wipes and page peels you used in your middle school projects. Stick to clean, simple cuts. A quick cross-dissolve between two related shots or a subtle fade to black to mark a new section is all you need for a smooth, professional flow. The best transitions are the ones you barely notice.
Simple Text Overlays
Text is your friend for adding crucial context that isn't obvious from the visuals alone. For an athlete’s reel, you could pop in a small overlay showing their "40-Yard Dash: 4.4s" during a sprinting clip. For a product highlight, it might be a key feature like "24-Hour Battery Life."
Just keep the fonts clean, readable, and consistent with your brand or personal style.
Basic Color Correction
If you've ever pulled footage from different cameras or shot on different days, you know the colors can be all over the place. Basic color correction is what unifies all those clips, giving them a cohesive, professional look.
Most editing software has simple tools to adjust brightness, contrast, and saturation. A little tweaking can make a massive difference, turning dull, flat footage into something vibrant and eye-catching.
Got Questions About Making a Highlight Video?
Even after you've mapped everything out, a few questions always seem to pop up during the editing process. It's totally normal. Getting these sorted out quickly is the key to keeping your project on track and avoiding those momentum-killing roadblocks.
Let’s tackle some of the most common hurdles, from figuring out the perfect video length to navigating the tricky world of music rights.
How Long Should My Highlight Reel Be?
There’s no one-size-fits-all answer here—the ideal length really boils down to where you're posting it and who you want to see it. But there are some solid rules of thumb that I always stick to.
- Social Media (TikTok, Instagram Reels): Keep it snappy. You’ve got to grab attention fast, so aim for 30 to 60 seconds. It's all about high-energy, quick cuts that get right to the action.
- Professional Portfolios or Recruiting Reels: You have a bit more breathing room here, so 2 to 4 minutes usually works well. This gives you enough time to really demonstrate a range of skills or projects without making the viewer's eyes glaze over.
- Website or Event Recaps: For a landing page or to summarize an event, I've found that keeping it under 90 seconds is the sweet spot. You want to deliver a powerful message and leave a great impression without slowing down the user experience.
My Two Cents: Whatever the length, always put your absolute best stuff first. You have about five seconds to hook someone, whether it's a college recruiter or just a casual scroller. If the beginning doesn't pop, you've already lost them.
Can I Just Use a Popular Song in My Video?
I get this question all the time, and the answer is a hard no—at least, not without getting the proper license. Dropping a copyrighted track from a famous artist into your video is a surefire way to get it muted, taken down, or even land you in legal hot water. It’s just not worth the headache.
The much smarter move is to explore royalty-free music libraries. These platforms are full of incredible, high-quality music that you can legally use. A small one-time fee or a simple subscription gives you peace of mind and keeps your video looking and sounding professional.
So, How Many Clips Should I Actually Use?
It's tempting to throw in every single decent play or moment you've captured, but trust me on this: quality always beats quantity. A killer highlight reel with 15-20 truly fantastic clips will always be more effective than a bloated one with 40 so-so moments.
Think of it like you're telling a story. Every clip should have a purpose. Trim the fat, cut right to the action, and make sure every second counts. Your goal should be "all killer, no filler."
Tired of spending hours finding the best moments in your footage? ClipShort can do the heavy lifting. Its smart tech analyzes your videos to pull out the highlights, adds eye-catching captions, and creates shorts that are ready to go viral. Start creating faster with ClipShort today!