How to Post a YouTube Video to Instagram for Maximum Reach
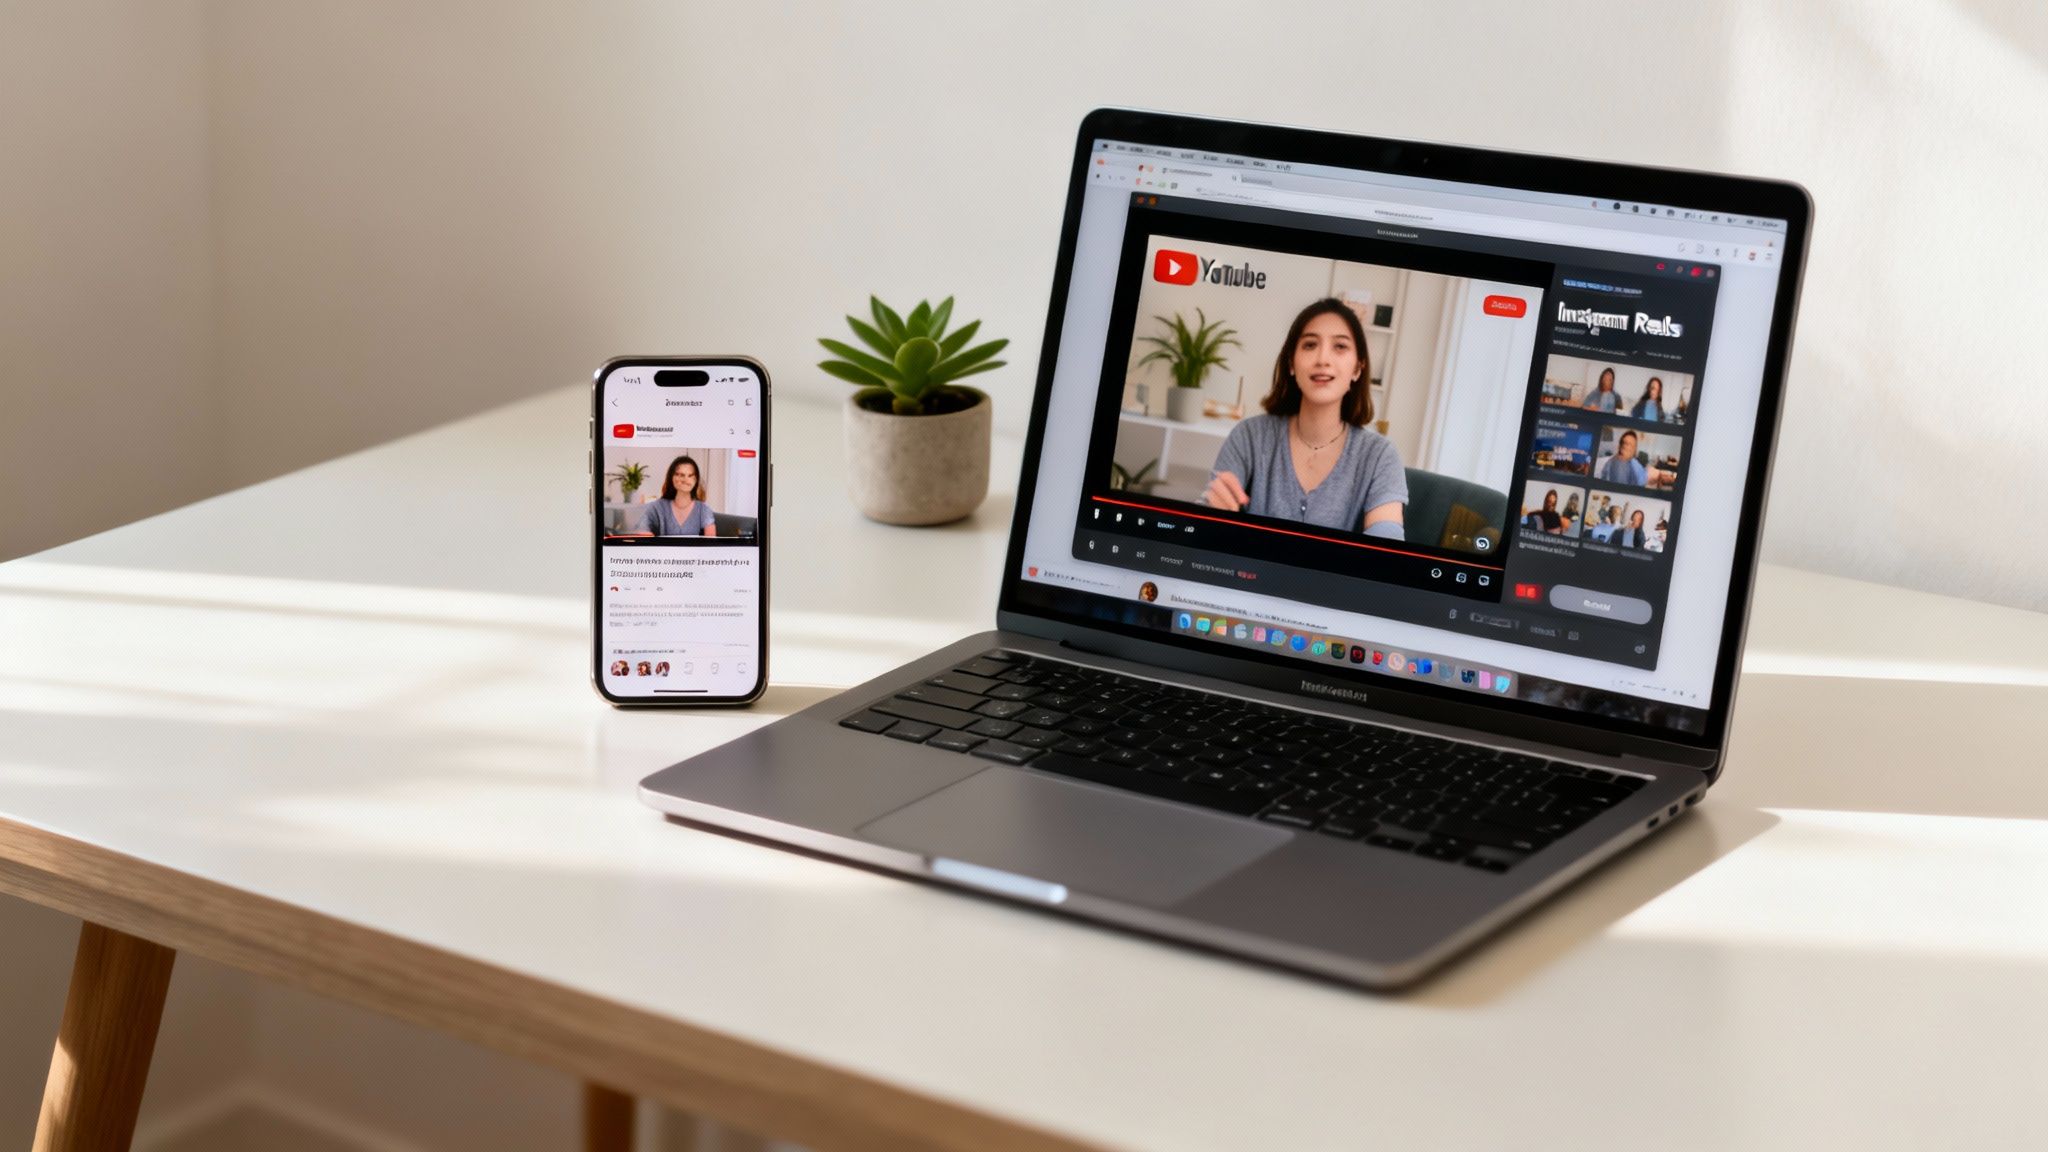
You can't just hit a "share to Instagram" button on your YouTube video and call it a day. It just doesn't work like that. To do it right, you need a smart repurposing strategy. This means you'll need to download your YouTube video first, then get your hands dirty by re-editing and reformatting it for Instagram’s vertical world—think Reels, Stories, and even Feed posts.
It’s all about transforming your longer, landscape-style content into short, punchy clips that feel like they were made for Instagram all along.
Why Bother Repurposing YouTube Videos for Instagram?
Let’s be real—creating unique, high-quality content for every single social media platform is a one-way ticket to burnout. Repurposing your best YouTube videos isn't just about saving time; it's one of the most powerful growth hacks in a creator's toolkit. It lets you tap into Instagram's massive, visually-hungry audience with content you’ve already poured your heart and soul into.
This approach gives your existing video library a second life, making your best work do double the heavy lifting. Plus, it diversifies your online footprint, so you’re not totally at the mercy of one platform’s moody algorithm.
Squeeze Every Ounce of Value from Your Content
Think about the effort that goes into a great YouTube video—the scripting, filming, editing, all of it. Letting that masterpiece live only on YouTube is like buying a killer outfit and only wearing it once. When you repurpose, you unlock its true potential.
Here's what you stand to gain:
- Tap into a Whole New Audience: A huge chunk of Instagram users probably haven't stumbled upon your YouTube channel. Dropping clips on their favorite app is the perfect way to introduce yourself to a fresh crowd.
- Skyrocket Your Engagement: Instagram is built for quick, snappy interactions. Short, impactful clips pulled from your longer videos are practically guaranteed to rack up likes, comments, and shares.
- Stay Consistent, Effortlessly: Posting repurposed clips regularly keeps your brand visible and top-of-mind, even during weeks when you’re too slammed to create brand-new content from scratch.
It’s a Proven Playbook for Audience Growth
In the age of short-form video, cross-posting from YouTube has become a go-to move for creators looking to blow up their reach. As of 2024, Instagram Reels are outperforming regular feed posts and Stories combined in terms of engagement, making repurposed clips insanely effective.
This strategy plugs you directly into Instagram’s 2+ billion active users and their love for polished, high-value content, helping to drive real follower growth.
Key Takeaway: The goal here isn't a lazy copy-paste job. It's about strategically adapting your best YouTube moments into a format that feels 100% native to Instagram. You want to create a seamless, enjoyable experience for that audience.
For a deeper dive, check out our complete guide on content repurposing strategies: https://www.clipshort.co/en/blog/content-repurposing-strategies.
To truly understand the power of giving your content a new life, it's worth learning how to repurpose content effectively across all your platforms. This is how you build a powerful content ecosystem where every single piece works together to support the others.
Of course, not every second of your YouTube video is going to work on Instagram. And that's okay. The real trick isn't cramming a 20-minute deep dive into a 60-second clip; it's about mining for gold. You have to find those 'scroll-stopping' moments that deliver a powerful punch, fast.
Your mission is to go through your best videos and pinpoint the clips that can truly stand on their own. These are the moments that are usually packed with emotion, offer a super quick win, or are just visually stunning. Think about the killer punchline in a comedy video, that breathtaking drone shot in your travel vlog, or the one game-changing tip from a long tutorial. Those are your candidates.
Dig Into Your YouTube Analytics
Your YouTube Studio is more than just a vanity dashboard—it's a treasure map. The audience retention graph, in particular, is where you'll find the X's that mark the spot. Look for the peaks and spikes. These are the literal moments where your audience was most hooked, where they even rewound the video to watch something again.
A spike in your audience retention graph is pure gold. It means you've found a moment that's already proven to be engaging. These clips are validated by your existing audience, making them a low-risk, high-reward choice for repurposing.
What do these spikes usually mean? They often point to:
- Emotional Highs: A big reveal, a genuinely heartfelt moment, or a joke that actually landed.
- Key Information: The "aha!" moment or the main takeaway from a how-to video.
- Visually Compelling Scenes: That awesome B-roll sequence you spent hours on or a dramatic change in scenery.
By grabbing these specific segments, you're not just guessing what might work on Instagram. You're using hard data to pick clips that are already proven winners.
What Makes a Clip "Instagram-Worthy"
Beyond the data, you need to develop an eye for what fits Instagram's fast-paced vibe. When you post a YouTube video to Instagram, you're playing in a totally different arena with a different set of rules. The best clips don't need a long-winded explanation to make sense.
Let's say you have a long-form product review. Forget the unboxing. Instead, grab the 15-second clip where you show off the product's most mind-blowing feature in action. Or for a cooking video, don't show all the boring prep work; cut straight to that final, satisfying "money shot" as you plate the gorgeous dish.
The goal here is to serve up a complete, bite-sized piece of value. Someone should be able to watch your Reel or Story, get the point, and feel satisfied—all without ever having seen the full YouTube video. This strategy not only creates better content for Instagram but also acts as the perfect teaser, tempting people to head over to your YouTube channel to see the full story.
A Practical Guide to Editing YouTube Videos for Instagram
Alright, you've pinpointed the golden clips from your YouTube channel. Now for the fun part: the edit. This is where we take that horizontal, long-form video and make it feel like it was born for Instagram. The goal isn't just to chop up a video; it's to create something that feels completely native to Reels or Stories.
First things first, you need the actual video file. If you have the original on your hard drive, you're ahead of the game. Just pull it into your favorite editor. If not, you'll need to download it from YouTube. There are plenty of third-party tools for this, but just a friendly reminder: only download your own content to stay on the right side of copyright.
Reformatting for a Vertical World
This is the single most critical change you'll make. Your YouTube videos are almost certainly 16:9 (widescreen), but Instagram is a vertical world. For Reels and Stories, you absolutely have to reformat to 9:16 to fill the screen and stop scrollers in their tracks.
But it's not as simple as just cropping the sides off. You need to actively reframe the shot to keep your main subject front and center. A lazy crop can easily cut off half your face or the key part of a demonstration. Most video editors let you slide the frame around to nail the focus. For a deeper dive, check out this guide on why vertical video dimensions are so important.
This is a great, simple workflow to keep in mind for finding those clips before you even think about editing.
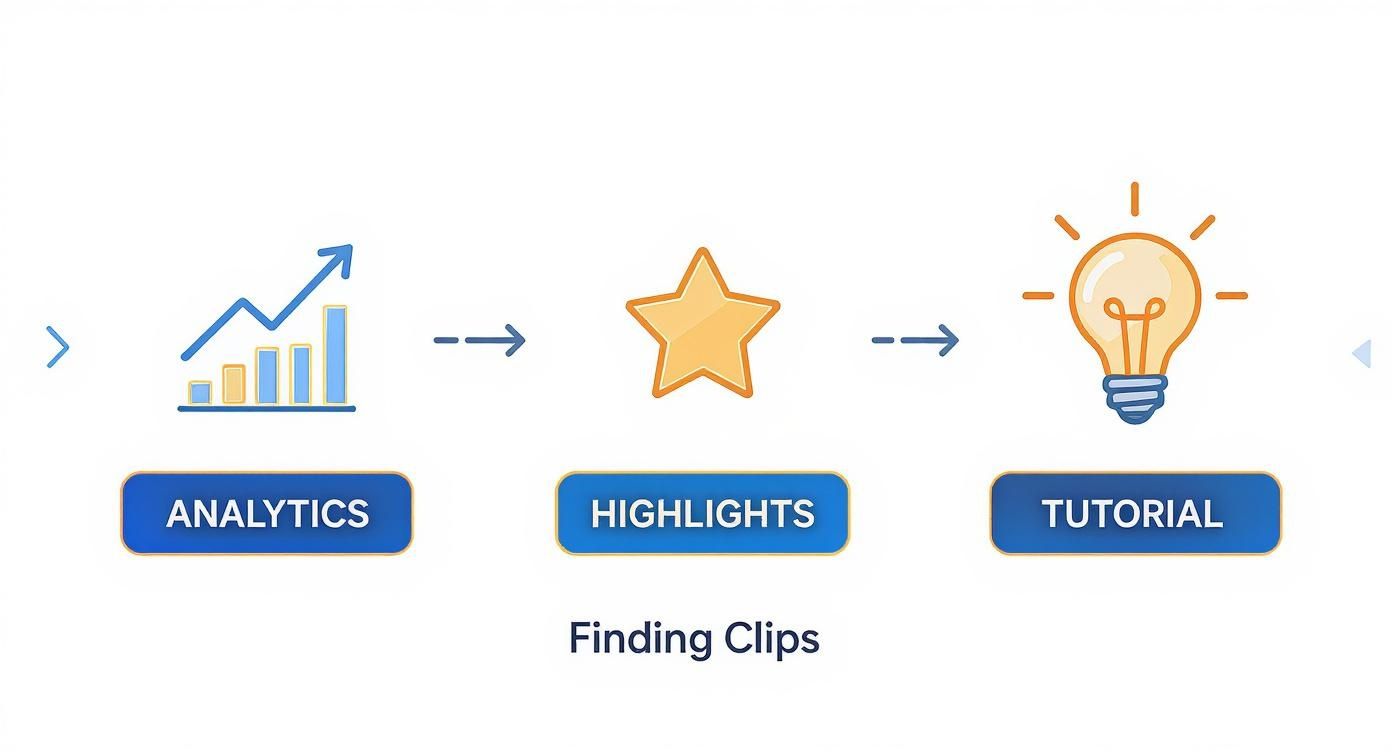
As you can see, it all starts with finding that perfect moment—whether it's a spike in your analytics, a memorable highlight, or a super-helpful tutorial segment. That's the foundation.
To keep things straight, here’s a quick-glance table for Instagram's video specs.
Instagram Video Format Specifications
This reference guide will help you ensure your repurposed YouTube videos are perfectly optimized for each Instagram format.
| Format Type | Aspect Ratio | Max Duration | Best Use Case |
|---|---|---|---|
| Instagram Reels | 9:16 | 90 seconds | Short, engaging, and educational clips for discovery. |
| Instagram Stories | 9:16 | 60 seconds | Behind-the-scenes, Q&As, and interactive content. |
| Feed Video Post | 4:5 or 1:1 | 60 minutes | Longer tutorials or highlights for your core audience. |
| Carousel Post | 1:1 or 4:5 | 60 seconds | Breaking a longer video into multiple bite-sized clips. |
Getting these specs right from the start saves a ton of headaches later and ensures your content looks polished and professional.
Trimming and Pacing for Short Attention Spans
People on Instagram scroll—a lot. Your clip needs to get to the point, and fast. The platform gives you some runway with its time limits:
- Instagram Reels: Up to 90 seconds.
- Instagram Stories: Individual clips are capped at 60 seconds.
But here's a pro tip: just because you can use the full 90 seconds doesn't mean you should. I've found the sweet spot for repurposed clips is usually between 15 and 45 seconds. Be ruthless. Trim your segment down to its most valuable, impactful core. Ditch the slow intros, long pauses, and any fluff. The first three seconds are everything. They need to be an absolute scroll-stopper.
The pacing on Instagram is a totally different beast than on YouTube. That slow, cinematic intro that works wonders on YouTube will get you swiped away in a heartbeat on Reels. Jump straight into the action or the main takeaway.
Adding Essential Instagram-Native Elements
To make your repurposed video truly blend in, you need to add the touches Instagram users expect. Animated, dynamic captions are at the top of that list—they're basically non-negotiable. So many people watch with the sound off, and good captions make sure your message still gets through loud and clear.
Here are a few other elements I always try to include:
- Dynamic Captions: Use a tool that generates and animates subtitles for you. Make sure the font and color align with your brand.
- Branded Elements: A subtle logo or a touch of your brand colors can make the content instantly recognizable. This is huge for building brand recall.
- Engaging Overlays: Think about adding a progress bar for slightly longer clips, throwing in some relevant emojis for personality, or slapping on a clear call-to-action (CTA) like "Link in bio for the full video!"
This used to be a ton of tedious work, but modern AI-powered tools like ClipShort can automate most of it. They find viral-worthy clips, slap on animated captions, and reformat everything in minutes. This lets you focus on strategy instead of getting lost in the weeds of editing, which is how you really learn to post a YouTube video to Instagram at scale.
Getting Your Instagram Post Ready for Prime Time
Alright, so you’ve got your video clipped and resized. But just hitting "upload" is only half the job. The real work—the stuff that gets you views and comments—happens right before you post. A killer video clip can easily get buried if you don't nail the caption, hashtags, and call-to-action.
This is your moment to frame the story and tell people what to do next. Think of the video as the hook. Now, it's time to build the rest of the post to reel your audience in.
Write a Caption That Actually Gets Read
Your caption is valuable real estate, but most people only see the first line before they have to tap "more." You have to make it count. Kick things off with a punchy question, a bold claim, or a relatable problem that stops the scroll cold.
Keep the rest of the caption easy to scan. I'm talking short paragraphs, emojis to break up the text, and maybe even a few bullet points. The whole point is to get people talking, so wrap it up with a direct question or prompt. For more ideas on sparking conversations, this guide on how to improve social media engagement has some great, practical tips you can use right away.
Nail Your Hashtag Game
Hashtags are basically the search engine for your content, connecting your video with people who aren’t following you... yet. Ditch the super generic tags like #video. They're useless. You need a smart mix of niche-specific hashtags that attract the right kind of viewers.
A solid strategy I've seen work time and again involves a mix:
- Broad Industry Tags: Think keywords for your general niche (e.g., #ContentMarketingTips).
- Specific Content Tags: Hashtags that describe exactly what's in the video (e.g., #YouTubeRepurposing).
- Community Tags: What are the popular tags your ideal audience is already using? (e.g., #CreatorEconomy).
- Branded Tags: Create a unique hashtag just for your brand or a specific content series.
Try to blend tags with huge search volumes and smaller, more focused ones. It's like fishing in a big ocean while also casting a line in a smaller, well-stocked pond.
Design a Cover Image People Want to Click
Sure, Reels often autoplay, but your cover image is what people see on your profile grid and the Explore page. It's the first impression, the visual handshake that makes someone decide whether to watch or keep scrolling. Please, don't just let Instagram pick a random, blurry frame for you.
Your cover image needs to be a clear, compelling preview of the value inside. I always recommend picking a high-quality still from the video, adding a bold text overlay that summarizes the topic, and keeping the design consistent with your brand. A clean, professional-looking grid is way more inviting.
The Art of the Call-to-Action
Every single post should have a purpose. What do you want people to do after they watch your video? Your call-to-action (CTA) needs to be simple, clear, and direct. Don't be shy about it—tell people exactly what you want from them.
Some of my favorite effective CTAs are:
- Asking for Comments: "What’s your biggest struggle with this? Drop a comment below!"
- Driving Shares & Saves: "Save this post for later!" or "Share this with a creator who needs to see it."
- Sending Traffic Elsewhere: "The full tutorial is waiting for you at the link in my bio!"
This is where you build a real community. One influencer I follow tested the same videos across platforms and found Reels was way better for building loyalty because the algorithm keeps showing your stuff to the same followers, which helps build a stronger connection.
For a full deep-dive on what’s working right now, be sure to check out our complete guide on Instagram Reels best practices.
Building a Cohesive Cross-Platform Strategy
Successfully repurposing YouTube videos for Instagram goes way beyond just the technical edits. It's about building a content ecosystem. The real goal is to create a seamless experience where your platforms don't compete but actually feed each other. This kind of strategic thinking is what turns scattered posts into a powerful brand-building machine.
Think of it this way: your Instagram account is the movie trailer, and your YouTube channel is the feature film. A well-chosen, high-impact Reel should hook viewers and leave them desperately wanting more. This creates a natural funnel that directs your most engaged followers straight to your long-form content.
Using Instagram as a Funnel
Your Instagram call-to-action is the bridge that connects the two platforms. Forget generic pleas like "check out my channel." You need to be specific.
Let's say you've repurposed a clip from a travel vlog. Instead of a bland CTA, try something like this in your caption: "Want to see the full, chaotic story behind this market? The full video is live now—you know where the link is!"
This direct approach gives people a clear reason to make the jump. You're not just asking them to follow you somewhere else; you're offering them the rest of a story you just started. It respects their time and turns passive scrollers into intentional viewers.
Navigating Copyright and Attribution
Ignoring copyright rules is one of the fastest ways to derail your entire strategy. This is especially true when it comes to music and audio.
A trending sound on Instagram is fair game within the app, but using that same copyrighted track in a video you edit externally can get your content flagged or even taken down.
To stay in the clear, always think about the source:
- Music: When adding music to a Reel or Story, stick to Instagram's native audio library. If you're editing your clips in another app, use royalty-free music libraries to be safe.
- Clips: Only repurpose your own video content. Grabbing clips from other creators' YouTube videos without their explicit permission is a major no-go.
Proper attribution and following copyright rules aren't just about dodging penalties. It’s about professionalism and showing respect for other creators. This builds trust with your audience and adds legitimacy to your brand.
Understanding the unique strengths of each platform is key. Cross-posting lets you tap into different algorithms and audience behaviors: TikTok for its viral reach, Instagram Reels for growing a loyal community, and YouTube Shorts for long-term discoverability. Reels, in particular, offers powerful e-commerce integrations like product tagging that can drive direct sales. You can find more great insights by exploring different cross-platform video strategies on dlvrit.com.
At the end of the day, making your channels work together seamlessly is what builds a resilient and powerful online presence.
Common Questions About YouTube to Instagram Repurposing
Even with a solid game plan, you're bound to hit a few snags when you start posting your YouTube content over on Instagram. Let's tackle some of the most common hurdles I see creators run into so you can keep your workflow moving smoothly.
"Can I Use the Same Audio in My Reel?"
This one comes up all the time. You found the perfect trending track for your YouTube Short, and you want to use that same video file for an Instagram Reel. Can you do it?
The short answer is: probably not. Audio licenses are almost always platform-specific. A sound you can use freely from YouTube’s library can easily get your Reel flagged for copyright infringement on Instagram if you upload it as part of your edited video. It's a frustrating but crucial detail.
My Advice: The safest bet is to always add trending audio directly within the Instagram app when you upload your Reel. If your video needs background music and you're editing it elsewhere, stick to royalty-free music libraries to avoid any takedown notices.
"Why Does My Video Look Blurry on Instagram?"
This is another classic headache. You export a beautiful, crisp 4K clip, but the moment it goes live on Instagram, it looks grainy and compressed. What gives?
The culprit is Instagram's aggressive compression. They do it to save server space and make sure videos load quickly for everyone, even on slower connections. You can't turn the compression off, but you can definitely minimize how bad it looks.
Here's how to fight back:
- Dial in your export settings. A high bitrate is your friend, but don't go overboard. For a 1080p video, exporting at around 10-15 Mbps is the sweet spot. Anything higher is just giving Instagram more data to crush down anyway.
- Upload on a strong connection. This is a bigger deal than most people think. Always use a stable Wi-Fi network. Uploading over a spotty cell connection often forces Instagram to compress your video even more aggressively to get it through.
Getting these little technical details right makes a massive difference in how professional your final post looks.
"Is It Okay to Just Post a Link in My Stories?"
Sure, you can just drop a link sticker to your YouTube video on a plain background in your Instagram Story. It's fast, but it’s rarely effective.
Think about it from a user's perspective. A simple link sticker feels like an ad, giving them zero reason to get curious and tap. It’s a dead end for engagement.
A much, much better approach is to create a quick, compelling teaser. Pull a 15-60 second highlight clip from your video, add some eye-catching captions, and then put the link sticker on top of that clip. You're giving your audience a real taste of the value, making them far more likely to actually click through and watch the whole thing on YouTube.
Ready to stop the tedious editing and start creating high-impact videos at scale? ClipShort uses AI to instantly find viral moments in your content, add dynamic captions, and perfectly reformat your videos for Instagram, TikTok, and YouTube Shorts. Turn your ideas into scroll-stopping content in minutes at https://www.clipshort.co.