How to Upload YouTube Shorts from PC a Pro Creator's Guide
Uploading YouTube Shorts from your PC is dead simple using YouTube Studio's "Create" button. It lets you grab any vertical video under 60 seconds, slap on a title with #shorts, and get it live. This completely sidesteps the clunky mobile-only process and streamlines your entire workflow.
Why a Desktop Workflow Is a Creator's Secret Weapon
If you're still fumbling with your phone to upload Shorts, you're leaving a massive amount of efficiency and quality on the table. Moving your entire creation process to a computer isn't just a small tweak—it's a strategic shift that separates casual creators from the pros. The power, precision, and control you get from a desktop setup are simply in another league.
Think about it. Editing on a big monitor lets you make frame-perfect cuts, dial in your color grading, and mix audio in a way that's practically impossible on a tiny touchscreen. That professional polish is what makes your content pop in a feed already flooded with billions of videos.
The Power of a Centralized Hub
Your PC becomes the command center for your entire content operation. It's where you can organize all your assets—high-quality b-roll, graphics, licensed music, sound effects—all in one place, ready to go. This kind of organization is what helps you maintain a consistent brand aesthetic and high production value across all your content.
Better yet, a desktop setup integrates perfectly with powerful tools that can put your content creation on autopilot. For instance, using a faceless video generator like ClipShort, you can churn out a backlog of polished, ready-to-upload Shorts without ever even picking up a camera. This automated approach turns content creation from a chore into a streamlined production line.
A desktop-centric workflow isn't just about having a bigger screen. It's about building an efficient, scalable content engine that pumps out high-quality videos consistently.
Gaining a Competitive Edge
The ability to upload YouTube Shorts from PC has been a total game-changer. Since YouTube rolled out native desktop support, its adoption has exploded, and it’s no coincidence that there's been a staggering 50% year-over-year growth in channels posting Shorts.
With the platform pulling in over 70 billion daily views, a streamlined PC workflow is your ticket to consistently tapping into that massive audience without any of the friction of a mobile-first process.
Of course, part of a great desktop workflow is a fast connection. If you find your uploads are crawling, check out these tips for increasing your upload speed. Ultimately, mastering a desktop process is all about creating better content, faster—and that’s the real secret to accelerating your channel's growth in such a competitive space.
Preparing Your Video File for a Perfect Upload
Before you even think about hitting that upload button, the fate of your YouTube Short is already being decided in your editing software. Getting your file settings right isn't just a suggestion—it's the single most important step to get your content seen.
This little pre-flight check is what tells YouTube’s algorithm to treat your video as a Short, pushing it directly into the coveted Shorts feed. Mess this up, and your masterpiece will just be another vertical video lost in the vast sea of regular content, completely missing the massive Shorts audience. It's like having the wrong key for a locked door; you're just not getting in.
The Unbreakable Rules of Shorts Formatting
First things first, let's talk about the two golden rules you can't ignore: dimensions and duration.
Your video must be vertical. The gold standard is a 9:16 aspect ratio, which translates to a crisp 1080x1920 pixels. This is what fills up a phone screen perfectly, and since that's where almost everyone watches Shorts, you want to use every pixel you can. While a square video (1:1) can technically work, 9:16 is the native format that delivers the most immersive experience.
Just as critical is the length. Your final video file has to be 60 seconds or less. Seriously, even a fraction of a second over—say, 60.1 seconds—and it's disqualified. To play it safe, I always recommend aiming for a max length of 59 seconds. This simple habit prevents any weirdness with how different editing programs calculate the final runtime.
Key Takeaway: The YouTube algorithm is not forgiving. To get your PC upload seen as a Short, you absolutely need a 9:16 aspect ratio (1080x1920 pixels) and a runtime under 60 seconds. No exceptions.
Polishing Your File for a Flawless Upload
Getting the basics right is one thing, but a few extra tweaks in post-production can make a huge difference. Think of this as the final polish that prevents upload errors and makes your content look and sound truly professional.
Here’s a quick-reference guide to nail the technical specs every single time.
YouTube Shorts Technical Specifications for PC Uploads
This table breaks down the essential video and audio requirements. Following these specs ensures your Short is processed correctly and looks great when you upload from your desktop.
| Specification | Requirement | Pro Tip |
|---|---|---|
| Aspect Ratio | 9:16 (Vertical) or 1:1 (Square) | Stick to 9:16 (1080x1920 pixels) to maximize screen real estate on mobile. |
| Duration | 60 seconds or less | Export your video at 59 seconds to avoid any potential upload classification errors. |
| File Format | .MP4 | This is the most universally accepted format and offers the best compatibility. |
| Video Codec | H.264 | Provides the best balance between high visual quality and a small, manageable file size. |
| Audio Codec | AAC-LC | The standard audio codec for web video, ensuring your sound is clear and crisp. |
| Frame Rate | 24, 25, 30, 48, 50, or 60 FPS | Match the frame rate you filmed in. 30 or 60 FPS are common for a smooth look. |
| Audio Levels | Target -14 LUFS | Normalize your audio to prevent it from being too loud or too quiet for viewers. |
Mastering these final touches is what separates amateurs from pros. It ensures that what you so carefully created in your editor is exactly what your audience gets to experience.
For creators looking to really level up their game, exploring advanced post-production video editing techniques can give you a noticeable edge. And if you want a deeper dive, our detailed breakdown of vertical video dimensions will help you perfect your export settings for good.
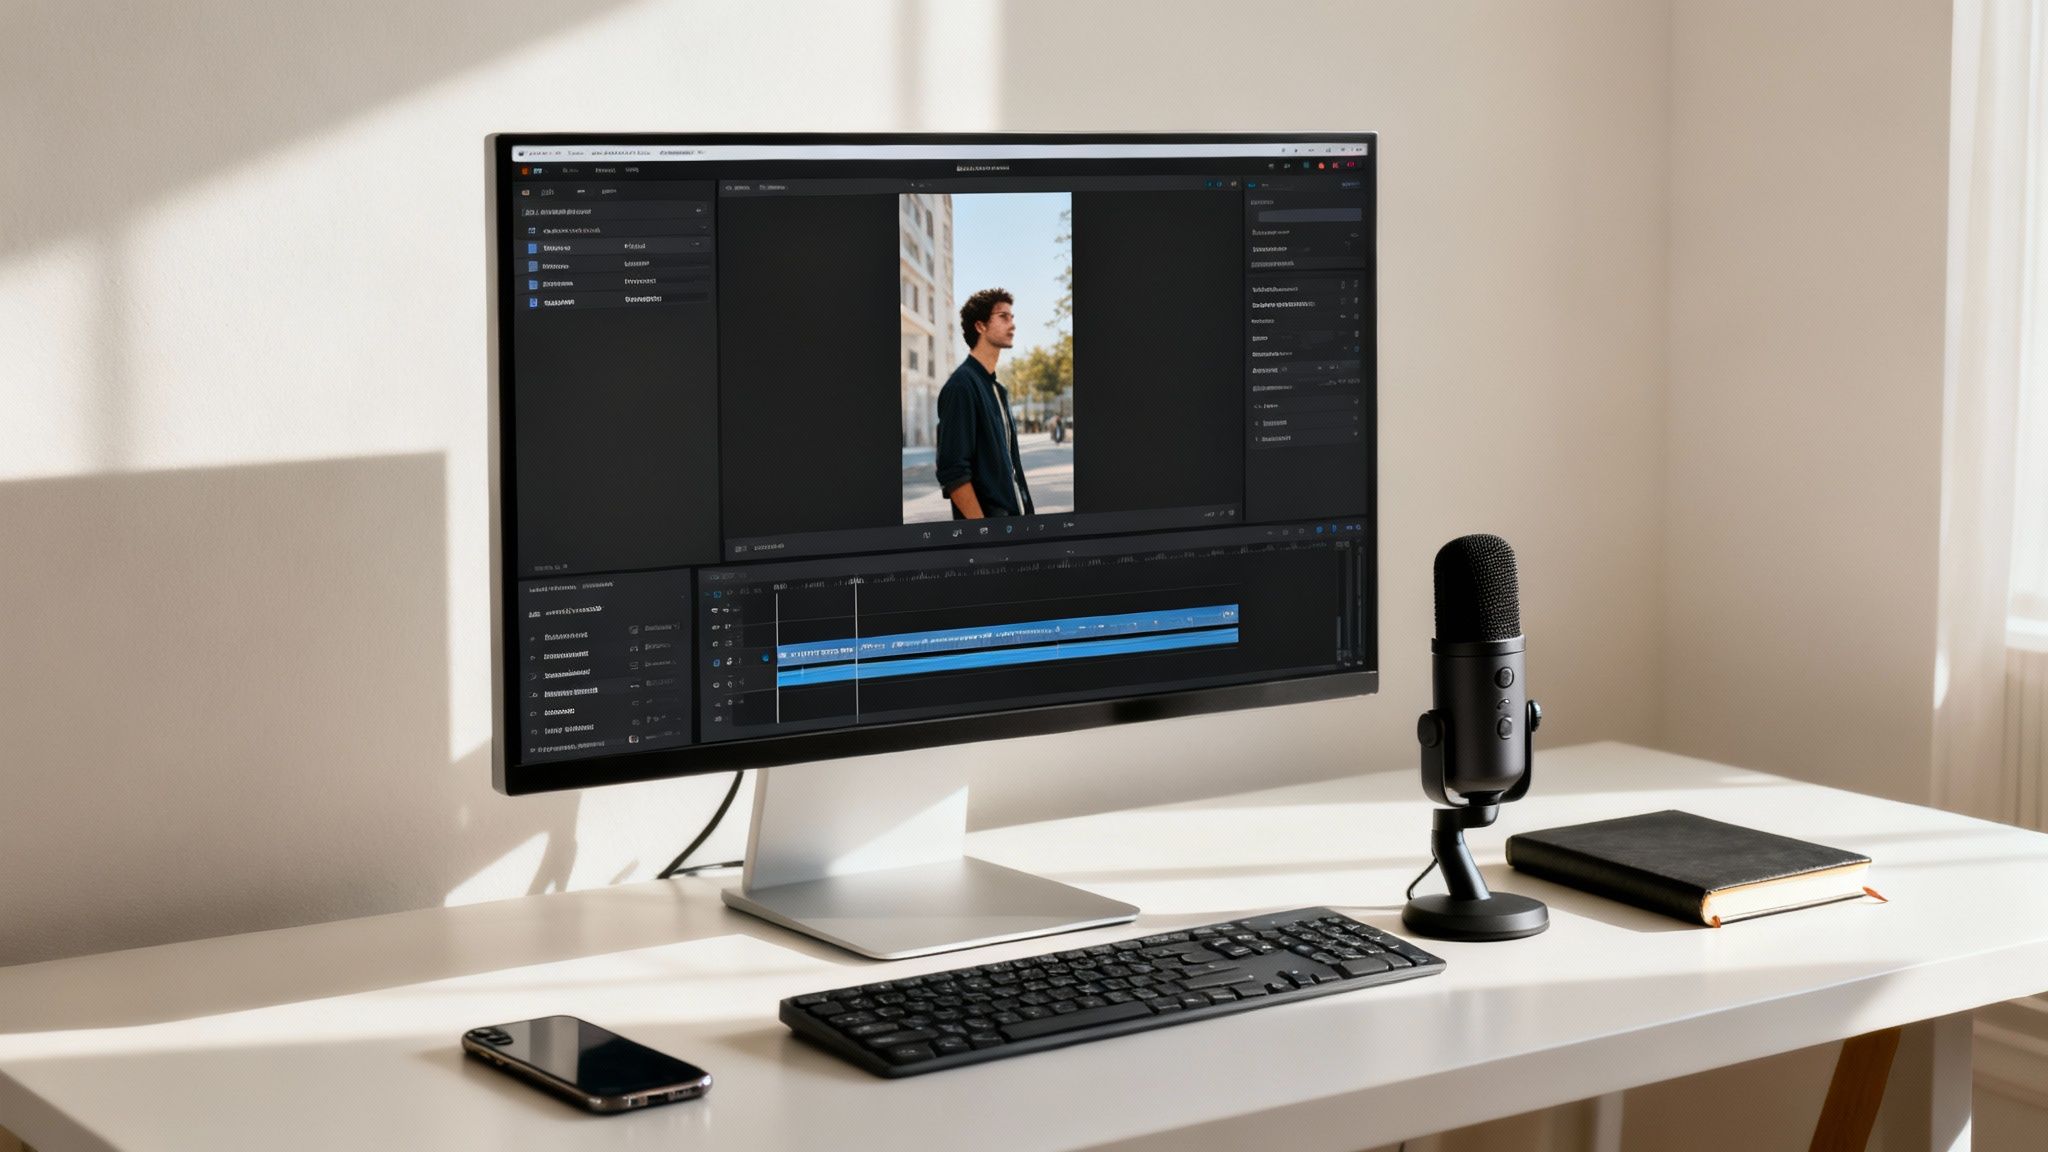
Alright, you've got your video file edited, polished, and ready to go. Now for the main event: getting it onto YouTube. We're going to use YouTube Studio, which is the command center for any serious creator. It’s hands-down the most reliable and feature-rich way to upload Shorts from your computer.
This is where you handle all the important stuff—the metadata, scheduling, and all the little details that tell YouTube's algorithm what your Short is about and who needs to see it. Don't worry if it seems intimidating; it's actually a super smooth process once you know the workflow.
Before we jump in, just remember the core rules for a video to even qualify as a Short. This quick visual breaks it down perfectly.
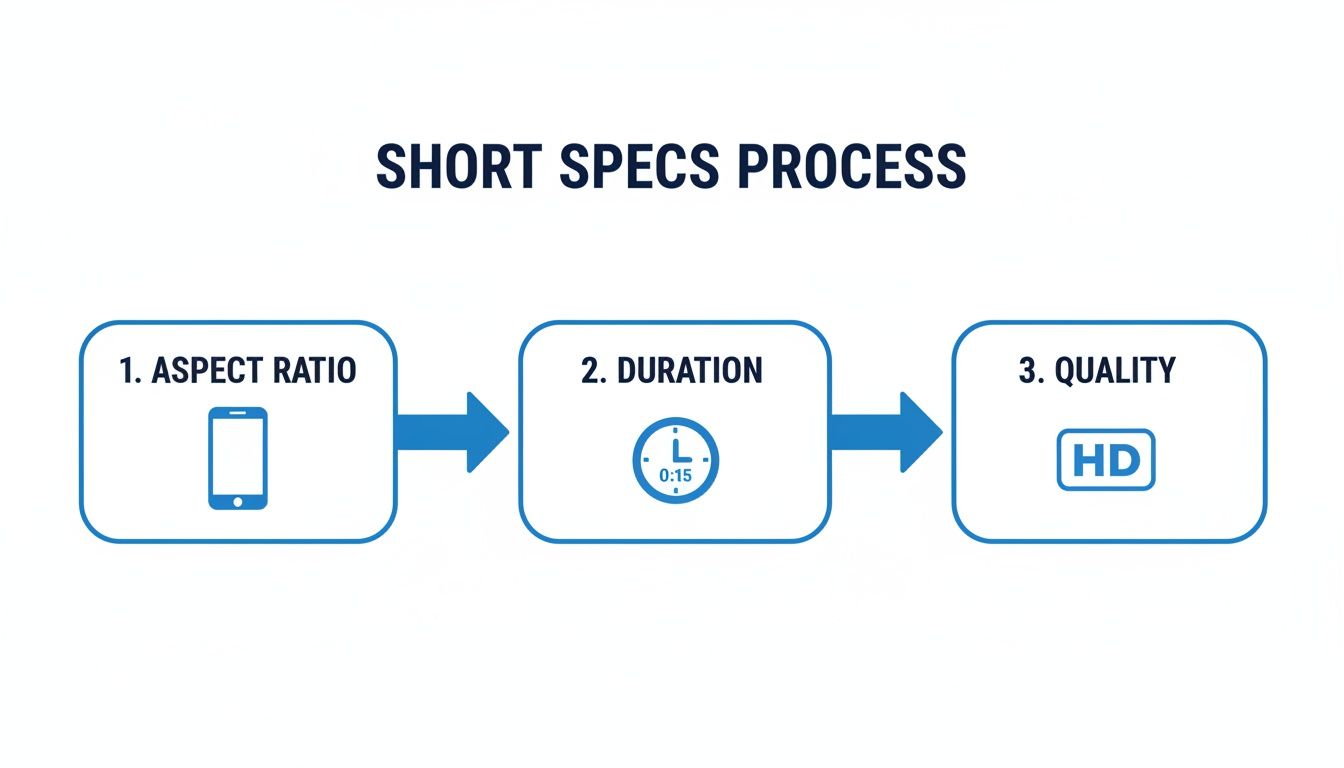
Simply put: keep it vertical and under 60 seconds. Get that right, and the algorithm knows exactly what to do with it.
The Upload Process Itself
First things first, log into your YouTube account and head straight to YouTube Studio. The easiest way is to click your profile picture in the top-right corner of YouTube and pick it from the menu.
Once you land on your creator dashboard, your eyes should go to the big red "Create" button, also in the top-right. Give that a click.
A little menu will pop up. Just choose "Upload videos," and you'll see the main uploader window appear. From here, you can either drag and drop your video file right onto the window or click "Select Files" to find it on your computer.
The moment you choose your file, it starts uploading in the background. This is a huge perk of the desktop workflow—you can get busy writing your title and description while the file transfers, which is a massive time-saver.
Dialing in Your Short’s Details
Now for the fun part: giving your Short its identity. You’ll be on the "Details" tab, and this is where you provide all the crucial context.
- Title: Keep it short, punchy, and compelling. Most importantly, you must include #shorts somewhere in the title (or the description). This is non-negotiable if you want YouTube to properly classify it.
- Description: While descriptions aren't as visible on Shorts as they are on longer videos, they still matter for keywords and search. Write a brief sentence or two about the video and, just to be safe, pop the #shorts tag in here too.
- Thumbnail: You can upload a custom thumbnail, but just know it only shows up on your channel page or in search results. It won't appear in the actual Shorts feed where most people will see your video.
- Audience: This one's required. Just let YouTube know if your content is "Made for Kids" or not.
Look, if you remember one thing, make it this: the #shorts hashtag is the most powerful signal you can send the algorithm. YouTube is smart enough to detect vertical videos under a minute, but adding that tag removes any doubt and helps get your video into the Shorts feed faster.
After you've filled out the details, you'll click "Next" through the "Video elements" and "Checks" tabs. For most Shorts, you won't need to do anything here. The final stop is the "Visibility" tab.
This is where you decide when your video goes live. You can publish it immediately, set it to private/unlisted, or—my personal favorite—schedule it for a specific time. Scheduling is a game-changer for staying consistent.
Once you’ve made your choice, just hit "Save" or "Publish," and you're done. Your Short is officially on its way to the world.
Optimizing Shorts for Discovery and Engagement
Getting your video uploaded is just the first step. The real work begins now. To actually get seen, you need to think like both the algorithm and your audience, making sure every piece of metadata—from the title to the tags—works together to push your content onto the Shorts shelf.
This is where you move past the simple mechanics of uploading from your PC and into the strategic art of making your Shorts discoverable. A great Short doesn't just stumble into the feed; it’s propelled there because it screams relevance and value from the second it goes live.
Crafting Titles That Stop the Scroll
Your title is your first, and often only, chance to hook a viewer. The Shorts feed moves incredibly fast, so your title has to be punchy, intriguing, and crystal clear. Forget the clickbait and focus on sparking curiosity or highlighting a clear benefit.
For instance, instead of a boring title like "My Cool Gadget," try something like "This Gadget Solves a Problem You Didn't Know You Had." See the difference? The second one plants a question in the viewer's mind, making them want to stick around for the answer. And don't forget to include #shorts in your title or description—it's a non-negotiable signal to the algorithm.
Think of your title as a headline on a newspaper in a crowded train station. It has less than a second to grab attention before the train—or in this case, the viewer's thumb—moves on.
Strategic Descriptions and Tagging
Sure, descriptions aren't front and center in the Shorts feed, but they're still scanned by YouTube's algorithm for keywords. A short, one-to-two-sentence description that summarizes your video and naturally weaves in relevant search terms is all you need.
Tags are your behind-the-scenes assistants, helping YouTube figure out where your content belongs. You have to think beyond the obvious here. If your Short is about baking a cake, don't just stop at "cake" and "baking." Go deeper with a mix of tags:
- Broad: "baking tips," "dessert recipes"
- Specific: "chocolate lava cake recipe," "easy baking for beginners"
- Niche: "five-minute dessert hacks," "no-bake cake ideas"
This layered approach helps YouTube understand the full context of your video. It can then show it to a wide audience interested in baking, as well as to users searching for something very specific. If you want to really master this, our complete guide on how to grow on YouTube Shorts offers a much deeper dive.
Timing Your Upload for Maximum Impact
Scheduling is easily one of the biggest perks of uploading Shorts from a PC. Dropping your content right when your audience is most active gives it an initial velocity boost that the algorithm absolutely loves.
The move to PC-based workflows has been a huge driver for the creator economy, with monetization payouts projected to hit an incredible $85 billion over three years. Top creators know that timing is everything—they report needing a 70%+ view-through rate for an algorithmic push, which often means posting mid-week between 3-5 PM or 6-7 PM to catch peak engagement hours.
By mastering these small but crucial optimization details, you're not just uploading a video. You're launching a strategic piece of content engineered for discovery from the get-go.
Automating Your Content with a Faceless Workflow
Uploading optimized Shorts from your PC is a huge leap forward, but what if you could put the entire creation process on autopilot? For creators trying to scale up without burning out, a faceless workflow is the secret weapon. It’s all about removing yourself as the bottleneck and turning content creation into a repeatable system.
This approach is an absolute game-changer for channels in niches like history, finance, or storytelling—anywhere the information is the real star, not the person on camera. Instead of spending hours filming and editing, you can build a pipeline that consistently pumps out high-quality content. This is exactly how you hit the posting frequency that the YouTube algorithm loves to see.
Building Your Content Engine
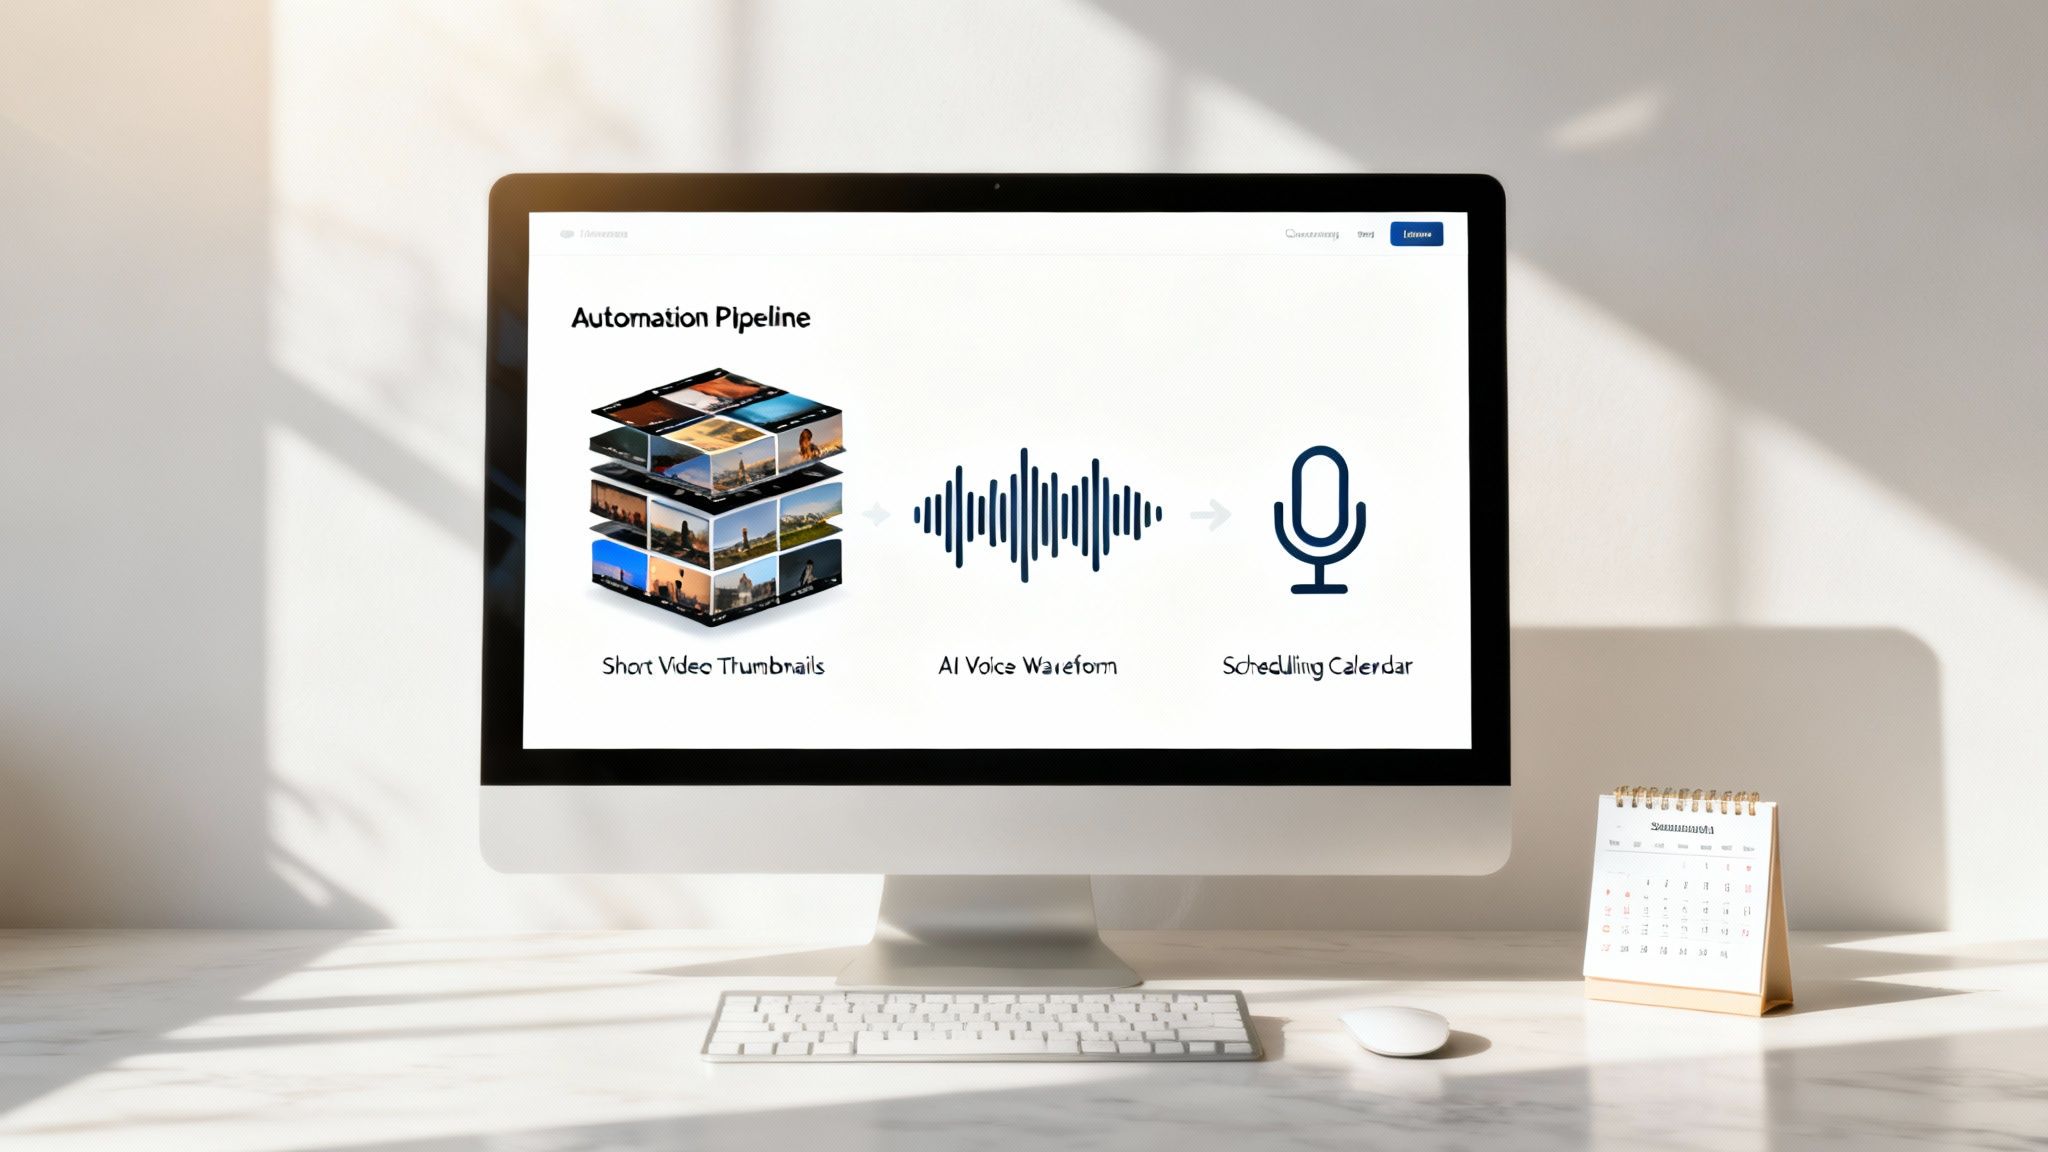
At the heart of any modern faceless workflow is AI-driven automation. The right tools can become the engine of your content strategy, taking care of the most soul-crushing, time-consuming parts of video production.
Think of it like an assembly line:
- Viral Script: You feed it a simple prompt, and an AI writes a script complete with a strong hook and a clear narrative arc.
- Lifelike Voiceover: Next, you pick the perfect AI voice from a library of options to match your channel’s vibe.
- Visuals & Syncing: The tool then pulls in or generates relevant visuals, syncing everything to the script automatically.
- The Final Polish: To finish it off, it adds animated captions, background music, and emojis to keep viewers hooked.
This whole process can happen right on your desktop, turning one idea into a polished, ready-to-upload Short in just a few minutes.
From Creation to Published Short
This is where combining AI tools with a PC-based upload process becomes so powerful. You can use a dedicated tool like ClipShort to knock out a whole week's worth of content in one afternoon. Once the videos are generated, you just download them and drop them straight into your established PC pipeline: the YouTube Studio uploader.
From there, you can batch-upload all your new Shorts, fine-tune the metadata for each one, and schedule them to go live throughout the week. You've just created a seamless, hands-off system.
When you pair an automated creation tool with the scheduling power of your PC, you shift from being a content creator to a content manager. You stop trading your time for videos and start overseeing a system that works for you.
This is how the top faceless channels absolutely dominate their niches. They build a machine to handle the heavy lifting of production, freeing them up to focus on strategy, keyword research, and engaging with their community. To see how to put this system in place, check out our deep dive on automatic content creation, which walks you through building your own content factory.
Common Questions About Uploading Shorts from a PC
Even with the best workflow, a few questions always seem to pop up. To make sure you're set up for success, I've rounded up the most common things creators ask about uploading Shorts from their computer. Think of this as your go-to FAQ for clearing up any confusion and avoiding those little mistakes that can cost you views.
My goal here is to give you direct, no-fluff answers so you can hit that "upload" button with total confidence. Let's tackle the specifics that often trip people up.
Does the #shorts Hashtag Still Do Anything?
Yes, and it’s a habit you shouldn't break. While YouTube's algorithm is smart enough to figure out a Short from its vertical format and sub-60-second runtime, slapping #shorts in your title or description is still a crucial best practice. It’s an explicit signal that leaves zero room for error.
Honestly, just think of it as free insurance. It guarantees your video gets categorized correctly for the Shorts feed, which is where you want to be. It's a tiny step that removes any doubt, so don't skip it.
Can I Schedule Shorts from My Computer?
You absolutely can, and it's one of the biggest reasons to use a desktop workflow. The standard YouTube Studio uploader gives you the exact same scheduling power for Shorts as it does for your long-form videos. This is a game-changer.
Being able to schedule lets you batch-create your content and stick to a consistent posting calendar. You can line up your videos to go live during your audience's peak activity hours, and that kind of consistency is a huge driver of channel growth.
A desktop-first approach unlocks scheduling, turning your content strategy from reactive to proactive. You can build out a whole library of content and set it to deploy on a perfect schedule, all without ever touching your phone.
What if My Video Is Just Over 60 Seconds?
This is one of those rules with absolutely no wiggle room. If your video is even a fraction of a second over the 60-second mark, YouTube will not classify it as a Short. It just becomes a regular vertical video.
That means it won't be pushed into the Shorts feed, which is where nearly all the discovery and viral potential lives. To be safe, always export your final video at 59.9 seconds or less. A quick duration check before you upload can save you a ton of frustration later.
Can I Use a Custom Thumbnail for a Short on PC?
You can upload one in YouTube Studio, but its role is limited and often misunderstood. Here’s the real story:
- Where it shows up: Your custom thumbnail will appear on your main channel page, in your playlists, and in traditional YouTube search results.
- Where it does NOT show up: It will not be used in the Shorts feed.
For the all-important Shorts feed, YouTube typically just grabs a frame from the first few seconds of your video. This makes your opening hook even more critical, as it essentially acts as the thumbnail that has to stop people from scrolling.
Ready to stop wrestling with filming and editing and start scaling your content? ClipShort is the AI-powered engine that lets you create a library of viral-style, faceless Shorts in minutes. Generate scripts, add lifelike voiceovers, and produce scroll-stopping videos with animated captions—all from your desktop. Transform your ideas into publish-ready Shorts today at ClipShort.