How to Change Aspect Ratio of Video for Social Media Success
When you're ready to change a video's aspect ratio, you'll typically start by picking a new dimension preset in your video editor—like 9:16 for TikTok. From there, you'll decide whether to crop into the footage, pad it with black bars (letterboxing), or let an AI tool automatically reframe the most important action. The whole point is to make your content look native to whatever platform you're posting on, maximizing its impact.
Why Aspect Ratio Is Your Secret Weapon for Virality
Have you ever been scrolling through TikTok or Reels and stumbled upon a widescreen video just shrunk down in the middle of the screen, with huge black bars on the top and bottom? It's jarring. It immediately tells you the content wasn't made for you or for this platform. For most people, that’s an instant swipe-away.
Your video's aspect ratio isn't just some technical detail; it's a powerful signal. It tells both the viewer and the platform's algorithm that your content belongs there. Getting this right is the very first step to creating a seamless, immersive experience that keeps people hooked from the first second. Platforms like TikTok and Instagram are built for vertical, full-screen video, and their algorithms often reward creators who format their content this way with much better reach.
The High Stakes of Mismatched Ratios
A mismatched ratio can absolutely crush your audience retention before your message even gets a chance to land. Picture a brand trying to repurpose a detailed YouTube ad for Instagram Reels. If they just squeeze the original 16:9 video into a 9:16 frame, any on-screen text becomes unreadable and key visuals get lost. This isn't just a small mistake—it actively sabotages your goals.
Industry benchmarks show that horizontally formatted videos on vertical feeds can see 25-35% lower completion rates. Viewers don't have the patience to tilt their phones or squint to see your content; they just move on to the next video.
The explosion of short-form video has made this a non-negotiable skill for creators. The global video production market, valued at a massive USD 70.40 billion in 2022, is projected to keep soaring, and a huge part of that growth is driven by the demand for platform-native content. In fact, one video production industry report noted that vertical HD uploads jumped by 51% recently, while square video formats declined. That tells you everything you need to know about where creator strategy is heading.
To make sure you're always using the right dimensions, here's a quick reference guide.
Quick Guide to Social Media Aspect Ratios
This table breaks down the optimal aspect ratios and resolutions for the most popular short-form video platforms. Keep it handy!
| Platform | Recommended Aspect Ratio | Resolution (Pixels) |
|---|---|---|
| TikTok | 9:16 | 1080 x 1920 |
| Instagram Reels | 9:16 | 1080 x 1920 |
| YouTube Shorts | 9:16 | 1080 x 1920 |
Getting these specs right ensures your video fills the entire screen, giving viewers the best possible experience without any distracting black bars or cropped-off action.
From Technical Detail to Growth Strategy
Ultimately, choosing the correct aspect ratio is a strategic decision. It shows you understand the viewing environment and, more importantly, that you respect your audience's time and attention. A perfectly formatted 9:16 video doesn't just look better; it performs better by grabbing attention and holding it.
Of course, a perfect aspect ratio is just one piece of the puzzle. Combining that technical polish with a deep understanding of how to make a video go viral is where the real magic happens. Mastering this one simple setting is often the difference between being ignored and blowing up.
Crop, Pad, or Reframe: Choosing Your Editing Method
When you're staring down a horizontal video that needs to become a vertical masterpiece, you've got three main paths you can take. Each one has its own creative tradeoffs, and your choice will completely change how your audience sees your story. Let's break down cropping, padding, and reframing so you can make the right call for your content.
The go-to method for most people is cropping. This is where you essentially punch in on your 16:9 footage, chopping off the sides to make it fit a 9:16 frame. It’s perfect when your subject is already dead center. Think of a wide interview shot—cropping in tight on the speaker's face can make a YouTube Short feel much more intimate and direct.
The big catch with cropping, though, is that you're throwing away a lot of visual information. It's easy to accidentally cut out crucial context, a second person in the shot, or some beautiful background scenery that was key to the original vibe.
Preserving Your Original Shot with Padding
If the idea of cutting up your carefully composed shot makes you cringe, padding (sometimes called letterboxing) is your best friend. This technique keeps your entire original video intact by adding bars above and below it. The bars are usually black, but I've seen cool variations using blurred backgrounds or branded colors.
Padding is fantastic for cinematic footage where the wide composition is non-negotiable. The downside? It doesn't look or feel native on platforms like TikTok or Reels. Those black bars can be a dead giveaway that the content was just repurposed, which might cause viewers to scroll right past. It’s safe, but it’s not immersive.
As you weigh these options, remember that every choice you make is part of the larger process of creating compelling product videos, where the final look and feel is everything.
The Modern Solution: AI Reframing
Now for the third, and frankly, coolest option: AI reframing. Tools like Adobe Premiere Pro’s Auto Reframe or dedicated platforms like ClipShort use artificial intelligence to analyze your footage and find the action. The software then automatically creates a 9:16 version that intelligently follows your subject, panning and moving to keep them perfectly in the frame.
This approach really gives you the best of both worlds. You get the full-screen, immersive look of a cropped video, but you don't lose the important parts of your shot. It's dynamic and saves a ton of manual editing time.
This flowchart makes it super simple to see which format you should be aiming for.
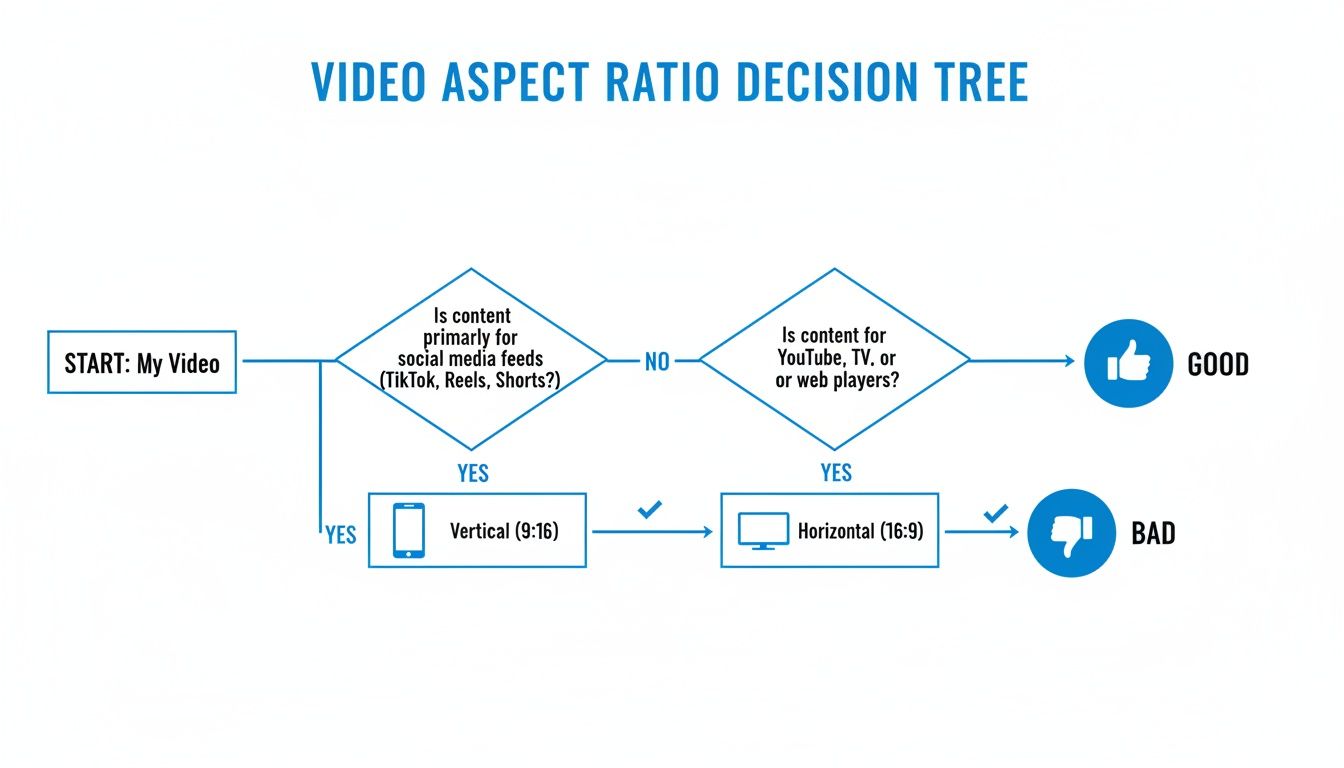
As you can see, vertical video is the undisputed king for mobile. If you're bringing over content from YouTube, we've got a whole guide on posting a YouTube video on Instagram that can help you nail the platform-specific details. Ultimately, there’s a time and place for each method—it all comes down to your specific video and what you want to achieve.
Mastering Ratios with Desktop Video Editors
For creators who demand absolute precision, nothing beats desktop video editing software like Adobe Premiere Pro or DaVinci Resolve. When you move past simple online tools, you step into a world of granular control over every single pixel. Changing an aspect ratio becomes a deliberate creative process, not just a technical chore.
Working in a professional editor means you’re making real choices. You can manually set keyframes to craft a custom pan-and-scan effect, making sure the camera follows the most important action in a wide shot. This is how you transform a sweeping 16:9 landscape into a compelling 9:16 vertical story without losing the entire narrative in the process.
The Power of Manual Control and AI Assistance
What's really incredible is how these desktop editors now blend that fine-tuned manual control with powerful AI features. Take Adobe Premiere Pro’s Auto Reframe effect. It can analyze your footage and automatically generate different aspect ratio versions, intelligently tracking subjects to keep them perfectly centered. This can literally save you hours of tedious manual work.
But here’s the best part: the AI gives you a fantastic starting point, but you always have the final say. If the automatic reframe misses a subtle but crucial detail, you can jump right in and adjust the keyframes yourself to nail it. It’s this hybrid approach of speed and precision that free online tools just can't compete with.
Of course, this level of power comes with a trade-off. The learning curve for software like DaVinci Resolve is steep, and the time you need to invest is significant. If you're trying to repurpose a backlog of hundreds of videos, this manual process can quickly become a major bottleneck.
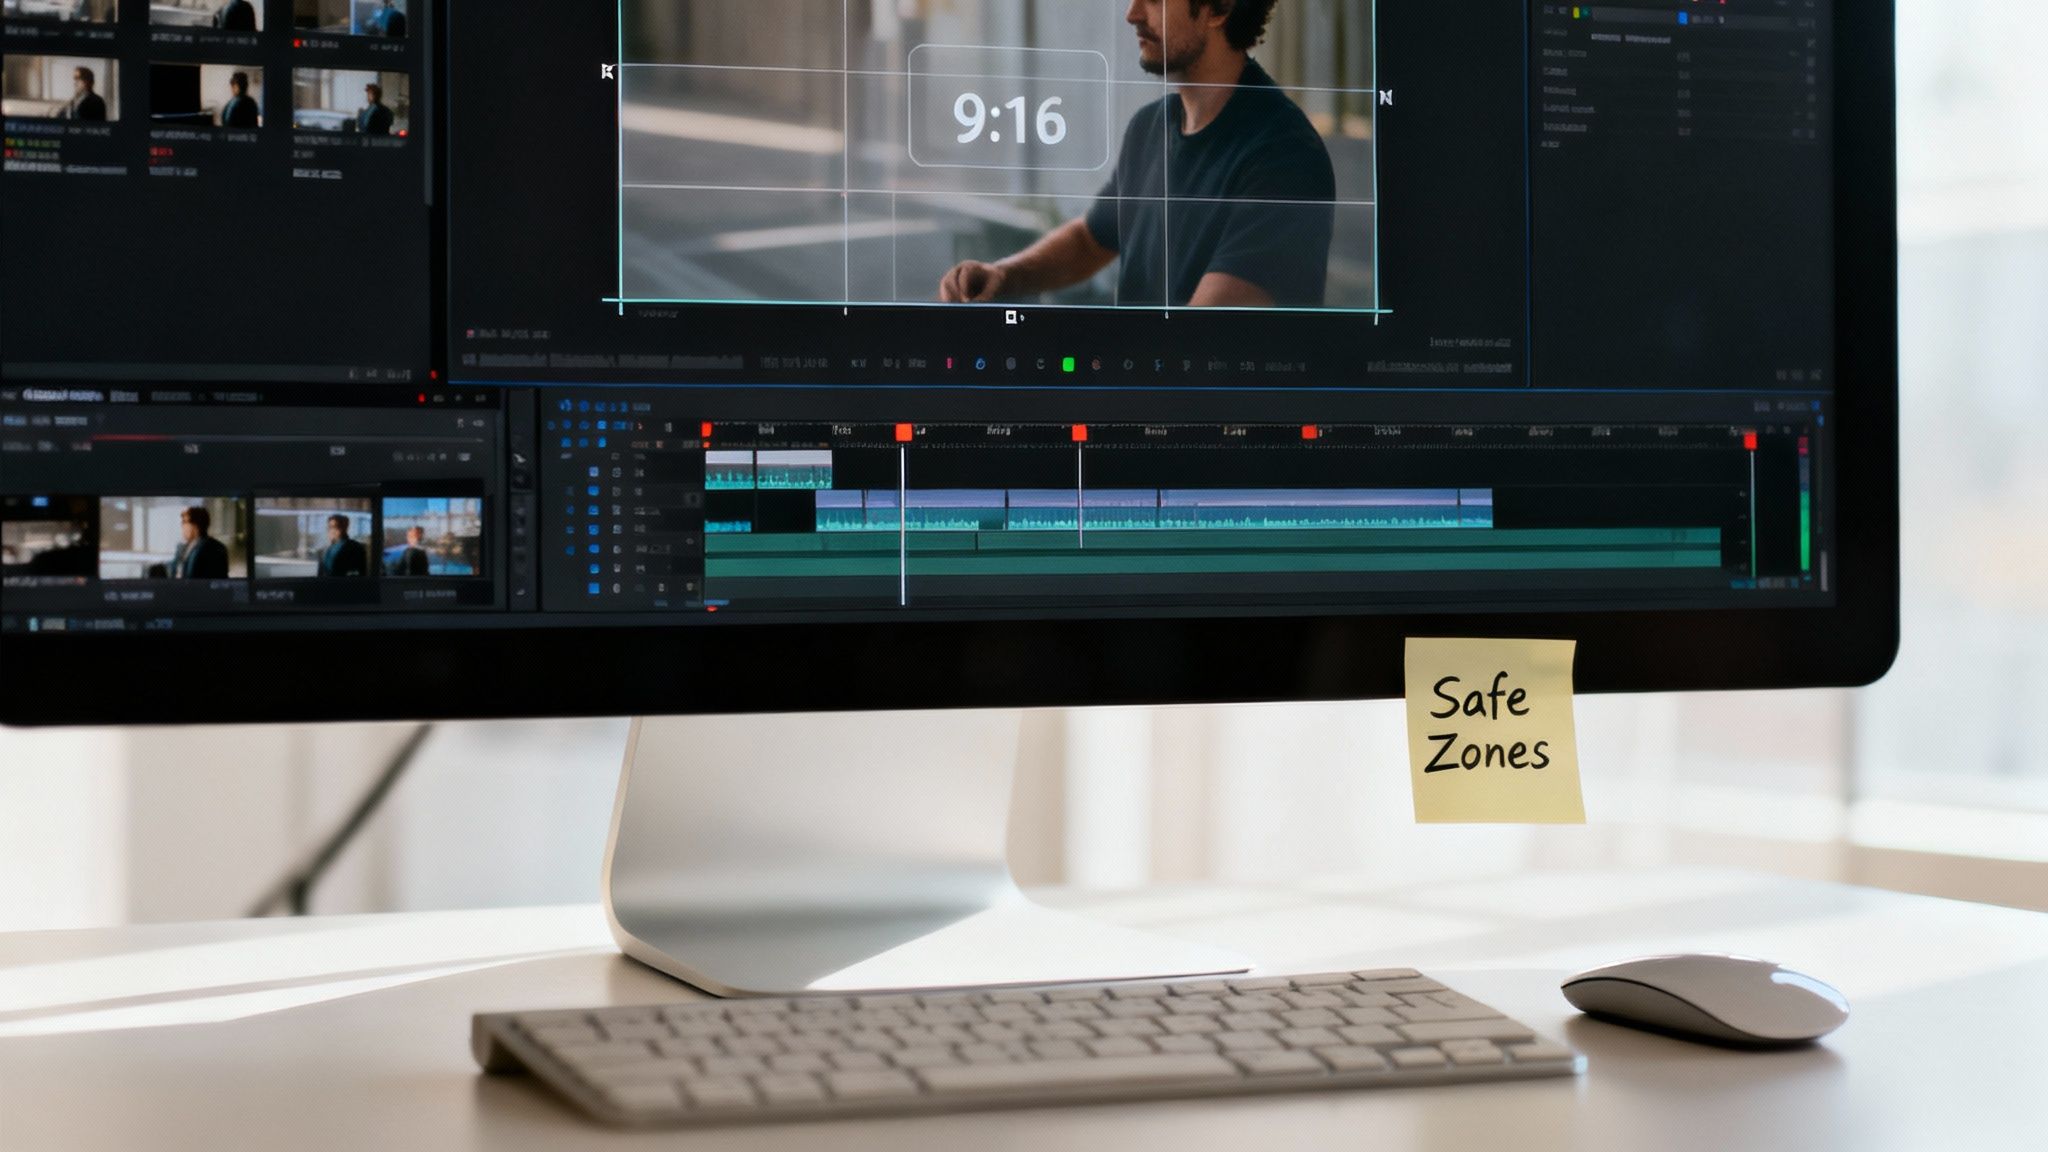
Understanding Platform Safe Zones
One of the most critical things to get right when working in a desktop editor is designing for platform safe zones. These are the areas on platforms like TikTok and Instagram that get covered up by the user interface—think buttons, usernames, and captions.
A classic rookie mistake is placing an important call-to-action near the bottom of a 9:16 frame, only to have it completely blocked by the app’s navigation bar. Your message becomes invisible, and your engagement tanks.
To get around this, professional editors let you use guides or overlays to see exactly where these UI elements will be. You're essentially editing with a cheat sheet for the final platform.
Common UI Elements to Watch For:
- Top Area: This is usually where you'll find profile info or search bars.
- Bottom Area: The busiest part of the screen. Captions, comments, and the like/share buttons all live here.
- Right Side: Typically holds the engagement icons for liking, commenting, and sharing.
By keeping your essential text, graphics, and subtitles squarely in the central, unobstructed part of the frame, you guarantee your content is actually seen. For a much deeper dive, our guide on vertical video dimensions breaks down the exact specs for every platform. This knowledge takes you from someone who just knows how to change aspect ratio of video to a creator who truly understands how to make it work.
Batch Processing Videos with Ffmpeg
So you have a massive library of videos that need to be repurposed. Doing them one by one isn't just slow—it’s a non-starter. This is where FFmpeg comes in, and for agencies, social media managers, or anyone with a bit of technical skill, it’s a total game-changer.
FFmpeg is a command-line tool that lets you process hundreds of videos at once without ever opening an editing app. You just write a simple script telling it what to do. Think of it as your secret weapon for efficiency, especially when you're facing repetitive tasks like converting a folder of client testimonials into TikTok-ready clips.
Automated Cropping to 9:16 Vertical
Let's say you have a folder full of standard 16:9 videos. Going through each one to manually crop it to a 9:16 vertical format would take an eternity. With FFmpeg, you can knock out the whole batch with a single command.
This script tells FFmpeg to find the center of your horizontal video and crop it perfectly to a 1080x1920 resolution.
for i in *.mp4; do ffmpeg -i "$i" -vf "crop=ih*9/16:ih" -c:a copy "cropped-$i"; done
The magic is in the crop=ih*9/16:ih part. It uses the input video's height (ih) to calculate the exact width needed for a 9:16 ratio. No guesswork, just a perfect vertical crop every single time.
Pro Tip: This command is set up for
.mp4files, but you can easily swap*.mp4for*.movor whatever file type you’re working with. That kind of flexibility is what makes batch processing so incredibly powerful.
Padding Videos with a Blurred Background
Sometimes, a hard crop just won't work. You might cut off something important in the frame. A much more stylish solution, and one you see all over social media, is to place your original video on top of a blurred, scaled-up version of itself. This trick fills the entire 9:16 screen without sacrificing any of your original footage.
This command is a bit more involved, but it automatically creates that slick, professional look:
for i in *.mp4; do ffmpeg -i "$i" -lavfi "[0:v]scale=1920:1080,boxblur=20:5,setsar=1[bg];[0:v]scale=-1:1080[fg];[bg][fg]overlay=(W-w)/2:(H-h)/2" "padded-$i"; done
Here's what it's doing: It creates two separate video layers in memory—a blurred background ([bg]) and a scaled foreground ([fg])—and then perfectly centers the foreground on top. This is how you change a video’s aspect ratio like a seasoned pro, creating content that looks completely native to vertical platforms.
The ClipShort Method: Your Automated Vertical Video Solution
Desktop editors and command-line tools like FFmpeg give you an incredible amount of control, but they all share one massive downside: they’re a huge time sink.
When your goal is to pump out high-quality vertical content consistently, all those hours spent tweaking keyframes, re-cropping footage, and worrying about platform safe zones add up fast. This is exactly where an AI-native tool like ClipShort comes in and completely flips the script on the traditional workflow.
Instead of getting bogged down in tedious edits, you can just sidestep the manual grind altogether. Say you have an idea for a TikTok. With ClipShort, you can start with a simple prompt, and its AI will generate a complete video script for you. From there, it builds out a perfectly formatted 9:16 video, complete with a surprisingly lifelike voiceover and slick animated captions.
From Horizontal Footage to Vertical Gold
But what if you already have existing horizontal footage? No problem.
You can upload your 16:9 videos directly into ClipShort, and its AI gets to work intelligently reframing the action for you. It has a knack for automatically identifying the main subjects and making sure they stay perfectly centered in the new vertical frame. The result is a dynamic, engaging clip that looks like you spent hours on it, but you never even had to touch a timeline.
This is the clean interface where you can either generate scripts from scratch or just upload your own media to get started.
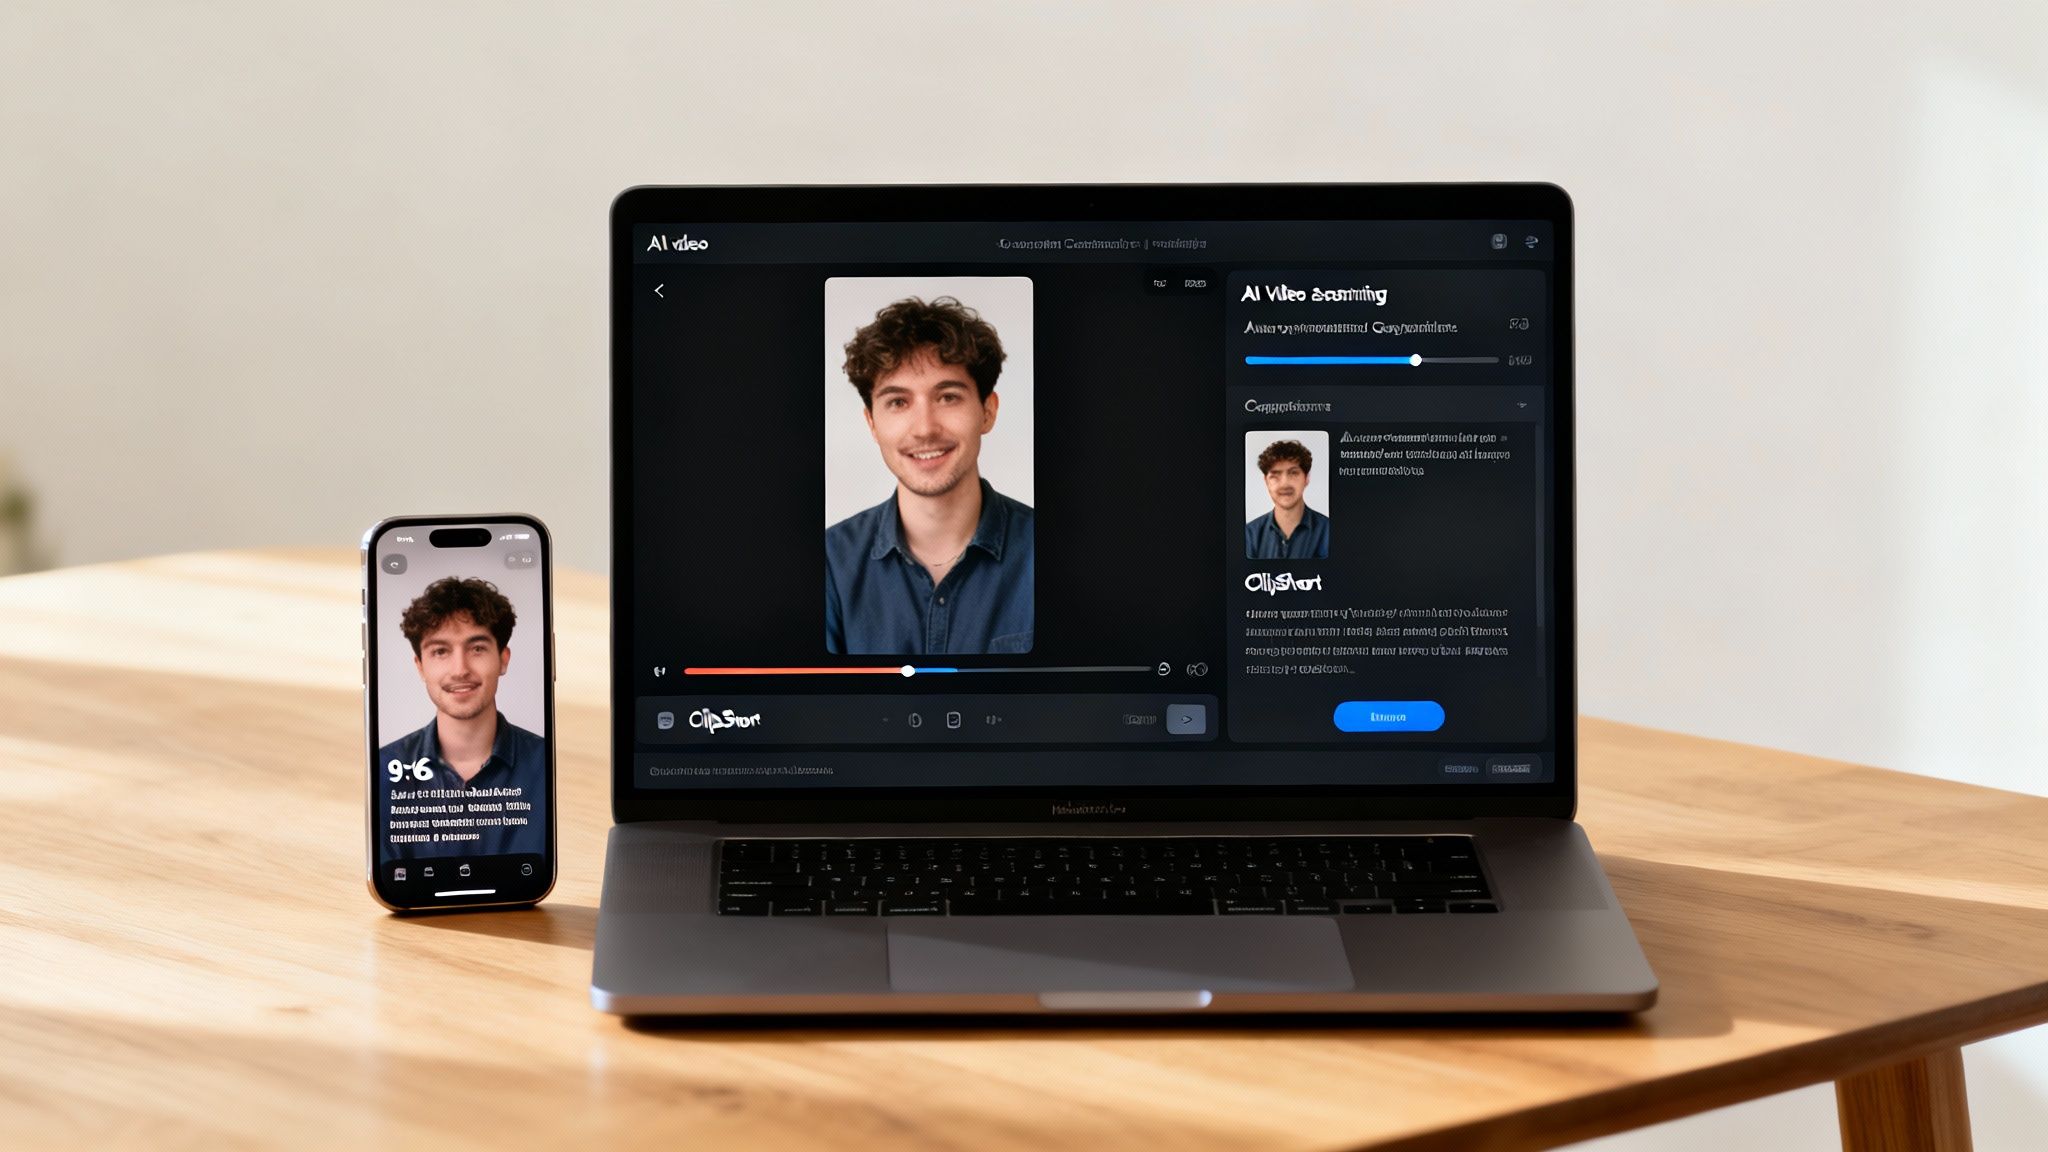
The real game-changer here is the sheer amount of time you get back. You stop being a video editor and become a content strategist again, free to focus on bigger-picture ideas and actually growing your audience.
Why Automation Is a Monetization Strategy
In today's content economy, adapting your video aspect ratio isn't just a "nice to have"—it's a mission-critical task for monetization. The digital video advertising market is absolutely massive, on track to hit $191.3 billion in 2024. Get the formatting wrong, and you're just bleeding money. For example, a poorly formatted video can slash swipe-up rates on TikTok shops by as much as 40%.
For small businesses and influencers trying to keep up, manual tools become a bottleneck. An automated solution like ClipShort, however, delivers polished, perfectly formatted videos in minutes. If you want to dive deeper into the numbers, you can read the full research on digital video advertising to see just how big this market is.
This isn’t just about being faster; it's about maintaining a level of quality and consistency that directly impacts performance.
The true benefit of an AI-powered workflow is its ability to handle the small but critical details automatically. For instance, ClipShort’s auto-generated captions are designed to stay within platform safe zones, ensuring your message is always clear and visible, no matter the device.
What this really means is that your videos are ready to publish in minutes, not hours. That allows you to maintain the kind of consistent posting schedule that platform algorithms love. You can go from a simple idea to a finished, high-quality vertical video at scale. This is how you change the aspect ratio of a video when you're truly serious about growth.
Here’s a quick rundown of what the ClipShort workflow offers:
- Script-to-Video Generation: Create entire videos from a single text prompt, complete with visuals and voiceover.
- AI-Powered Reframing: Automatically convert your horizontal videos into dynamic vertical clips that intuitively follow the action.
- Safe-Zone-Aware Captions: Generate animated subtitles that are guaranteed not to be cut off by TikTok or Instagram's UI elements.
- Massive Time Savings: Cut your editing time from hours down to just a few minutes, which lets you post more frequently and consistently.
By letting automation handle all the technical heavy lifting, you can finally put your energy back into what actually matters: telling great stories and connecting with your audience.
Common Questions About Video Aspect Ratios
Even after you get the theory down, practical questions always pop up the moment you sit down to edit. Let's tackle some of the most common ones I hear, so you can avoid those little frustrations and edit with more confidence.
Will Changing the Aspect Ratio Ruin My Video Quality?
This is probably the number one question, and the answer is: it depends entirely on how you do it.
If you just force a 16:9 project into a 9:16 timeline and stretch the footage to fit, yes, the quality will absolutely tank. You’ll end up with a distorted, pixelated mess that looks completely unprofessional.
But there are smarter ways. If you're working with high-resolution footage (like 4K), you have a ton of pixel data to play with. You can easily crop into a specific part of the shot to create a razor-sharp 1080x1920 vertical video. Padding, on the other hand, preserves the original video's quality perfectly because you aren't actually touching the footage itself—you’re just adding bars to fill the empty space.
What Is the Best Aspect Ratio for Social Media?
This sounds simple, but the "best" ratio really depends on the specific placement, not just the platform itself. For the endless scroll feeds—think TikTok, Instagram Reels, and YouTube Shorts—9:16 is the only way to go. It delivers that full-screen, immersive experience users have come to expect.
But what about a standard Instagram feed post? You actually have a bit more flexibility there.
- 1:1 (Square): The classic, safe choice that always looks good in the grid view.
- 4:5 (Portrait): This is often seen as the sweet spot for feed posts. It grabs more vertical screen real estate than a square video, making it more eye-catching without being quite as tall as a Reel.
Understanding these small differences can have a huge impact on your engagement. To really nail the specs for every platform, check out our detailed guide on social media video sizes for a complete breakdown.
Why Do Some Videos Have Black Bars?
You know the ones—those black bars on the top and bottom (letterboxing) or on the sides (pillarboxing). They show up when a video's aspect ratio doesn't match the screen or player it's being viewed on. This was a massive problem when smartphones first took over, as everyone tried to cram their landscape 16:9 videos onto newly dominant vertical screens.
This mismatch is still a huge issue. Recent screen resolution data shows a massive shift to vertical viewing, with mobile resolutions like 360x800 and 414x896 becoming incredibly common. This trend has forced creators to adapt, with native vertical HD (1080x1920) uploads surging 51% in the last year alone as older formats fade away. Ignoring this shift is costly—studies show that videos with mismatched ratios can lose 30-40% of their total view time. You can discover more insights about screen resolution stats here if you want to dig into the data.
The bottom line is this: while black bars preserve your original shot, they scream "repurposed content" on vertical-first platforms. Viewers see it as lazy, and they're far more likely to just scroll past. Taking the time to properly reframe your content for a native 9:16 feel is almost always the better strategy for engagement.
Ready to stop wasting hours on manual edits? With ClipShort, you can generate perfectly formatted, viral-style Shorts, Reels, and TikToks in minutes using AI. Let automation handle the cropping, reframing, and captioning so you can focus on what really matters—growing your audience. Transform your content strategy by visiting https://www.clipshort.co and see the difference for yourself.